
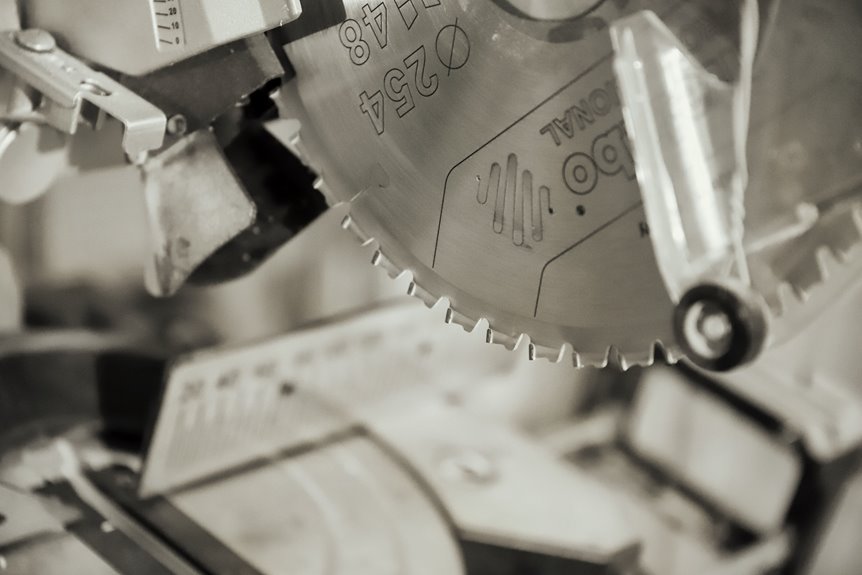

The quiet hum of a workshop can change quickly when you are ready to replace a circular saw blade. You can do the job safely if you slow down, use the correct wrench, and keep your hands clear. First, cut the power. Then lock the spindle, remove the blade, and inspect the parts that hold it in place. Small details matter here, and one missed step can turn a simple task into a serious hazard.
Choose the Right Tools and Blade
Before you touch the saw, gather the right tools and make sure the blade matches the job. You’ll need a blade wrench, a clean surface, and good light so tool selection feels simple, not stressful. Check blade compatibility by matching the arbor size, rotation arrow, and tooth direction to your saw.
If you pick the wrong blade, the cut can wander, and that’s nobody’s idea of a good day. Choose a blade made for wood, metal, or masonry, depending on your project. Then inspect it for chips, bends, or dull teeth before you start.
When you prepare this way, you create a safer, calmer workflow and set yourself up for a smooth change. Your hands stay confident, and your saw feels ready.
Unplug the Saw or Remove the Battery
Now that you have picked the right blade and set out your tools, it’s time to cut the power and make the saw safe to handle.
A safe setup matters, and this step helps keep you there.
If you’re using a corded saw, unplug it from the outlet and pull the plug, not the cord.
If you’re using a cordless saw, remove the battery right away and set it aside.
This power isolation helps prevent surprise starts and gives you confidence while you work.
Check that the trigger feels inactive and that the tool can’t start on its own.
Then wait a moment for the blade to stop moving completely.
A short pause now can prevent problems later, and your hands will thank you.
Lock the Spindle and Remove the Bolt
With the saw fully powered down, your next job is to lock the spindle so the bolt doesn’t spin with the blade.
Find the spindle lock near the blade housing, then press it in firmly. If the blade shifts a little, turn it by hand until the lock catches. You should feel it set.
Now place the wrench on the bolt and begin bolt removal with slow, steady pressure. Turn it in the correct direction for your saw, usually counterclockwise.
Keep one hand steady and your face back, because a stubborn bolt can pop loose fast. If it feels tight, pause and reset the lock. That way, you stay in control and keep your hands clear of trouble.
Remove the Old Circular Saw Blade
As the bolt comes free, ease the old circular saw blade off the arbor with your hand and keep your fingers clear of the teeth. Let the blade rest in your palm, then guide it away slowly so it doesn’t nick the guard or your skin. If it feels stuck, check that the washer is loose and the lock still holds.
Next, set the blade on a stable surface and move it to blade disposal right away so nobody reaches for it by mistake. While the area is open, inspect the arbor for dust, bends, or wear around the mounting point. Wipe the space clean as well. A tidy saw helps you work with more confidence, and the next step will go more smoothly.
Install the New Circular Saw Blade
Slide the new blade onto the arbor carefully, and stop to check the fit before you continue. The blade should mount smoothly, not forcefully, so align the center hole with the arbor and guide it on by hand. If it doesn’t sit flat, pause and realign it.
Next, place the outer washer back in position so it rests evenly against the blade. Then thread the arbor nut on with your fingers until it catches easily. Keep the blade still while you work, and avoid quick twists. A steady, careful approach helps you install the blade with confidence and less hassle.
Check Blade Direction and Tighten Securely
Check the blade’s rotation arrow and make sure the teeth point the right way before you tighten anything. You’ll want the blade seated flat on the arbor, with the washer and nut aligned correctly so the fit feels solid.
Then hold the spindle lock and snug the arbor nut firmly, because a secure blade keeps the saw steady and helps you work with confidence.
Verify Blade Rotation
Before you tighten anything down, take a quick moment to verify the blade’s rotation and fit. This small step helps keep the saw safe and working as it should. Check the blade rotation, then confirm the tool feels right in your hands.
If the blade sits flat and turns in the correct direction, you’re on solid ground. Next, hold the spindle lock and snug the nut securely, but don’t tighten it so much that later removal becomes difficult. Give the blade a gentle hand check to confirm that it stays firm and true.
When you do this carefully, you follow the same routine that helps protect every saw user, and that confidence makes the job easier.
Align Tooth Direction
Once the new blade is on the arbor, turn your attention to the tooth direction because that detail tells you a lot about safe cutting and clean results.
You want the teeth to match the cutting direction shown on the guard so the blade bites wood the right way. Check tooth alignment before you move on, since even a small mistake can make the saw pull, chatter, or leave rough edges.
When the teeth face forward at the top, you’re on the right track. Then hold the blade steady and make sure it sits flat against the flange.
A snug fit helps the whole setup stay calm and stable. Take a breath, trust your eyes, and keep going.
Tighten Arbor Nut
With the blade set in the right direction, tighten the arbor nut so the blade stays solid and true. Hold the spindle lock, then turn the wrench clockwise until the nut feels snug.
Use proper torque, not brute force, because too much pressure can make later removal difficult. Keep the outer washer flat and seated, and make sure the blade rests flush on the arbor.
If the nut starts to catch, back it off and check the threads for dirt or damage. A small amount of thread protection helps the parts stay smooth and ready for the next swap.
When everything is tight, give the blade a gentle check by hand. A secure fit is important for safe operation.
Inspect the Guard, Flange, and Arbor
Before you install the new blade, check that the guard moves freely and snaps back into place without sticking.
Then inspect the flange for wear, bends, or buildup that could throw the blade off center.
After that, clean the arbor threads so the nut tightens smoothly and holds the blade firmly.
Check Guard Movement
Usually, the guard, flange, and arbor should all move as intended, so take a close look at them now. You want the guard to glide without sticking, and you want enough guard clearance for the blade to sit safely as it lifts and drops. As you move it by hand, feel for smooth action and steady spring tension. If the guard hangs up, stops short, or snaps weakly, pause and check it again.
Then make sure the flange and arbor stay centered and turn as expected, without wobble or rough spots. This small check helps you feel confident before you handle the blade. A few careful seconds now can save you from a messy surprise later, and that’s a win for any saw user.
Examine Flange Condition
Now that the guard moves as it should, take a close look at the flange and arbor for the same smooth, steady condition. You want your saw to feel like part of the team, so inspect each part with care.
- Look for wear on the flange face.
- Check for corrosion or pitting on the flange.
- Make sure the flange sits flat.
- Inspect the arbor for bends or nicks.
- Confirm the blade seats without wobble.
If you spot damage, stop and replace the worn part before you mount a new blade.
A clean, solid fit helps the blade run true and keeps your hands safer. Small flaws can turn into noisy trouble fast, and nobody needs that surprise. When these parts look sound, you’re ready for the next step with more confidence.
Clean Arbor Threads
Under the blade guard, the arbor threads need the same careful attention as the blade itself. First, unplug the saw or remove the battery. Then brush away dust, pitch, and grit from the threads and nearby flange.
Next, clean the threads with a small nylon brush or cloth so you don’t nick the metal. If you spot packed debris, wipe it free before you slide on the washer. Then check the arbor for bends, wear, or rust, because a clean fit helps the blade sit true.
After that, apply a light amount of thread lubricant if the maker allows it, since this can ease later removal. Keep your hands steady and treat each part with care. That small effort helps the saw run safely.
Make a Safe Trial Cut
Take your initial cut with care because this is where you confirm that the new blade is seated correctly and the saw feels steady in your hands.
Set a scrap board on a flat surface, then guide the saw through a short cut with calm pressure. You aren’t rushing. You’re checking your work like a careful teammate.
- Start with a small offcut.
- Hold the saw with both hands.
- Watch for smooth blade movement.
- Listen for rough sounds or wobble.
- Check the material finish for tears or burns.
After that, test cut accuracy by measuring the edge and comparing it to your mark. If the cut drifts, stop and inspect the blade and nut again. Once the line stays true, you can be confident your saw is ready, and you’re back in the groove.
Frequently Asked Questions
How Do I Know When a Circular Saw Blade Needs Replacement?
You know it is time to replace the blade when it leaves ragged cuts, burns the wood, or chatters as it cuts. Other signs include chipped teeth, wobble, rust, and reduced cutting performance that slows you down.
What Type of Blade Works Best for Plywood or Hardwood?
For plywood cutting, use a fine-tooth plywood blade. For hardwood slicing, choose a high-tooth-count carbide blade. You will get cleaner edges, less tear-out, and smoother cuts.
Can I Reuse an Old Arbor Nut When Changing Blades?
You can reuse it if the arbor nut shows no wear, the threads remain crisp, and reuse appears safe. Replace it if you notice damage, deformation, or loosening during tightening.
How Often Should I Clean Sawdust From the Blade Guard?
You should clean sawdust from the blade guard after every use, or whenever buildup appears. This blade maintenance helps keep your safety routine reliable, gives you confidence in your saw, and prevents binding.
What Signs Show the Blade Is Installed Incorrectly?
You’ll notice blade wobble, uneven cuts, grinding, or vibration when it is installed incorrectly. Improper seating can also leave the blade off-center, so you may hear rubbing and feel the saw strain under load.


