
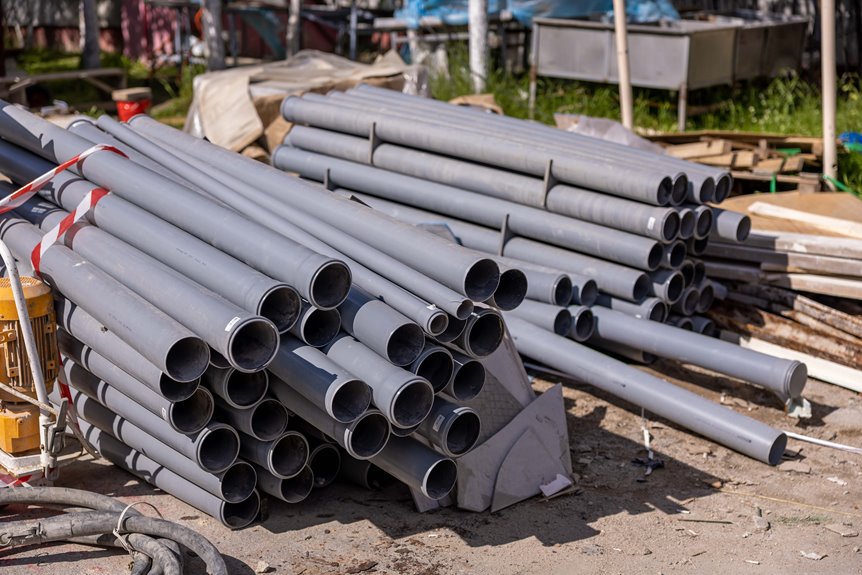

Can a PVC pipe really stay clean and crack free when you use power tools, or does that only happen in perfect videos? You can get a smooth cut if you choose the right blade, mark the line clearly, and hold the pipe steady before you start. The key is matching the tool to the cut, because one small slip can turn a simple job into a jagged mess.
What Tools Cut PVC Pipe Best?
Should you need a clean PVC cut, the best tool depends on the pipe size, the finish you want, and how much control you need.
You’ll see clear tool comparisons between miter saws, handsaws, and specialty cutters. A miter saw with a fine-tooth blade gives you fast, square cuts on larger pipe, and it feels familiar if you prefer steady work. A ratcheting cutter fits smaller pipe and gives you more control in tight spots.
Specialty cutters help if you want quick, neat cuts without much cleanup. If you’re matching pieces for a project, pick the tool that keeps you confident and keeps the cut straight. Then you can move forward with less hassle and more trust in your setup.
How to Choose the Right PVC Blade
A good PVC blade can make the job feel controlled instead of messy, so it helps to choose one that matches the pipe and the tool you’re using. You want a fine blade that cuts cleanly without grabbing the plastic.
For a miter saw, pick a blade with a higher tooth count, since more teeth usually leave a smoother edge. For a handheld saw, choose a blade that feels steady and doesn’t flex much.
The blade material also matters. Carbide blades stay sharp longer and handle repeated cuts well, so they suit busy jobs. Also, look for a blade made for plastic or trim work.
When you match the blade to the task, you’ll feel more confident and get cleaner cuts with less hassle.
Mark PVC Pipe for a Clean Cut
Start by measuring the pipe carefully, because a clean cut begins with a clean mark. You want an accurate measurement, so check the length twice and trust the smaller edge of the tape, not the fuzzy side.
Then make your line with a pencil or marker, keeping it easy to see. For the neatest result, use wraparound marking, such as a paper strip or hose clamp, so the line circles the pipe evenly. That full ring helps you stay square and reduces the need for corrections.
If your mark looks off, fix it now before any tool comes out. Taking a few extra seconds here leads to cleaner cuts and less frustration, and that’s a good result.
Keep PVC Stable While You Cut
Once you’ve marked the cut, clamp the pipe to a stable surface so it can’t roll, bounce, or wiggle while you work.
Pick a bench, sawhorse, or table, and place the cut line close to the support point. That keeps the pipe from flexing and helps you stay in control.
Use soft jaws, a vise, or another stable clamping method to hold it firmly without crushing the PVC. If the pipe still shivers, tighten your setup and add vibration control techniques, such as extra padding or a second clamp.
You’ll feel more relaxed when the pipe stays put, and your cut usually comes out straighter too. A steady pipe lets you focus on the tool, not on chasing the work around the shop.
Cut PVC Pipe With a Circular Saw
As you use a circular saw to cut PVC pipe, let the blade do the hard work. Set your circular saw guide first, then mark the pipe clearly so you stay on track. Secure the pipe tightly on a stable surface, because wobbly PVC can ruin a clean cut quickly.
- Check your plunge depth setup before you start.
- Use a fine tooth blade for smoother edges.
- Feed the saw slowly and let it glide.
You will get better control as you guide the saw with calm, steady pressure. Keep your hands clear, and don’t rush the last part of the cut.
If the pipe starts to move, stop and reset it. That helps you stay careful and finish with a cleaner edge.
Cut PVC Pipe With a Miter Saw
A miter saw makes cutting PVC much easier when you want a clean, square edge without extra fuss. Start with a solid miter saw setup: use a fine tooth blade, mark the pipe all the way around, and clamp it tightly so it can’t roll. That small amount of prep helps you stay in control, even if you’re new to the job.
Next, line the mark up under the blade and lower it slowly. Let the saw work at its own pace, and keep your hands clear.
If you’re cutting wider pipe, turn it carefully as needed to finish the pass.
This steady approach produces clean, square cuts and a neat fit for fittings. Wait for the blade to stop before lifting the saw.
Use a Reciprocating Saw on PVC
With a reciprocating saw, you need the right blade so it cuts PVC cleanly instead of chewing up the edge. Clamp the pipe firmly on a stable surface so it won’t jump or twist while you work.
Then use controlled pressure and let the saw move at its own pace for a straighter, smoother cut.
Choose the Right Blade
For a reciprocating saw, the right blade can make the difference between a neat cut and a ragged mess, so choose a fine tooth blade made for plastic or metal. You want a blade tooth count high enough to slice PVC cleanly, not tear it. The blade material type matters too, since bi metal blades stay tough and cut smoothly.
- Pick 14 to 18 teeth per inch for most PVC jobs.
- Choose a narrow blade whenever you want better control.
- Replace a dull blade fast so the cut stays tidy.
With the right blade in place, you’ll feel more confident and cut like you belong on the job. It’s a small choice, but it saves time, reduces chipping, and keeps your pipe looking ready for the next step.
Secure the Pipe Firmly
Before you fire up the reciprocating saw, lock the PVC down so it stays still from start to finish. A steady setup helps you stay in control and makes the cut feel less nerve wracking. Use pipe clamping on a workbench, sawhorse, or vise with soft jaws so the pipe does not roll or flex. Keep the marked line near the support point. Good vibration control matters here because a shaking pipe can make your blade wander.
| Support | Benefit | Best Use |
|---|---|---|
| Vise | Strong grip | Small pipe |
| Clamp | Quick hold | Fast setup |
| Soft jaws | Less damage | Smooth finish |
When the pipe stays locked in place, you work with the saw, not against it. That is how your cut stays cleaner and your hands stay calmer.
Cut With Controlled Pressure
Whenever you use a reciprocating saw on PVC, light pressure makes the biggest difference because the blade cuts best when you let it work at its own pace. Keep your hands steady and use a measured feed rhythm so the saw stays controlled instead of grabbing the pipe. If you rush, you can chip the edge or make the cut wander. You aren’t fighting the tool here, you’re guiding it.
- Start the blade before it touches the PVC.
- Hold the pipe firmly so it won’t bounce.
- Ease off near the end for a cleaner finish.
With gentle pressure, you help the teeth bite cleanly, and the cut feels smoother too. That steady touch keeps you in control and makes the whole job easier.
Trim Small PVC Sections With an Oscillating Tool
Whenever you only need to trim a small PVC section, an oscillating tool can give you tight control without the shake that bigger saws sometimes bring.
Fit a fine blade, mark the cut clearly, and steady the pipe on a firm surface. Guide the tool with careful blade control so it bites only where you want. This helps you work in narrow spaces, such as spots near walls or fittings, without crowding your hands. Keep the blade moving at a steady pace and let it score the pipe before you press a little harder. When the section is short, clamp it so it won’t jump. After the cut, check the edge and smooth any rough spots so the piece slides in cleanly.
Cut PVC Pipe With a Jigsaw
To cut PVC pipe with a jigsaw, use a fine-tooth blade so it cuts cleanly instead of tearing up the edge. Hold the pipe firmly on a stable surface, because a steady pipe helps you make a straighter cut and prevents wobbling.
After the cut, smooth the edges with a knife or sandpaper so the pipe fits together properly.
Choosing The Right Blade
Whenever you use a jigsaw to cut PVC pipe, the blade choice matters just as much as your mark and steady hand. Pick a fine tooth blade with a small blade tooth pitch because it slices the plastic more cleanly and helps you avoid jagged edges. Check material compatibility too, since a blade made for wood can melt or chatter on PVC. You aren’t just buying teeth, you’re choosing a smoother cut and less cleanup.
- Fine teeth help the blade glide through plastic.
- Narrow blades turn more easily on pipe curves.
- A fresh blade stays cooler and cuts cleaner.
If you’re unsure, choose a blade labeled for plastic or metal. That simple match gives you more control and makes the job feel less stressful.
Securing The Pipe
A sharp jigsaw blade helps a lot, but a steady pipe helps just as much. Secure the PVC before you make the initial cut.
Set it on a bench, sawhorse, or table, then choose support methods that keep the cut zone close to the support point. This reduces flex and gives you a cleaner cut path.
Next, try a few clamp placement options and choose the one that holds the pipe firmly without crushing it. Soft jaws or a vise can help you grip it safely, and they’re useful whenever you want the pipe to feel solid.
Make sure the pipe can’t roll or bounce. Once the setup is stable, you’ll have more control, and your jigsaw will follow the mark more accurately.
Smoothing Cut Edges
Once you finish the jigsaw cut, smooth the edges right away so the pipe feels safe and fits cleanly. Run your finger lightly around the rim, then shave any sharp spots with a utility knife.
Next, use 120 grit sandpaper to soften the inside and outside edges. This edge chamfering helps the pipe slide into fittings without catching.
- Check both ends for burrs and tiny chips.
- Keep the pipe steady while you sand.
- Wipe away dust before you test the fit.
When you want a smooth fit, work slowly and stay gentle. A few careful strokes can save you from a stubborn joint later. You aren’t just cleaning a cut, you’re making the pipe ready for the rest of the job, and that makes the whole project feel easier.
Sand and Deburr PVC Pipe Edges
After you make the cut, smooth the PVC edges so the pipe slides into fittings without resistance.
First, use a utility knife to remove any loose burrs from the inside and outside rim. Then sand the edge with 120-grit paper using steady, light strokes. This edge-smoothing step improves the finish and helps the pipe feel ready for the next joint. If the cut still feels sharp, keep working until it feels smooth, not gritty. You don’t need much pressure, because PVC softens quickly under heavy rubbing. Wipe away dust with a dry cloth so nothing remains in the joint area. Taking a minute here helps ensure tight, clean connections without extra trouble.
Prevent Cracks, Chips, and Burrs
Keep the cut calm, and you’ll cut the risk of damage right along with it. For pipe crack prevention, you need steady support and a gentle touch. Clamp the pipe close to the cut so it can’t flex, then let the blade work at its own pace. Quick pressure can split the wall and leave rough edges.
- Mark the line clearly so you don’t chase a wandering cut.
- Use a fine tooth blade for cleaner teeth marks and less chipping.
- Ease up near the end to avoid a sudden snap.
That same control helps with edge burr reduction too. If you rush, the pipe may fray instead of slice cleanly. Stay patient, keep your grip firm, and let the cut feel smooth from start to finish.
Follow PVC Cutting Safety Basics
PVC cutting may look simple, but safety still needs to lead the way because a spinning blade or sharp cutter can turn a small mistake into a sore lesson fast. You fit right in when you slow down, wear eye protection, and keep both hands steady and clear.
Clamp the pipe so it can’t roll, shift, or surprise you midcut. Keep your work area bright and tidy because clutter invites slips. If you’re using a saw, wait for the blade to stop before you lift it.
For dust control, work where air moves well and sweep up chips as you go. Simple habits like these protect your focus, help your cuts stay clean, and let you work with confidence instead of worry.
Choose the Best Tool for Each Cut
The best tool depends on the cut you need, so it helps to match the tool to the job before you touch the pipe. With a quick tool comparison, you can pick the option that fits your setup and keeps you moving with confidence.
- Use a miter saw for fast, clean straight cuts on longer pipe.
- Choose ratcheting or rotating specialty cutters when you want a simple hand tool for tight spaces.
- Pick a fine tooth blade when your cut needs extra smooth edges and less fuss.
You aren’t guessing here. You’re choosing the tool that fits your space, pipe size, and comfort level. That keeps the job efficient and a lot less awkward.
Whenever you match the cutter to the cut, you work like part of the crew, and the pipe usually thanks you for it.
Fix Common PVC Cutting Problems
When a PVC cut chips or comes out uneven, don’t panic. You can fix both issues with a steadier setup and a slower cut. Keep the pipe clearly marked and clamped tightly, and let the blade or cutter work at its own pace so the edge stays clean.
If the cut still looks rough, trim off the burrs and square it up before moving on.
Prevent Chipping
A clean cut starts with a calm hand, because chipping usually shows up whenever the blade rushes, grabs, or exits the pipe too fast. You can stop that with blade speed control and steady pressure. Keep the pipe locked down with cut end support so the edge doesn’t snap as the teeth leave it.
- Let the saw reach full speed before contact.
- Feed the blade gently, not with a push.
- Ease off near the finish so the rim stays neat.
If you use a miter saw, choose a fine tooth blade and let it work. With a pipe cutter, turn the handle in small steps. Then check the edge right away. You’ll feel more in control, and your cut will look like it belongs in the job.
Correct Uneven Cuts
If your PVC cut ends up crooked, you don’t need to scrap the pipe and start over right away. First, check edge squareness with a small square or a flat table. If one side leans, trim the high edge a little at a time with a miter saw, pipe cutter, or sanding block.
Keep the pipe steady while you work, because a wobble can turn a small error into a bigger one. For slight mistakes, you can also mark a new line and correct angled cuts by shaving only the longest side. Then check the fit before you go farther.
You aren’t the first person to deal with a stubborn pipe, and this fix is usually quick. A calm, careful touch will get the cut back on track fast.
Frequently Asked Questions
Can I Cut PVC Pipe Indoors Without Making Much Dust?
Yes, you can. Dust free indoor cutting is easiest with low mess tool choices like a ratcheting cutter. One contractor survey found clean cuts cut cleanup time by 40%, so you will feel right at home.
How Do I Cut PVC Pipe Already Installed in a Tight Space?
Use tight access techniques and concealed pipe access: mark the cut, secure what you can, then use a compact ratcheting cutter or oscillating tool. Work slowly, and deburr the pipe so it fits cleanly.
Should I Cool PVC While Cutting to Prevent Melting?
No, you usually should not cool PVC while cutting. Better results come from controlling blade heat and friction with a sharp fine-tooth blade, slow feed, and steady cuts.
Can I Use a Power Tool on Curved or Flexible PVC Pipe?
Yes, you can, provided you secure the pipe well and handle the bend carefully. Proper support for curved pipe safety and careful flexible pipe handling will help you cut cleanly and work confidently.
How Do I Store PVC Pipe After Cutting to Prevent Warping?
Store PVC in proper pipe storage. Keep pieces flat, supported, and out of heat. Use straight cut stacking with spacers so they do not sag or bend, and you will keep your cuts true and ready.


