
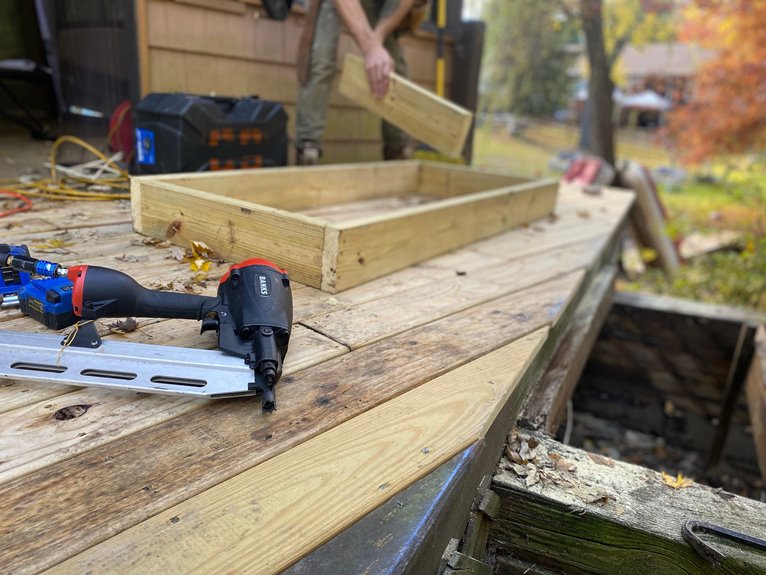

A pneumatic nail gun is used to drive nails quickly and consistently into materials like wood, drywall, roofing, siding, flooring, and trim. It is especially useful for jobs where hand nailing would take too long or cause fatigue. From framing walls to installing molding, it can improve speed and accuracy. The key is choosing the right type of nailer for the task, because that determines how well it performs.
What Is a Pneumatic Nail Gun
A pneumatic nail gun is a fast, air powered tool that helps you drive nails with less strain and more control. You hold the pneumatic nail gun, connect an air hose to an outside compressor, and let compressed air do the hard work.
Inside, a piston moves in a cylinder, a head valve guides the air, and a driver blade strikes each nail. Whenever you pull the trigger, the top chamber vents, pressure shifts, and the piston drops to send the nail through the nosepiece.
Nails feed from a magazine or drum, so you stay ready without batteries or fuel cells. Because of that, you can work with a steady rhythm, and some models fire almost 20 cycles a second, provided the compressor keeps up.
Common Pneumatic Nail Gun Uses
You’ll see pneumatic nail guns used in all kinds of jobs, from rough framing to fine trim work, because they let you fasten wood and other materials quickly without wearing yourself out.
On large builds, you can frame walls, set roof trusses, and build decks, patios, and fences with steady power from an air compressor. Roofers rely on them to place shingles quickly, while flooring and siding crews use them to secure materials with strong, even drives.
In finish work, you can install trim, molding, cabinets, and delicate veneers with small holes that stay neat. You’ll also find them in upholstery, automotive trim, and factory work, where you need the same reliable shot again and again.
How a Pneumatic Nail Gun Works
When you pull the trigger, compressed air moves through the valve and pushes the piston down quickly. That air-powered cycle drives the blade forward, so the nail fires cleanly.
Afterward, the valve resets, the pressure shifts, and the piston moves back into position for the next shot.
Air-Driven Firing Cycle
Once you pull the trigger, the nail gun starts a fast air powered chain reaction that feels almost instant but remains carefully controlled.
Using compressed air, you open a valve that vents pressure above the head valve, so lower pressure lifts it and sends air into the cylinder.
That rush pushes the piston and driver down in one sharp stroke, and you feel the nail drive home with a solid hit.
Next, air escapes through side holes into a return chamber, where pressure starts building for the comeback.
As soon as you let go, the top pressure returns, the valve reseats, and the stored force sends the piston back.
With steady supply pressure and a healthy valve, your tool keeps firing smoothly, sometimes around 20 times each second.
Piston And Valve Action
At this point, the real action moves inside the nailer, where the piston and valves work together like a tiny air-powered engine. You pull the trigger, and the trigger valve vents pressure above the head valve. That shift lets reservoir air lift the head valve and flood the cylinder, so the piston drops fast and the driver blade slams the nail.
| Step | Pressure shift | Result |
|---|---|---|
| Rest | Balanced | No airflow |
| Trigger | Top vents | Valve opens |
| Drive | Bottom wins | Piston drops |
| Vent | Cylinder ports open | Air escapes |
| Reset | Top pressure returns | Piston rises |
As the piston moves, it compresses air below it, and that trapped air helps send it back up. The timing feels smooth, so you can keep working with confidence.
Key Pneumatic Nail Gun Parts
You’ll get the best control when you know the main parts, starting with the hose connector and trigger, which bring in air and start the shot.
The magazine keeps nails lined up and ready, while the nose guides each nail into place with steady aim.
Inside, the driver does the hard work by pushing the nail forward fast, so the whole tool feels smooth instead of stubborn.
Hose Connector And Trigger
The hose connector and trigger work together to make a pneumatic nail gun feel responsive and controlled. You plug the tool into a compressor, and the hose connector sends steady air pressure through a pressurized line, usually around 70 to 120 psi for framing or 60 to 90 psi for finish work.
A quick disconnect coupling helps you attach and remove the hose quickly, and swivel fittings can keep the line from twisting. When you squeeze the trigger, you open a valve that shifts pressure and starts the firing stroke. If your gun uses a contact trip style, the nose can fire on touch, while a sequential trigger requires the nose first, then the trigger. Keep the trigger valve and fittings clean and lubricated so you stay safe and in control.
Nose, Magazine, And Driver
Guiding every nail with steady control, the nose, magazine, and driver do the real heavy lifting inside a pneumatic nail gun. You place the nose on the work, and its safety tip must press in before air can fire a shot.
Next, the magazine keeps nails lined up and feeds them smoothly, whether you use stick strips or a coil for bigger jobs. Then the driver, a hardened steel blade, takes the piston’s punch and sends each nail deep into the wood.
Together, these parts turn compressed air into fast, clean fastening. If one bends, wears, or jams, you’ll feel it quickly: misfires, sloppy depth, and slow work. A quick check keeps your tool ready and keeps you in the groove.
Why Professionals Use Pneumatic Nail Guns
Fast-moving crews rely on pneumatic nail guns because they turn a tiring, stop-and-start job into a steady rhythm that saves time and energy. You get the speed you need, and your team stays in sync.
Pneumatic nailers are designed to drive nails with strong, repeatable force, so framing, decking, and sheathing move faster and cleaner. On busy sites, that consistency matters because you can trust each shot to land the same way.
You also benefit from tools that stay light in your hands and keep working through long shifts. Since they accept many collated fasteners, you can match the nail to the code and the holding strength you need. With proper care, they last for years whenever compressor power is available.
Pneumatic Nail Gun vs. Battery Nailer
While both tools drive nails well, the better choice usually depends on how you work on the job.
If you need speed and steady power, pneumatic nailers use compressed air from a compressor and hose, which gives you lighter tools and fast, repeatable firing. That makes them a strong fit for shop work, framing, and other high output tasks where your crew wants a smooth rhythm.
If you need to move freely, a battery nailer can help. It carries the power onboard, so you can climb ladders or reach remote spots without dragging hoses. Still, it’s heavier, and runtime can run out sooner.
Match the tool to the task, and you’ll be ready on site.
Pneumatic Nail Gun vs. Gas and Powder Tools
For steady, all-day work, pneumatic nailers usually have the advantage over gas and powder-actuated tools. Pneumatic nailers run on compressed air, so they’re lighter, fire quickly, and are easier to use when a compressor is available.
They also tend to cost less up front and require less maintenance because there are no fuel cells or explosive cartridges to replace. Gas nailers offer cordless convenience, which is useful on remote jobs, but they’re heavier and require refills.
Powder-actuated tools are different, since they’re designed for concrete or steel and require special training. For smooth, reliable performance and a more crew-friendly workflow, pneumatics are often the better fit.
Pneumatic Nail Guns for Framing
When you use a pneumatic framing nail gun, you get the power to drive large nails quickly, so wall, deck, and roof framing moves along more smoothly.
You can fasten studs, joists, and sheathing with steady force, which helps keep each connection tight and reliable.
Because these tools are built for heavy duty work, they’re a strong choice when you need speed without sacrificing holding power.
Framing Power and Speed
Pneumatic framing nailers bring real power and speed to framing work, so you can drive full-head or clipped-head nails into studs and joists with confidence. They help you keep pace with your crew because they fire fast and support a steady workflow. Since they run on air, you can keep moving through wall framing, subflooring, and roof sheathing without tiring hand strikes.
- Choose stick or coil nails for the job you’re tackling.
- Use coil magazines when you need more nails between reloads.
- Count on the extra drive force for thicker lumber and OSB.
That added power also helps you fasten plywood and some metal connectors more reliably. When the job gets busy, your tool keeps up and helps you stay in rhythm with the build.
Heavy-Duty Structural Fastening
For heavy-duty structural fastening, a framing nailer gives you the power and pace needed to keep building work moving.
With pneumatic framing nailers, you drive full-head or clipped-head nails into studs, plates, sheathing, and joists with steady force. The air compressor keeps each shot fast and consistent, so you can place 40 to 60 or more nails a minute without wearing out your arm.
Coil or strip magazines hold plenty of nails, which means fewer stops on large jobs. On framing crews, these tools feel like part of the team because they’re light, tough, and built for repeated use.
Match the nail type and pressure to code, and you’ll get solid holding power and real confidence.
Pneumatic Nail Guns for Finish Work
Even delicate trim can go smoothly with the right tool, and that’s where pneumatic finish nail guns really shine. Pneumatic finish nail guns, typically 15 to 18 gauge, drive smaller diameter brads and finish nails that are ideal for trim, baseboards, crown molding, and cabinetry where a minimal hole size matters. You get clean results without fighting the wood, so your work feels more polished and your space feels like it truly belongs.
- They fire fast and keep depth consistent on repeat cuts.
- They help prevent splitting in softer stock and tight corners.
- They run on compressed air, so you skip batteries and fuel.
When you’re fitting fine millwork, that lighter feel matters. You can move with confidence, place each nail with care, and keep the finish neat enough that your crew will nod in approval.
Roofing, Siding, and Flooring Nail Guns
Across a roof, along a wall, or under your feet, the right pneumatic nail gun can save you time and spare a lot of frustration. Roofers use coil nailers to drive shingles fast, while siding nailers stay lighter so you can set nails into wood or vinyl without chewing up the surface. Flooring nail guns work differently. They push cleats at a precise angle so hardwood locks tight without splitting.
| Tool | Best Job | Fastener |
|---|---|---|
| Roofing gun | Shingles | Coil nails |
| Siding nailer | Siding | Finish nails |
| Flooring nailer | Hardwood | Cleats or staples |
Pick the right gauge, shank, and magazine style, and you will get stronger hold and cleaner results. When you match the gun to the job, you work alongside pros who get it done cleanly.
When to Use Brad, Pin, and Staple Guns
Whenever you need a clean finish and the right amount of hold, the choice between a brad gun, a pin nailer, and a staple gun matters. You aren’t just picking tools, you’re matching the job to the hold you need and the look you want.
Brad guns fit trim, baseboards, and cabinetry when you want a small hole and steady support. Pin nailers work best on delicate moldings when you need nearly invisible fastening and fewer splits. Staple guns are best for upholstery, carpet, and thin sheet work because they spread force more evenly.
- Use brads for lightweight trim that still takes stress.
- Use pins when glue does most of the work.
- Use staples for broad contact and strong shear resistance.
Knowing these differences helps you choose the right tool with confidence.
How to Choose the Right Pneumatic Nailer
Now that you know which small nailers work best for trim, it helps to look at the bigger picture before you buy. You’ll want the tool to match the job, so pick framing nailers for decks, fences, and house framing, and choose roofing or siding nailers for shingles or panels. For cabinets and fine trim, a brad or pin nailer keeps holes tiny and neat.
Next, check how the nails feed. Stick-collated strip nailers stay light and reload fast, while coil models hold more fasteners for longer work. If you already run an air compressor, a pneumatic nailer gives you quick firing and less tool weight. Also, choose the right gauge, head style, and a sequential trigger. A palm nailer can help in tight spots.
Pneumatic Nail Gun Maintenance Basics
Keeping a pneumatic nail gun in good shape takes less work than fixing one after it starts acting up, and that small amount of care can save time, money, and frustration. To keep the tool performing well, apply a few drops of oil to the inlet before each use, or daily on heavy jobs.
Drain the compressor and filter regularly so moisture doesn’t enter the tool and cause sticky valves. If the gun starts losing power or leaking air, check the O-rings, seals, and head valve. Keep the magazine and nose clean so nails feed straight.
- Use the correct nail gauge and collation.
- Tighten parts to the maker’s torque specs.
- Store it disconnected and dry.
Frequently Asked Questions
What Kind of Nail Gun for Beadboard?
You’ll want an 18-gauge brad nailer for beadboard trim; it will not damage delicate boards, and its small holes are easy to conceal. For extra fine work, use a 23-gauge pin nailer, especially when paired with glue.
How Much Does a Pneumatic Nail Gun Cost?
You will usually pay $40 to $120 for entry level models, $120 to $300 for mid range ones, and $250 to $600 or more for pro tools. If you do not already own one, add $100 to $400 for a compressor and hose.
What Are the Three Types of Nail Guns?
You’ll find three tool types: pneumatic, battery powered, and powder actuated nail guns. Each one serves a different purpose, helping you work faster, match the job site, and choose the right tool.
What Do I Need to Use a Pneumatic Nail Gun?
You need a compatible air compressor, a rated hose, a quick connect fitting, the correct collated nails, tool oil, and a safety checklist. Wear safety glasses, hearing protection, and boots, then follow your nail gun’s pressure and CFM requirements.


