
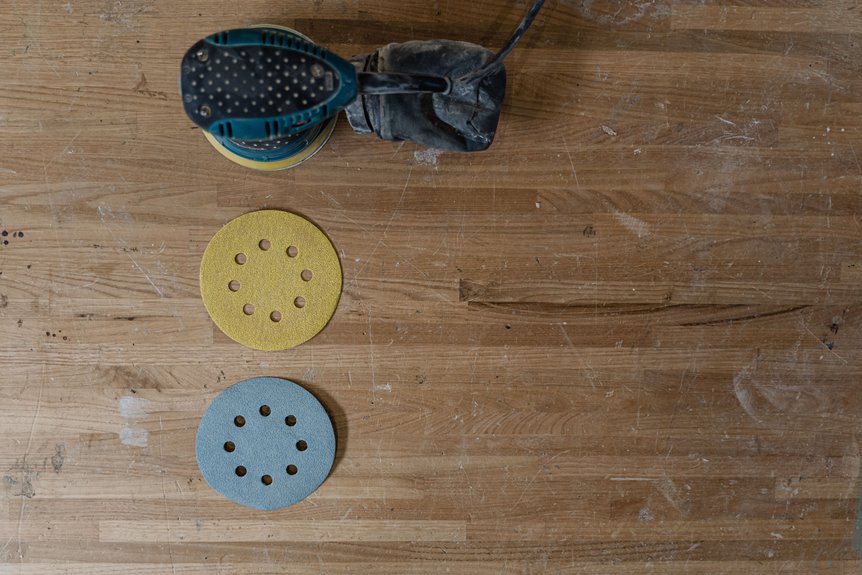

Choosing the right sandpaper for your power sander can save you time, wood, and a lot of frustration. You will get better results when you match the grit to the task, since coarse paper removes rough spots quickly, while finer paper leaves a cleaner finish. You also need the right backing so the sheet stays secure and works with your tool. Once you know how grit, material, and sander type fit together, the rest becomes much easier.
How Sandpaper Grit Works
Whenever you pick sandpaper grit, you’re choosing how fast the abrasive should work and how smooth it should leave the surface.
With grit numbering basics, smaller numbers mean larger, tougher particles that cut fast, while bigger numbers mean finer particles that polish more gently.
In abrasive grain breakdown, each grain acts like a tiny cutter, so the grit count tells you how many cutters sit on the paper and how sharp they feel.
That’s why coarse paper feels aggressive and fine paper feels calm.
You can trust this simple scale to guide your next step.
As you move up the grit range, you leave behind shallower scratches, which helps you build a smoother finish without confusion.
Choose the Right Grit for the Job
Now that you know how grit numbers control how fast sandpaper cuts, the next step is picking the right grit for the job in front of you.
For heavy removal, start with 40 to 60 grit and let it strip old paint, rust, or rough edges without fighting you. If the surface only needs a cleanup, 80 to 120 grit gives you steady smoothing. Then move to 180 to 220 grit whenever you want a finish ready for paint or stain. For ultra fine finishing, choose 320 grit or finer on delicate spots.
You’ll get better results when you step through grits instead of jumping ahead. That way, each pass erases the last scratch pattern, and you end up with a surface that feels right.
Pick the Right Backing for Your Sander
You need backing that matches your sander, or the paper won’t stick well or sand evenly. Hook and loop backing works fast on many orbital sanders, while PSA backing sheets give you a strong adhesive hold for tools that call for it. When you choose the right one, you make sanding smoother, quicker, and less frustrating.
Hook And Loop Backing
Hook and loop backing can make sanding feel a lot less fussy, and that matters whenever you’re trying to get real work done without fighting your tools.
You get quick change systems that let you swap discs fast, so you stay in the groove and keep your project moving. It also gives you a secure pad fit, which helps the disc stay flat and cut evenly.
- Match the backing to your sander’s pad.
- Press the disc on firmly so it grips well.
- Replace worn discs before they slip or clog.
When you choose the right hook and loop style, you join a crowd of makers who value easy setup and solid results. That small fit choice can save time, reduce hassle, and help you sand with more confidence.
PSA Backing Sheets
PSA backing sheets give you a simpler peel and stick way to outfit some sanders, making them a handy next step after hook and loop discs. You press the sheet onto the pad, and the adhesive pressure holds it in place while you work. That steady grip helps you sand without extra fuss, especially when you want a clean, even feel.
Still, you need strong sheet compatibility because PSA sheets must match your sander’s pad shape and size. Check the cutouts, edges, and dust holes before you buy. If the fit is off, the sheet can lift, wear fast, or sand unevenly.
The best PSA choice feels easy, secure, and right at home on your tool.
Match Grit to Your Material
Whenever you sand, the material matters just as much as the grit number, because the wrong choice can waste time and leave unwanted marks. For wood surface prep, start around 80 grit, then move up in steps until the finish feels right. For delicate material sanding, choose 220 grit or finer to protect thin edges and fragile layers.
- For rough wood, use 40 to 60 grit to remove old finish quickly.
- For most smoothing, 80 to 120 grit helps level the surface.
- For final touchups, 180 to 320 grit gives a cleaner, softer result.
You will work more effectively when you match the abrasive to the surface, not just the sander. That simple choice keeps the job steady, efficient, and more rewarding.
Avoid Clogging, Swirls, and Scratches
Even with the right grit, sanding can still go sideways when the paper clogs, leaves swirls, or scratches the surface too hard. You can keep things under control by clearing dust often and using clogging prevention habits such as light passes and clean abrasives.
Check the pad so it sits flat, because a tilted sander can carve ugly loops fast. Then guide the tool with steady pressure and let it do the work.
To minimize scratches, sand with the grain on wood and avoid pressing down when the paper starts to dull. If you feel the cut fade, stop and inspect the sheet.
Fresh paper glides better, leaves a cleaner path, and helps you achieve a smooth finish instead of dealing with marks later.
Know When to Switch Grits
Usually, you should switch grits as soon as the current one stops doing its job and the scratch marks look even and controlled. That’s your cue, and it means you’re ready for the next step in grit progression. You don’t need to push a tired sheet forever; fresh abrasive replacement keeps the cut clean and steady.
- Move up only after the old scratches are gone.
- Feel the surface with your hand to check for rough spots.
- Change sooner when the paper loads up or starts glazing.
When you follow this rhythm, you stay with the grain of the work, and you fit right in with good sanding habits. Each grit should erase the last one, not fight it. That simple habit saves time and helps your finish look calm, smooth, and cared for.
Frequently Asked Questions
How Do I Know Which Sandpaper Fits My Specific Sander Model?
Check your sander’s model against the sandpaper specifications. Make sure the pad is compatible and the attachment system matches your tool. Confirm the shape, hole pattern, and backing type in the owner’s manual.
What Sandpaper Size Should I Buy for My Belt Sander?
Buy the exact belt sander size your tool requires, matching the belt’s length and width. When choosing grit weight, start coarse for removal, then move finer for a smoother finish and a better fit.
Can I Use the Same Sandpaper on Wood and Metal?
No, you should not use the same sandpaper on wood and metal. Choose the grit carefully for each material. Differences in coating and abrasive type matter when working with mixed materials, so use sandpaper rated for the specific surface to achieve safer, smoother results.
How Often Should I Replace Sandpaper During a Project?
Replace your sandpaper as soon as you notice wear, clogging, or slower cutting; fresh paper helps protect project quality. You will usually need to change it several times during a project, especially when sanding hard or painted surfaces.
Do Dust-Extraction Holes Need to Match Exactly?
Usually, yes, you will want dust hole alignment to match your sander’s pad closely. Even if it seems fussy, proper alignment improves vacuum airflow, keeps dust down, and helps you work cleaner.


