
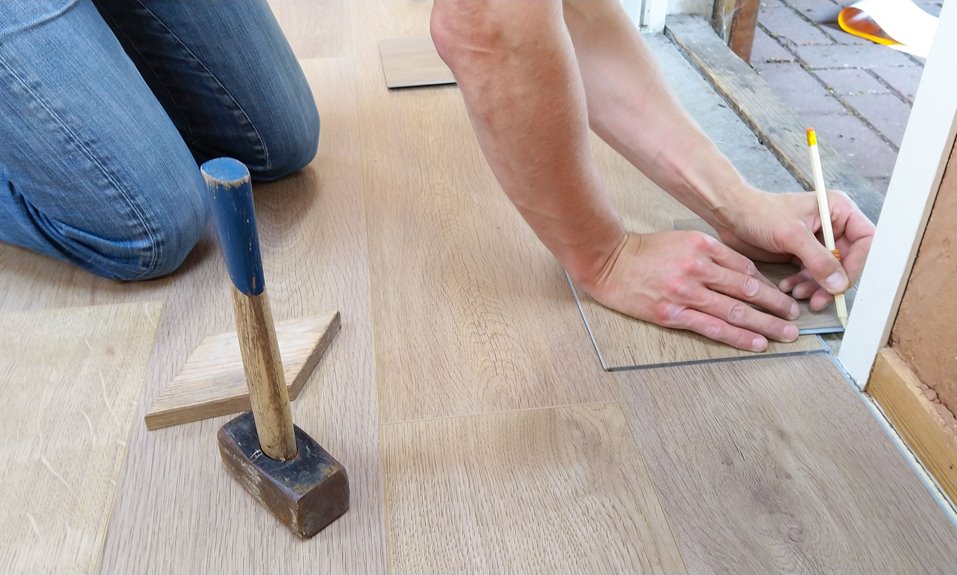

Need clean cuts or a chipped edge that stares back at you? When you cut laminate flooring with power tools, the right saw and a steady setup make all the difference. You can measure, mark, and cut with far less stress once you know which tool fits each job. From straight rip cuts to tricky notches, the method changes, and the small details matter more than you might expect.
Best Power Tools for Cutting Laminate Flooring
The right saw and blade combo can make laminate cutting feel much less stressful. You’ll usually reach for a circular saw for long rip cuts, a miter saw for clean crosscuts, and a jigsaw when the shape gets tricky.
In a tool comparison, the circular saw handles speed, while the miter saw provides repeatable accuracy. A fine tooth carbide tipped blade helps you keep edges cleaner and your work more precise.
For specialty applications, an oscillating multi tool works well for flush cuts and tight door jambs, and a utility knife is useful for thin laminate or light scoring. If you’re new to the job, choose the tool that matches the cut, not the one that looks toughest. That simple choice helps you work like a pro faster.
How to Measure and Mark Laminate Flooring
Start by measuring each plank carefully with a tape measure, since even a small mistake can leave you with a gap or a board that won’t fit.
Then mark your cut line with a pencil or chalk, and use a square or straightedge so your rip cuts and crosscuts stay true.
If you’re leaving room for expansion, mark that small gap before you make the cut so the flooring fits cleanly later.
Accurate Room Measurements
Before you make any cut, take a few minutes to measure each laminate plank carefully, because a small mistake here can throw off the whole room and waste good material. Let your room dimensions guide every step, so measure twice and trust the tape, not your memory. Then use layout planning to decide where each board will land, especially along walls, corners, and doorways.
Check the length and width of the space, and note any bends or tight spots. Leave a small expansion gap at the edges so the floor can move naturally. When a room feels tricky, sketch it on paper and mark each section clearly. This simple habit keeps you organized, calm, and ready for cleaner cuts later.
Marking Cut Lines
With the board laid flat and your tape measure in hand, mark each laminate cut line carefully so the saw has a clear path to follow. Use a square or straightedge to keep every rip cut and crosscut true. Leave a small expansion gap at the end, then draw the line with a sharp pencil or chalk so it stands out.
Tape over the mark when you want extra chip control. Before you cut the real plank, test the setup on an offcut. That quick check helps you spot blade maintenance needs and saves frustration later.
Keep your waste disposal bucket nearby so scraps stay out of your way and your work area stays calm, safe, and ready for the next board.
Set Up Tools Safely Before Cutting
A stable setup makes cutting laminate feel much less stressful, so take a few minutes to secure your work area and tools.
Put on goggles, a dust mask, and gloves before you start, because dust protection matters and your hands deserve a break too. Then clamp the plank or rest it firmly on sawhorses so tool stability stays strong and the board won’t wobble. Make sure the cut line hangs just past the edge of the support whenever needed, since that helps the blade move cleanly without binding. Check that your blade is sharp and your cord or battery sits out of the way.
When everything feels solid, you’ll cut with more control and less worry, and that confidence helps.
Make Straight Cuts With a Circular Saw
Once you have marked your cut line, a circular saw can make quick, clean work of straight laminate cuts. You will feel more confident once you clamp the plank, wear goggles, and keep the board fully supported. Use blade depth control so the teeth sit just past the flooring, not deep into the subfloor. That small step protects your workspace and keeps the cut smooth. For expansion gap planning, measure twice and leave the right edge space before you start.
| Step | What you do |
|---|---|
| 1 | Set the plank on sawhorses |
| 2 | Tape the cut line |
| 3 | Check the blade depth |
| 4 | Guide the saw slowly |
| 5 | Let the offcut fall free |
Cut with steady pressure and let the saw do the work.
Cut Curves and Notches With a Jigsaw
As your straight cuts are done, the jigsaw takes over for the tricky spots that a circular saw can’t handle. You can trust it for curves, inside corners, and clean notches that fit tightly against obstacles.
Start by tracing the shape with a pencil, then clamp the plank so it stays steady.
For jigsaw blade selection, choose a fine tooth blade made for laminate so you get less chipping and smoother edges.
When you’re cutting around pipes, drill a starter hole inside the marked circle, then guide the blade slowly along the line.
Keep the finished side facing down, and let the saw do the work.
If the fit feels close, trim a little more and check again. That’s how you stay calm and get a professional look.
Trim Laminate Flooring With a Table Saw
At the moment you need to trim laminate flooring with a table saw, it helps to slow down and set things up with care before you make the initial cut. A solid table saw setup keeps your cut straight and your nerves calmer too. Check the fence, set the blade just above the plank, and keep the finished face aligned for the cut you want. For table saw safety, wear goggles, a dust mask, and gloves, then guide the board with steady pressure.
- Measure and mark each plank first.
- Use clamps or a stable support.
- Feed the board smoothly, not fast.
When you work this way, you fit right into a crew that values clean results and safe habits.
How to Prevent Chipping and Mistakes
Chipping and small cutting mistakes can feel frustrating, but you can prevent most of them with a few careful habits before the blade even starts moving. Check blade sharpness first, because a dull blade tears the wear layer quickly. Then mark your line clearly, add painter’s tape, and keep the board fully supported so it does not chatter. Good dust control also helps you see the line and keeps grit from scratching the finish.
| Habit | Why it helps |
|---|---|
| Sharp, fine-tooth blade | Cleaner edges |
| Tight clamping and support | Less vibration |
| Slow, steady feed | Fewer slips |
Cut with the finished face down on many saws, and test your setup on an offcut. Measure twice, cut once, then breathe.
Frequently Asked Questions
Can Laminate Flooring Be Cut Outdoors to Reduce Dust?
Yes, you can cut laminate flooring outdoors to improve dust control. Cutting outside keeps most of the mess out of your work area, and using clamps plus a mask can help reduce cleanup and protect you while you work. You will keep your space cleaner and maintain a more professional workflow.
How Do I Cut Laminate Flooring Around Heating Vents?
You’ll make vent cutouts by tracing the vent, adding duct clearance, and cutting the shape with a jigsaw or oscillating tool. Test fit often, then trim slowly so the flooring sits neatly and fits the room.
What Should I Do if the Laminate Blade Overheats?
Stop cutting and let the blade cool. Inspect it for dullness or buildup. You will protect your tool and get cleaner cuts with quick maintenance, a sharp replacement blade, and steadier, lighter passes.
Can I Reuse Offcuts for Small Finishing Pieces?
Yes, you can reuse offcuts for small finishing pieces. They are a useful bridge for tight spots. Store them with your offcut storage and keep trim matching in mind so your floor feels complete, not patched.
How Do I Dispose of Laminate Flooring Dust Safely?
Dispose of laminate flooring dust safely by vacuuming it with a HEPA filter, sealing debris in a bag, and wiping surfaces with a damp cloth. Keep up with dust cleanup, wear respiratory protection, and follow the same precautions throughout the job.


