
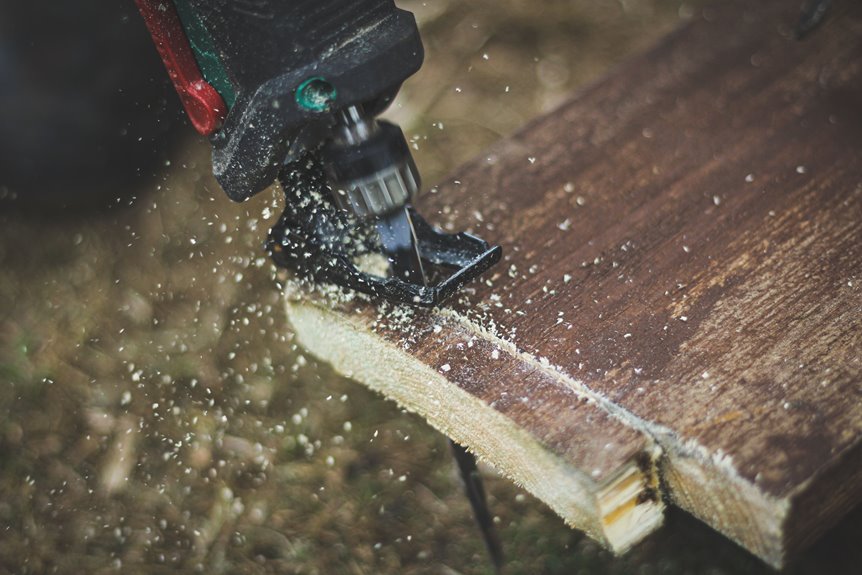

Whenever you have watched plywood chip out the moment your saw hits the edge, you know how frustrating that feels. The good news is that you can avoid most of that mess with the right blade, the right setup, and a few careful moves. Once you line things up correctly, the cut can stay clean enough to make you smile a little. And once you get the first part right, the rest becomes much easier than you may think.
Choose the Best Blade for Plywood
A clean plywood cut starts with the blade, and this is where many people get tripped up. You don’t need the fanciest saw, but you do need the right blade. Choose a fine-tooth carbide-tipped plywood blade, because carbide stays sharp longer and shears fibers instead of crushing them.
Pay close attention to tooth geometry too. More teeth usually produce a smoother edge, so a higher tooth count helps reduce splintering. If the blade feels dull, replace it. A worn blade tears the surface and makes the job harder.
Once you choose a sharp, fine-cut blade, you set yourself up for cleaner edges and less frustration. It’s a small detail, but it makes a noticeable difference.
Mark Your Cut Line Clearly
Before you start the saw, give the cut line the attention it deserves. You aren’t just making a mark, you’re guiding the whole cut.
Use a sharp pencil or fine marker, then check your layout marking from both ends so the line stays true. If you need better line visibility, add painter’s tape first and draw on top of it.
A bright line helps you follow the path without second-guessing yourself. When the cut must stay exact, use a straightedge and keep your hand steady. You can also score the line lightly with a utility knife to make the edge stand out and reduce fuzz.
Clear marks help you work with confidence, and that matters whenever you want a clean result that feels like yours.
Support the Sheet Before You Cut
Good line marks only help if the plywood stays calm and steady while you cut, so now it’s time to give the sheet real support.
Lay the plywood on a flat base so it won’t bounce or sag. Use sheet support under both sides of the cut, and keep the middle from dropping as the blade moves through. If you’re using 2x4s, space them so they hold the panel without pinching it. Foam board also works well because it gives stable backing and lets the saw pass through cleanly.
Check that nothing wobbles before you start, because movement can bruise the fibers and invite splintering. Once the sheet feels solid, you’ll cut with more control, and that steady setup helps you stay confident too.
Set the Saw Blade Depth Correctly
Set the blade so it extends only a little past the plywood. That small change can help prevent messy tearout. You want the blade depth just deep enough to clear the sheet, not cut far into extra material. Less blade exposure gives the teeth less room to yank fibers loose, and it also helps you feel more in control.
If your saw has clear depth marks, use them. Then lower the shoe and check the edge before you start. A tighter setting keeps the cut cleaner and helps you work with confidence.
When you’re part of a crew, even on a solo job, that careful setup feels like a small win. Adjust once, breathe, and let the saw do the steady work.
Place the Good Face Down
Put the good face down whenever you cut plywood, because the saw blade usually splinters the side it exits.
That means you can keep the cleanest edge on the top face you’ll see most often, while the rougher cut lands on the back.
If you’re cutting two matching sheets, place the good sides toward each other so you can protect both outside faces at once.
Good Face Orientation
While you’re cutting plywood with a circular saw, one small choice can save you a lot of frustration: keep the best face down.
That simple face orientation puts the cleaner side where the blade leaves the wood, so grain visibility stays low on the side people will see. You don’t need fancy gear to join the club of neat, confident cuts. Just flip the sheet, mark your line clearly, and let the rougher face take the splinter risk. If you’re working with matching panels, place the good sides toward each other so both outer faces stay cleaner. While the top edge looks a little fuzzy, don’t panic. You aren’t doing it wrong. You’re just protecting the finish where it matters most.
Saw Blade Exit
Because a circular saw cuts as it rises out of the plywood, the top face usually takes the splintering hit. That’s why you should keep the good face down. You aren’t doing anything wrong. You’re simply working with the blade exit. As the teeth leave the board, they can lift fibers and cause exit splintering on the side you see first. So, give that rougher side to the waste or the concealed face.
- Let the cut finish before lifting the saw.
- Keep steady forward pressure.
- Support the sheet so the edge stays firm.
- Watch for any lifting at the blade exit.
As you set up this way, you can get cleaner plywood cuts without the panic.
Cleanest Edge Placement
Place the good face down, and you’ll give the saw’s rougher exit side the job of handling most of the splintering. That simple move protects the face you’ll see most, so you can cut with more confidence.
When you’re planning sheet nesting, keep the nicest surfaces together and turn them inward whenever you can. Then the rougher side lands where trim or backing can hide it.
For panels with strong edge visibility, this matters even more, because every chipped fiber can catch the eye. You aren’t just making a cut. You’re protecting the part that has to look right in your space.
Tape the Cut Line
Use low-tack painter’s tape to support the wood without leaving a sticky mess behind. Put the tape over both faces along the cut line because that extra coverage helps hold down loose fibers on each side.
Then burnish the tape flat with your hand or a putty knife so it bonds well and gives your saw a cleaner path.
Choose Low-Tack Tape
A good low-tack tape can make a big difference when you’re cutting plywood, since it helps support the surface fibers right along the cut line. You want a low-tack adhesive that sticks well but lifts cleanly, so you don’t leave tape residue behind after the cut. That small choice keeps your work looking sharp and saves you cleanup time.
- Pick painter’s tape or a similar gentle tape.
- Press it flat so it bonds evenly.
- Place it directly over your mark.
- Remove it slowly after cutting.
Cover Both Faces
Once you’ve got painter’s tape on the cut line, take that same care to protect the other face too.
When you tape both sides, you give the plywood double sided protection, so the top and bottom fibers can stay put as you cut. That matters when you want symmetrical edge quality, especially on a sheet that will show in the final build. You don’t need a thick layer, just cover the line cleanly and let each face feel supported. If you’re working with a partner, this step helps you both trust the cut and keep the job moving. It also gives the waste side a little extra help, so the good side stays crisp.
With both faces covered, you’re setting up a cleaner cut and a calmer shop.
Burnish Tape Flat
Press the painter’s tape down hard, because a loose strip won’t help much as the saw starts moving. You want it flat, smooth, and tight across the cut line, so the blade meets steady support instead of a lifted edge. Use your thumb or a scrap block to burnish the tape from one end to the other. That simple step helps the tape act like a tiny shield. If the tape wrinkles, peel it back and flatten the masking tape again before you mark or cut.
- Press along the grain.
- Smooth bubbles right away.
- Keep tape over both edges.
- Check that the line stays visible.
When you do this with care, you join the group of woodworkers who get cleaner cuts and fewer fuzzy chips.
Score the Cut Line First
If you want a cleaner edge, score the cut line before you bring the circular saw to the plywood. You aren’t carving a trench, just kissing the surface so the blade meets fewer loose fibers. Use a sharp knife and make one firm pass right on the mark.
That small move helps your tool choice work better, because even a great blade can’t fix rough surface prep. If you have taped the line, score right through the tape and wood together. Then brush away dust so the cut stays easy to follow.
When you work this way, you join a crew of woodworkers who care about clean edges and fewer surprises. It’s a simple step, but it gives you more control and less splintering where you’ll see the cut most.
Cut at a Steady Speed
A steady feed speed makes a big difference because the saw cuts cleaner when you let the blade do the work.
When you keep a consistent cutting pace, the teeth slice fibers instead of chewing them up. Use steady feed pressure, not a hard shove, so the saw stays controlled and the edge stays neat. If you move too fast, the blade can grab and leave fuzzy chips. If you move too slowly, you can burn the plywood.
- Start smooth and stay smooth.
- Match your pace to the blade sound.
- Keep the saw moving steadily, not jerking.
- Trust the cut and breathe.
That rhythm helps you feel like part of the crew, not the only one working hard.
Keep the Saw Base Flat
Keep the saw base flat from the moment you start the cut until the blade leaves the plywood. As you maintain full shoe contact, you protect baseplate stability and help the blade track cleanly. A tilted saw can chatter, wander, and bruise the cut line. You are not fighting the sheet alone, you are staying in control with it.
| Goal | What you do | Result |
|---|---|---|
| Flat shoe | Press evenly | Cleaner edge |
| Stable grip | Hold firm | Less wobble |
| Smooth move | Advance slowly | Better control |
| Guide match | Keep the shoe on it | Straighter cut |
| Even pressure | Do not lift too early | Fewer splinters |
Prevent Tear-Out at the End
To prevent tear-out at the end of the cut, slow down as the blade nears the far edge and let the saw finish the job cleanly. You’ll feel more in control when you stay patient here, because the last inches matter most.
- Keep steady pressure for end of cut control.
- Support the exit edge with scrap or foam.
- Hold the base flat until the blade stops.
- Let the offcut drop away without twisting.
That little bit of exit edge support keeps fibers from lifting as the teeth leave the plywood.
You and your saw make a better team when you guide the cut all the way through, not just most of it. If you rush now, the edge can splinter like it’s trying to escape. Finish smooth, and your cut will look sharp and tidy.
Clamp a Straightedge Guide
Clamp a straightedge guide firmly to your plywood so your saw has a reliable path to follow. Choose a straightedge that’s long, stiff, and easy to hold in place, then position the clamp so it doesn’t block your saw shoe. Once it’s secure, guide the saw smoothly against it and let the tool do the work without drifting.
Choose A Straightedge
A straightedge guide gives your circular saw something solid to follow, and that simple support can help you avoid a crooked cut and a lot of frustration. When you choose one, measure accurately and align the edge with your cut line before you trust it. Pick a board, level, or metal rule that stays rigid and won’t bow under pressure. You want a guide that feels like part of the sheet, so your saw glides with confidence.
- Check that it’s longer than your cut.
- Make sure the edge is straight, not warped.
- Use one with a smooth face for easy clamping.
- Test fit it against scrap plywood first.
When the guide fits well, you get less guesswork and more control. That’s how you keep your cut clean and your hands calm.
Position The Clamp
Once you’ve got your straightedge lined up, place the clamp where it will hold the guide firm without blocking your saw’s base. Keep your clamp placement close enough to stop shifting, but far enough from the cut path so you can move smoothly. A secure hold matters because even a tiny slip can throw off the edge and add splintering.
Tighten the clamp until the guide feels solid, then give the straightedge a quick nudge test with your hand. If it moves, reset it before you start. Use one clamp near each end whenever you can, since that helps the guide stay true across the sheet.
You’re building a clean cut with the plywood, so take a moment here and make the setup feel calm, steady, and ready.
Guide The Cut
With the straightedge locked in place, set it so the saw’s shoe can ride smoothly along the edge from start to finish. Check your cut alignment before you squeeze the trigger, because a small shift can turn a clean line into a ragged one. While you keep the guide steady, you help the blade stay on track and protect the good face of the sheet. If the clamp feels loose, reset it now and avoid plywood damage.
- Press the shoe flat against the guide.
- Keep your stance balanced and relaxed.
- Start the saw before it touches wood.
- Feed it forward at one steady pace.
As you cut, trust the guide’s stability and let the saw glide, not fight. That steady rhythm helps you stay in control and keep the edge clean.
Use a Reverse-Tooth Blade
Flip the blade in the correct direction, and you can make a big difference in how your plywood edge looks. A reverse tooth blade cuts on the downstroke, so it helps keep the top veneer from lifting as you move through the sheet.
That makes this blade choice a smart upgrade when you want cleaner results without extra fuss. You’ll still want a sharp, fine tooth blade for the best cut, because dull teeth can chew fibers and leave a rough edge.
If you don’t swap blades often, check the arrow on the blade and match it to your saw. Then let the saw do the work, and you’ll feel more in control with every cut you make.
Sand the Cut Edge Smooth
After you make the cut, smooth the edge with fine-grit sandpaper so you don’t damage the plywood face.
Sand with the grain to keep the surface looking clean and natural, not scratched up.
Then break any sharp fibers along the edge so it feels safer and looks finished.
Choose Fine-Grit Sandpaper
Once the saw cut is done, fine-grit sandpaper helps you turn a good edge into a smooth one. For plywood, choose edge finishing that feels neat, not fuzzy, and that starts with the right grit.
You aren’t trying to reshape the board, just smooth the rough spots and build confidence in the result.
- Use 180 to 220 grit for most edges.
- Wrap the paper around a sanding block for control.
- Move with light pressure so you don’t scuff the face.
- Check the edge often and stop once it feels even.
If tiny splinters still poke up, a few gentle passes can take care of them. With fine grit, you get clean results without much effort.
Sand With the Grain
Sanding with the grain gives your plywood edge a smoother, cleaner look without creating fresh scratches. Follow the wood lines instead of fighting them so each stroke blends into the cut rather than standing out. Use fine grit paper and light pressure, then check the edge often so you don’t wear away too much. This small step helps you finish the edge smoothly and makes the panel feel more refined in your hands.
If you see a little roughness or tiny whiskers, keep sanding in one direction to remove the remaining fuzz. Take your time here, because a steady touch usually works best. You aren’t fixing a mistake, you’re giving your cut the polish it deserves, and that’s a solid place to stand.
Break Sharp Fibers
Even if your plywood cut looks clean, the edge can still hold tiny sharp fibers that snag your hand or make the finish look rough.
Now smooth that edge so it feels safe and looks intentional. Use fine sandpaper and light strokes with the grain. You aren’t trying to reshape the board, only to remove the sharp bits left by fiber fracture and edge shearing.
- Wrap sandpaper around a block.
- Touch only the cut edge.
- Keep pressure gentle.
- Check for splinters with your fingertips.
As you work, the edge will soften quickly, and the sheet will start to feel more finished. That small step helps you produce cleaner results and work more comfortably.
Avoid Common Cutting Mistakes
As you work, a few small mistakes can turn a clean plywood cut into a messy edge, so it helps to avoid them before you squeeze the trigger. Do not rush blade maintenance or cutting safety. A dull blade, too much depth, or a shaky sheet can undo your best setup. You have got this, and the fix is simple.
| Mistake | Better choice |
|---|---|
| Dull blade | Use a sharp, fine tooth blade |
| Deep set blade | Barely clear the plywood |
| Loose sheet | Support it fully |
| Fast feed | Move slow and steady |
| Lifting earliest | Let the blade stop first |
Keep the good face down, guide the saw firmly, and do not force the cut. Small, calm moves help you get the clean edge your project deserves.
Frequently Asked Questions
Can I Cut Plywood Without a Circular Saw?
Yes, you can cut plywood without a circular saw using hand saw alternatives like a fine-tooth handsaw or a jigsaw. You will get cleaner edges with scoring techniques first, and you will still feel confident.
What’s the Best Way to Measure Plywood Accurately?
Measure twice, cut once. One study found that measurement mistakes account for over 20 percent of project rework. Use a reliable tape measure, mark both edges, and confirm straightedge alignment so your measurements are accurate and consistent.
How Do I Avoid Kickback While Cutting Plywood?
Avoid kickback by keeping the blade aligned, supporting the sheet fully, and using steady feed pressure. Start the saw before it touches the wood, do not force it, and keep the shoe flat so you stay safe.
Should I Cut Plywood Indoors or Outdoors?
You’ll usually cut plywood outdoors because it helps control dust and avoids indoor ventilation concerns. When you must work inside, ventilate well, wear a mask, and keep your crew’s shared space clean and safe.
How Do I Keep the Saw Battery From Dying Mid-Cut?
You can keep the battery alive with good battery management and efficient cutting. Start with a fully charged pack, use a sharp fine-tooth blade, cut slowly, and let the saw do the work.


