
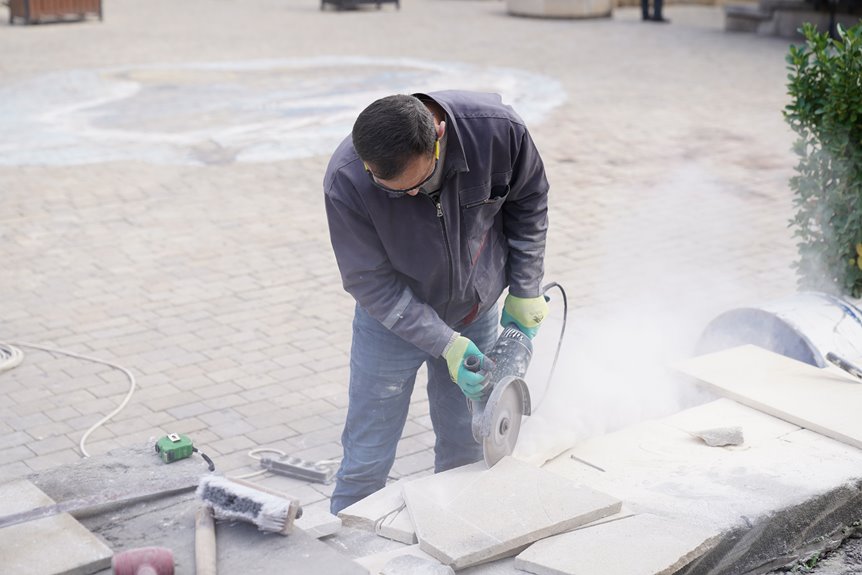

The wet saw hums and the blade glints, and a clean tile edge can feel closer than you expect. To get there, you need the right saw, a steady setup, and a clear mark before you make the first cut. With a few smart steps, you can avoid chips, handle tricky L cuts, and keep porcelain or ceramic moving smoothly through the blade, even when the job feels a little nerve-wracking.
Choose the Right Wet Saw
Start with the right wet saw, because that choice can make the whole job feel much easier.
You’ll fit in faster once you pick a saw that matches your tile and your space.
Look at wet saw types first.
A compact table saw works well for small jobs, while a larger sliding saw helps with long cuts and thicker tile.
Then check blade compatibility, because the wrong blade can chip edges or slow you down.
You want a saw that accepts a diamond blade made for your tile material.
Also, choose a model with a sturdy base and a smooth fence.
Once the saw feels solid, you can focus on clean cuts and feel more confident from the start.
Gather Tile Cutting Tools and Safety Gear
Before you make the first cut, gather every tool and safety item you’ll need so the job stays calm instead of chaotic.
Set your wet saw on a flat stand, make sure the blade is clean, and fill the water tray.
Keep eye protection, gloves, and hearing protection close by, because you need a safe workspace, not a risky one.
Secure loose sleeves, jewelry, and long hair so nothing can catch.
Place tiles in easy storage near the saw, but not where they can slip.
Check blade condition before you start, since a dull or dirty blade can ruin the cut and affect your results.
Also keep a towel, sponge, and extension cord ready so you can stay organized and focused from the first cut to the last.
Mark Tiles for Accurate Cuts
Start by measuring each tile carefully, then mark your cut line with a china marker, pencil, or marker and straightedge. Use a square, speed square, or straightedge to keep the line true, and mark tiles ahead of time so you can move smoothly once the saw is ready. Before you cut, check that the layout line matches the finished face and the cut direction. That small check can save you from a costly do over.
Measure Tile Carefully
A careful measurement can save you a lot of tile, time, and frustration, so take a few extra minutes to mark each piece with precision. You want an accurate measurement, so check the tile dimensions twice before you cut. Use a tape measure and a square edge to confirm every side, especially since tiles can vary slightly.
If you’re working with patterned tile, remember which face will show, because one small mix-up can waste a piece you’d rather keep. Then compare the opening or edge space with the tile again, since tiny gaps still matter.
When you measure carefully, you join the group of DIYers who get cleaner results and fewer do-overs. That little extra step helps you stay calm, confident, and ready for the saw.
Mark Cut Lines
Mark each tile with care, because the line you draw now will guide every cut that follows. Use waterproof markers so your marks stay clear while water splashes across the surface. A china marker, pencil, or fine tip marker can all work, but choose the one that gives you the best layout visibility on your tile color.
Draw along a straightedge or square so the line stays crisp and easy to follow. Mark the finished face and the cut direction too, so you don’t second guess yourself later. If you’re working with patterned tile, keep the mark light but readable. The attention you give here sets you up for cleaner cuts and a smoother rhythm at the saw.
Check Layout Alignment
How do you know the layout is truly right before you bring the tile to the blade? Check each tile against your grid reference, then compare it with the room lines on the floor. That way, your cuts stay true, and your pattern feels calm and joined up.
Use a square or straightedge to confirm corner squareness, because a tiny drift can throw off the next piece. Then dry fit the tile where it belongs, and make sure the marked line still lands on the fence the way you planned. If the fit looks off, adjust now, not after the cut.
Take a breath, trust your marks, and keep the layout honest. As soon as everything lines up, you’ll feel ready, and the saw will simply follow your lead.
Set Up the Wet Saw Safely
Set your wet saw on a level, steady surface so it won’t shift while you work. Then check the blade guard and make sure it moves freely, and fill the water tray with clean water until the blade stays fully wet.
This small setup step helps you cut cleaner and keeps the saw safer, which is a useful step before the real work starts.
Choose Level Surface
A level, sturdy surface is the first thing you need because a wet saw only cuts well when it stays steady. If your table wobbles, the tile can shift and your cut can wander. You want a stable workbench, or you can level the floor to fix a slightly uneven spot before you start. That small step helps you stay calm, and it keeps the saw from bouncing around.
- Set the saw on flat, solid ground.
- Check for rocking before you plug it in.
- Shim only if the base stays firm.
- Keep the surface clear of loose grit.
- Recheck level after moving the saw.
When the base feels secure, you can guide the tile with more confidence and less stress.
Check Blade Guard
Before you make the initial cut, check the blade guard and make sure it moves freely without sticking. A quick blade guard inspection helps you catch dirt, chips, or a bent part before they turn into a headache. Lift and lower the guard manually, then watch that it snaps back into place on its own.
You also want guard alignment safety, so confirm the guard sits centered over the blade and never rubs the tile path. If it binds, clean around the pivot and adjust the setup before you start. That small step keeps the saw steady, and it helps you stay calm and confident.
You aren’t being fussy, you’re keeping your cut clean and your hands safer.
Fill Water Tray
Now that the blade guard moves freely, turn your attention to the water tray and get the saw ready for a clean, safe cut. Set the wet saw on a flat surface, then fill the tray with clean water to the marked line. Proper tray fill levels keep the blade cool and help you avoid rough cuts.
- Check the pump inlet for grit
- Top off the tray before each session
- Watch for steady water flow over the blade
- Wipe out slurry during water reservoir maintenance
- Replace dirty water when it turns cloudy
When you do this, you follow the same careful routine that experienced tile setters trust. If the water doesn’t reach the blade, pause and correct it before you start cutting.
A few calm minutes here can save your tile, your blade, and your nerves.
Position Tile Before Cutting
Should you line up the tile carefully at the start, the cut goes much more smoothly and feels far less stressful. Set the tile flat on the saw table, then check the fence alignment so the mark meets the blade exactly where you want it. Keep tile support under long pieces so they don’t sag or twist while you guide them forward.
Place the largest section of the tile between the blade and your hands because that gives you steadier control and a safer feel. If you’re making a diagonal cut, use the angle guide instead of guessing. Take a moment to confirm the finished face and cut direction. That small pause helps you work with confidence and get clean, accurate results.
Make Straight Cuts Cleanly
Start by marking the cut line clearly because a clean, straight cut begins with a clear target. Then guide the tile slowly and steadily along the fence so the blade stays on line and doesn’t wander.
If you keep your hands relaxed and let the saw do the work, you’ll get smoother edges with far less chipping.
Mark the Cut Line
Before you make a single cut, take a moment to mark the tile carefully because a clean line makes the whole job feel less stressful and a lot more accurate. Use reliable marking tools like a china marker, pencil, or straightedge, and check line visibility before the tile gets wet.
You aren’t just drawing a line, you’re setting up a cut that fits your space and keeps you in rhythm with the rest of the project.
- Measure twice, then mark once.
- Use a square for crisp edges.
- Keep the finished face in view.
- Mark several tiles at once.
- Choose a water-resistant line for porcelain.
That extra care helps you feel ready, and it keeps your cut on track when the blade starts.
Guide Tile Smoothly
With the line already marked, you can guide the tile through the saw with more confidence, and that calm, steady approach helps keep straight cuts clean. Set the tile flat against the fence, keep the larger side supported, and let the blade come up to speed first. Then use smooth feed control and a steady cutting pace so the saw does the work instead of your hands forcing it.
| Move | What to do | Why it helps |
|---|---|---|
| Start | Ease the tile in | Reduces chipping |
| Middle | Keep pressure light | Holds the line |
| End | Slow down near the exit | Cleans the edge |
If the tile starts to drift, ease back and realign gently. You are not rushing a race here, just making a clean cut with your crew, one careful pass at a time.
Handle L Cuts and Notches
Whenever a tile cut needs a turn, an L cut or notch can feel tricky, but it gets much easier once you break it into smaller, straight cuts. You aren’t alone here, plenty of DIYers face this exact challenge.
First, mark both legs of the cut clearly, then make corner relief cuts up to the meeting point. Next, trim the inside notch to remove the small middle piece in clean passes. Keep the tile flat and steady so each cut stays true.
- Measure twice before you start
- Cut one line at a time
- Stop at the corner mark
- Remove waste in small pieces
- Check the fit before moving on
Cut Porcelain and Ceramic Tile Correctly
Porcelain and ceramic tile can look tough, and they are, but a wet saw helps you make clean cuts without turning the job into a battle.
Set your tile flat, mark the cut line with a water-resistant pencil, and keep the finished face facing the right way.
Then align the tile with the fence so the blade meets your mark exactly.
Use a continuous rim diamond blade for better glaze compatibility, and let the saw reach full speed before you feed the tile.
Move slowly and steadily, because the saw should do the work, not your shoulders.
After the cut, check the edge and do light edge polishing only if you need a smoother fit.
This keeps your pieces neat, your hands confident, and your project moving with less stress.
Prevent Chips and Breaks
Chips and breaks usually happen because the tile gets rushed, twisted, or left without enough support, so your best defense is calm control. You’ll keep the cut clean when you guide the piece with patience and steady hands.
- Set the tile flat before the blade touches it.
- Keep the larger side supported for better fracture control.
- Use edge protection on visible sides with tape if needed.
- Feed the tile slowly, without jerking or pausing.
- Let the blade finish the cut instead of forcing the last inch.
When you stay relaxed, you help the saw do the work and the tile stays whole. Keep your eyes on the line, your pressure light, and your rhythm smooth.
Clean Up and Inspect Cuts
Once the tile is cut, do not rush to call it done. First, give the area a quick surface cleanup so slurry, grit, and wet dust do not turn into a slick surprise. Wipe the saw table, blade guard, and nearby floor with a damp rag, then empty the tray and rinse it. Next comes cut inspection. Check both edges for chips, wobble, or a slight curve, and compare the piece to your layout line. If you spot a rough spot, lightly dress it with a stone so it fits with the rest of your project.
| Step | What You Do | Why It Helps |
|---|---|---|
| Wipe | Remove slurry | Safer footing |
| Rinse | Clean tray | Better flow |
| Check | Inspect edge | Better fit |
| Sand | Ease chips | Smoother finish |
| Dry | Put tools away | Ready next time |
Frequently Asked Questions
How Do I Choose Between a Manual and Electric Wet Saw?
Choose between manual and electric saws by matching the tool to your project. Use a manual saw for quick, simple cuts. Use an electric saw for harder tile and cleaner results. Also consider the right wet saw size for proper support and faster cutting.
Can I Cut Glass Tile With the Same Wet Saw Blade?
Not always. Glass tile compatibility depends on your wet saw blade material differences. You will want a glass-rated continuous rim diamond blade, plenty of water, and a gentle feed so you do not shatter the tile.
How Do I Cut Very Small Tile Pieces Safely?
Clamp the tile firmly to a scrap board, then feed it slowly with a push stick. Keep your fingers well clear, wear eye protection, and do not hold tiny pieces near the blade.
What Should I Do if the Tile Keeps Wandering During the Cut?
Use proper guides to steady the tile and check blade alignment often. Keep the tile flat against the fence, feed it slowly, and adjust your setup so it feels secure and controlled.
How Often Should I Replace a Wet Saw Diamond Blade?
Replace it when blade wear inspection shows glazing, wobbling, or slow cutting. That could be after a few jobs or after a thousand. Trust replacement timing, and you will keep your cuts accurate and consistent, like the crew’s favorite pro.


