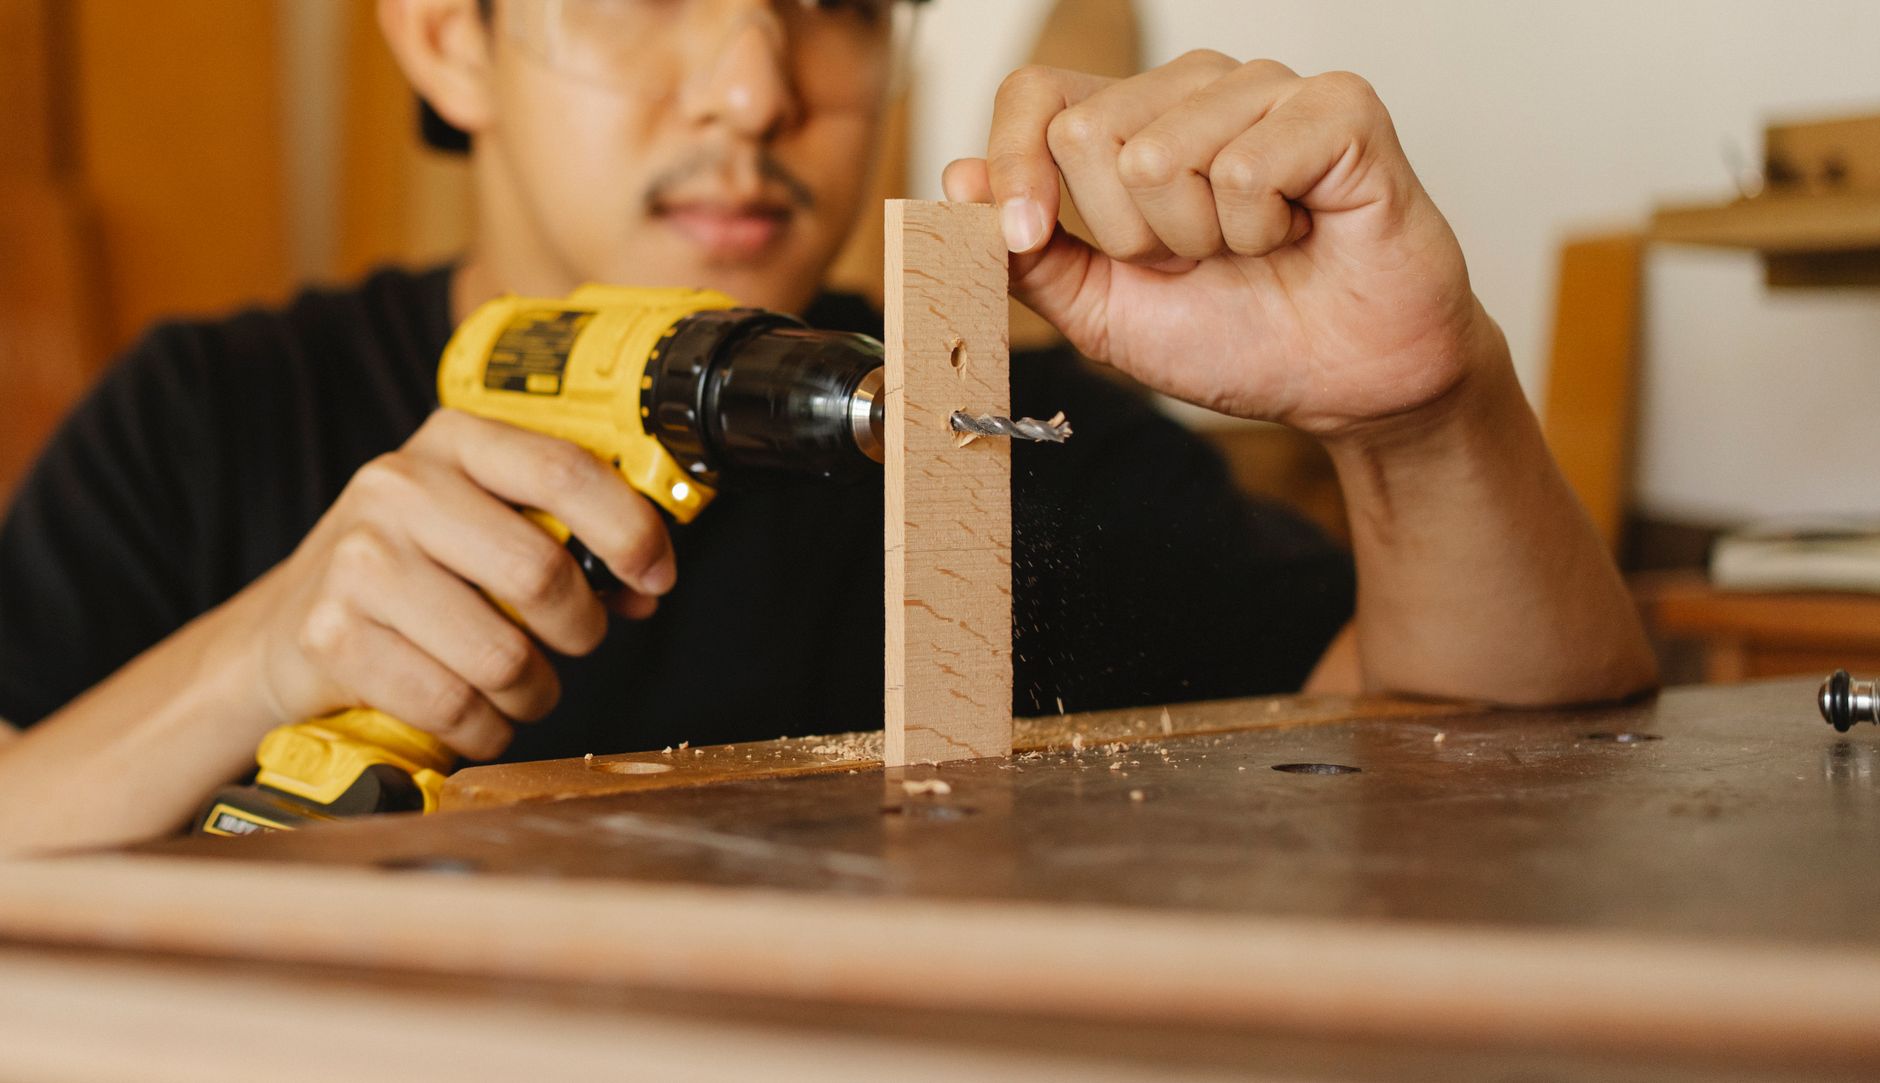

To drill straight, keep the bit on a true line so the hole stays perpendicular instead of wandering. You get that result with a clean start, steady pressure, and a setup that keeps the bit from skating before it cuts.
This walkthrough shows how to drill straight without a drill press, using simple checks, low-cost aids, and fixes for wood, thick stock, and horizontal runs.
Why freehand holes drift off line
A bit skates before it bites, especially on glossy surfaces, end grain, and hard woods with tight grain. The point lands, slips a hair, then the cut starts at an angle that gets harder to correct as depth increases.
A dull bit makes that slide worse. Fresh cutting edges grab sooner, so the hole starts where you marked it instead of chasing the grain across the surface.
Speed and pressure matter just as much. A fast, hot bit can chatter or burn the wood, while uneven hand pressure nudges the shaft to one side and turns a clean start into a crooked run.
Surface grip controls the start
Smooth plywood, varnished stock, and polished hardwood let the tip skate. A center punch or awl makes a small dimple that gives the point something to seat in before the flutes begin cutting.
Clamped stock stays put while you start the hole. A loose board shifts under torque, and that tiny movement changes the angle before the bit has cut enough to hold its own line.
Body position changes the cut
A shaky stance sends force through your wrists instead of through the bit. Both hands on the drill, elbows settled, and feet planted square to the work give you a steadier path than one-handed freehand drilling.
Even a good layout loses value when the workpiece moves. Once the board slides or your shoulder rolls, the bit follows that motion, and the hole begins to drift where your posture goes.
A shallow pilot cut gives the bit a path, reducing grab before the drill has room to wander.
The cleanest way to start a hole
Marking and starting the hole well does more for alignment than most people expect. A neat dimple, a confirmed angle, and a small pilot hole keep the tool from skating before the cut has any depth.
Mark the center before the bit touches wood
Sharp pencil lines or a fine knife mark give you a visible target. Then a center punch or awl makes a shallow starting cone that catches the point and keeps it from wandering across the face.
That little recess matters on hardwood, MDF, and soft pine alike. In wood, the tip enters under high local pressure, and a point trapped in a dimple resists sideways motion better than a bare point on flat grain.
Verify angle before cutting
A square, speed square, or small bubble level gives you a clear visual check before the motor spins up. Set the drill next to the edge of the square, then tip your wrists until the shaft matches that line.
Do not trust your eye alone on a wide board. A few degrees off at the surface turns into a visible lean after the bit travels an inch or two, which is why the setup check pays off early.
Use a pilot hole for tight work
A smaller pilot hole gives the larger bit a track to follow, which is useful in hardwood, long holes, and joinery where alignment matters. The pilot should be straight itself, because any error gets transferred into the final hole.
For shelf pins, hardware holes, and dowels, that first pass reduces lateral grab. You get a cleaner cut, less splitting, and a better shot at keeping the final hole straight.
That same restraint matters when keeping the tool upright, because a square entry prevents the bit from levering sideways.
Keeping a handheld drill square
Perpendicular drilling is a control problem more than a strength problem. The shaft needs a steady line, and your job is to keep the tool from rolling, yawing, or dipping as the flutes bite deeper.
Plant both hands and brace your stance
One hand on the trigger handle and the other on the front grip gives you control at both ends of the tool. That two-point hold reduces twist and makes it easier to correct a tiny lean before it grows.
Square your shoulders to the work and keep your weight balanced over both feet. A bent wrist or twisted torso telegraphs into the drill, and the bit follows the easiest path instead of the line you marked.
Check perpendicularity as you set up
A speed square beside the drill body gives you a fast visual reference for a 90-degree angle. For repeat work, a small bubble level can sit against the drill or a guide block and show tilt at a glance.
That check matters more than a perfect eye line. Even a slight lean near the surface creates a hole that reads crooked once hardware, dowels, or screws enter the opening.
Choose a sharp bit and moderate speed
Sharp bits cut with less side load, so they track more cleanly through the wood. A dull edge scrapes before it slices, which raises friction and makes the tool feel like it wants to pull away from center.
Moderate speed gives you time to react. High rpm can overheat some materials and make the bit skate at the start, while a controlled feed keeps the cut stable and lets you correct drift sooner.
Depth and material then decide the setup, since each option trades speed, control, and repeatability differently.
For hardwood, slow the feed a touch and clear chips often. Packed chips act like wedges, and wedges push the bit off line.
Choosing between a drill guide, block, and press
Accuracy aids change the job from guesswork to reference-based drilling. A drill guide, a drill block, and a drill press all help, but each serves a different level of precision and convenience.
| Tool | What It Does | Best Use |
|---|---|---|
| Drill guide | Helps keep a handheld drill perpendicular to the work | Simple straight holes without setting up a larger machine |
| Drill block | Gives the bit a square face to reference against | Quick layout holes, dowel starts, and scrap-wood jigs |
| Drill press | Holds the bit rigid and vertical through the cut | Maximum drilling accuracy for repeatable shop work |
Use a drill guide for handheld accuracy
A simple guide block is the easiest helper when you need a perpendicular hole but still want the portability of a handheld drill. It keeps the body of the drill aligned to the work instead of relying on your wrists alone.
That matters on cabinet parts, trim, and repair work where setting up a larger machine would take longer than the hole itself. A guide cuts the margin for drift without changing your whole workflow.
Use a drill block for quick reference
A drill block or a square-cut scrap-wood jig gives you a flat face to register against the surface. It is cheap, fast, and handy when you need a clean starter reference more than a full metal guide.
Drill a pilot through the block on the drill press or square it carefully once, then reuse it as a visual fence. The block helps the bit start straight, which is enough for many shelf-pin and dowel jobs.
Use a drill press for the highest accuracy
A drill press holds the tool and work in a fixed relationship, so it remains the most reliable way to drill straight holes. The spindle moves vertically, and that rigid path removes the wobble that hand pressure can introduce.
For furniture parts, jigs, and repeated holes, that consistency is hard to beat. It also makes a pilot hole and a final bit line up more predictably, which is why shop work leans on it so heavily.
A simple decision path helps here. Use a guide for handheld jobs, a block for quick layout support, and a drill press whenever exact repeatability matters more than portability.
Thick stock makes that choice more consequential, especially when the bit must stay aligned over a longer cut.
Straight drilling in thick lumber and deep holes
Long holes expose every tiny tilt. A start that looks clean on the surface can drift several degrees by the time you reach the far side of thick lumber, so feed control becomes the main job.
Feed slowly through the cut
A slow, even feed keeps the bit centered in the kerf instead of forcing it to bite sideways. Deep cuts amplify any hand wobble, and a rush into the material makes that wobble show up as a curved path.
Hard maple, oak, and layered stock demand extra patience. Their resistance changes as the bit moves through growth rings or glue lines, and that change can tug the shaft off line unless you keep the pressure smooth.
Clear chips before they pack tight
Chips build heat and add friction. In a deep hole, that packed debris can act like a corkscrew brake, and the drill pulls harder on the side with less resistance.
Back the bit out every short distance to clear the flutes. You get cooler cutting, less binding, and a cleaner path through a long bore in dense wood.
Reset your sightline during the cut
A long hole deserves more than one look. Recheck the shaft against your square or visual line after the first half inch, then again after the cut begins to bury the flutes.
That habit catches drift before it becomes obvious on the exit side. Small deviations stack up fast, and thick stock gives those errors room to grow.
Long runs magnify that risk, and even a slight angle can throw off an entire series of holes.
For very deep bores, mark a stop depth on the bit with tape and use it as a checkpoint. The tape line reminds you to clear chips and reset your angle before the cut runs away.
Horizontal runs and evenly spaced layouts
Horizontal drilling adds sag to the equation. The drill wants to droop under its own weight, so your support hand, stance, and work support need to fight gravity before the bit ever starts cutting.
Support the tool and workpiece
Clamp the board at a comfortable height and rest part of the drill’s weight with your front hand. That support cuts the downward pull that turns a level line into a slight arc.
A scrap under long stock can also stop vibration. Less movement means the bit stays on the line you set, especially on narrow shelves and trim pieces.
Lay out from one baseline
Consistent hole spacing starts with one straight reference edge. Mark every center from that baseline, not from the last hole, so small measurement errors do not stack up across the row.
A story pole, tape marks, or a ruler with the same starting point keeps the spacing even. That matters for shelf pins, hardware rows, and dowels that need to line up cleanly after assembly.
Use a fence or simple jig
A fence gives your drill or workpiece a hard stop, which keeps repeated holes in the same position. A stop block on a scrap jig works the same way and is often enough for short runs in wood.
For cabinet hardware, a fence saves time and keeps the last hole as true as the first. Once the layout is locked in, the hole pattern looks intentional instead of drifting from one mark to the next.
Uniform spacing depends on correcting those small slips quickly, before the pattern loses its rhythm.
- Clamp the board. Movement during cutting is the fastest way to ruin alignment.
- Start with an awl. The dimple keeps the point from skating on smooth stock.
- Use a square check. A quick visual reference catches tilt before the hole deepens.
- Clear chips often. Less heat and less binding mean straighter tracking.
- Measure from one edge. Baseline layout keeps spacing even across a row.
What to do when a hole starts to wander
A drifting hole usually shows up early as a change in sound, a slight tug, or a line that no longer matches the square. Catching that movement quickly gives you a chance to correct the setup before the cut gets too deep.
Correct the start instead of chasing it
Back out, clear the chips, and reset the shaft to your line. A crooked start gets worse fast, so correcting the angle early is better than trying to muscle the bit back after it has buried itself.
For wood, a small shim under the work or a better clamp position can fix the cause, not just the symptom. The drill follows the workpiece, so stable support matters as much as hand control.
Swap out a dull bit
A worn bit wanders because it scrapes more than it cuts. That extra friction creates heat and side pull, which is why a sharp replacement often makes the hole track straighter right away.
In a shop setting, brad-point bits in wood tend to start cleaner than general-purpose twist bits because the center spur anchors the tip. The bit shape matters because the point does the locating before the cutting lips do the work.
Use scrap as a recovery aid
Scrap wood can act as a reset block when a surface is too slick or too soft for direct starting. Drill through the scrap once, then use that square opening as a visual and physical guide for the real piece.
That trick is useful on finish surfaces and short repairs. It gives the bit a controlled entrance, which buys you a straighter path on the actual workpiece.
The same recovery logic helps with shelf pins and hardware rows. Once one hole strays, treat the next mark as a new layout problem instead of spacing from the mistake.
A wandering bit is easier to recover early, but the real key is resetting the layout before drilling again.
What to remember
Straight drilling starts before the trigger pulls. A marked center, a dimple from a punch or awl, a square stance, and a sharp bit all work together, and each one reduces the chance that the hole will wander once the cut begins.
FAQ
How do you drill a hole perfectly straight?
Use a center punch or awl, clamp the work, and check the drill against a square before the bit starts. A drill press gives the most reliable path, but a handheld drill with a guide or block can come very close in wood.
Is there a tool to help drill straight?
A drill guide helps keep a handheld drill aligned perpendicular to the work. A drill block or scrap-wood jig can also give you a square reference, while a drill press gives the most rigid and repeatable result.
How to drill straight without a drill press?
Use both hands on the drill, brace your stance, clamp the workpiece, and start with a punched dimple or pilot hole. A speed square or small bubble level helps you verify the angle before the cut deepens.
How do you drill holes evenly spaced?
Lay out every center from one baseline, not from the last hole, and use a fence or stop block for repeat work. That keeps small measurement errors from stacking up across the row.
How do you drill straight holes horizontally?
Support the drill and the workpiece so the tool does not sag under its own weight. A clamped board, a firm two-hand grip, and a horizontal reference line keep the bore from drooping as you cut.