
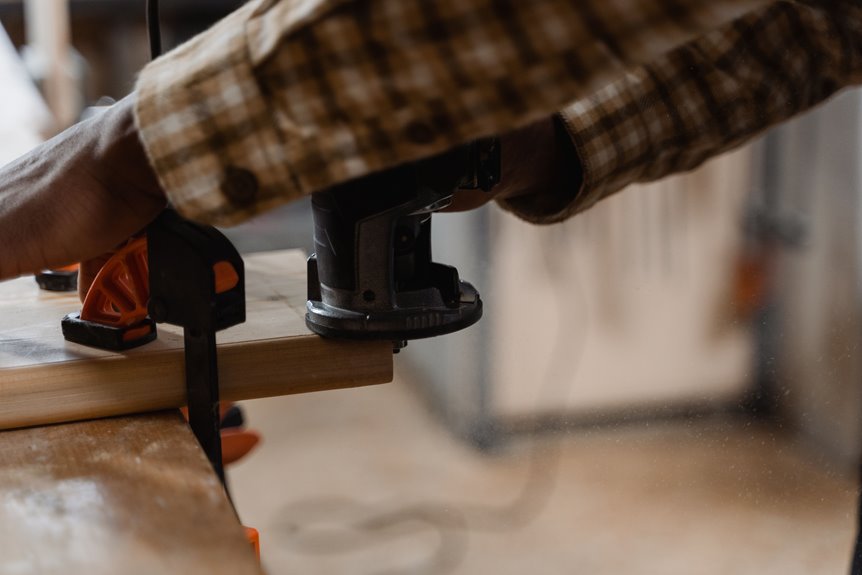

A router table can turn a tricky edge into a clean, even line, but only if you set it up with care. You will learn where it works best, how to adjust the fence and bit, and how to keep burns, tearout, and wasted stock to a minimum. Once you know the small details, the whole process feels less like guesswork and more like control.
Best Uses for a Router Table
A router table shines when you need clean, repeatable cuts that would be hard to make freehand. You can use it for edge profiling, trimming end grain, shaping dados, and adding decorative details with steady control. In a small shop setup, it saves space and still gives you the accuracy that makes a project feel polished.
When you pair it with router table jigs, you can guide narrow parts, keep safer spacing, and repeat the same cut without stress. That matters when you build shelves, face frames, or cabinet parts and want pieces to match. It also helps when you work alone, because the table supports the stock while you focus on the feed.
Choose the Right Router Table
When you choose the right router table, you make the whole shop feel easier and safer to use. Start by looking for table stability, because a solid base keeps your cuts steady and your confidence high. Next, check the workspace footprint so the table fits your room without crowding your movement.
You’ll also want a flat top and a fence that stays true, since those details help you guide stock with less fuss. If you share a shop, pick a table that adjusts quickly and stores neatly. That way, you can work smoothly without feeling cramped. When the table feels dependable, you’ll spend less time wrestling gear and more time making clean, accurate cuts with the crew.
Set Up the Router Table and Bit
Before you make the initial cut, take a few minutes to set the router table up with care, because that small step can save you a lot of wasted wood and frustration.
Start by leveling the table so the surface stays flat and steady under your work. Then check the insert for flushness, because a proud insert can snag the stock and spoil your cut. Mount the router firmly, and make sure the bit height adjusts smoothly from above the table.
Set the table at a height that lets you stand comfortably and see the work clearly. As you tighten every knob and bolt, keep the base square and stable. Once the setup feels solid, you can cut with more confidence, and that stability matters when you want results you can trust.
Install the Fence for Clean Cuts
To get clean cuts, set the fence so it sits straight, stays parallel to the bit, and holds the work steady. Lock it down firmly, because even a small shift can affect the cut.
Before running your final board, make a quick test cut on scrap and adjust the fence if the cut needs fine tuning.
Fence Alignment Basics
Getting the fence lined up properly may seem minor, but it makes a big difference in how clean your cuts turn out. Start with fence squareness checks against the tabletop, then set the fence parallel to the bit.
Next, use micro adjustments to the fence position to dial in the fit gradually instead of making large changes. Keep both faces flat and straight so your stock rides true. After that, close the opening snugly around the bit without rubbing.
When you take time here, the cut feels smoother, the edge looks sharper, and your confidence builds with each pass. A well aligned fence helps you work with consistency.
Secure Locking Methods
Once your fence sits square and true, the next job is locking it in place so it stays there while you work. You want a setup that feels solid, not fussy, because confidence matters once the wood starts moving. Check clamp placement so pressure lands on the fence body, not the bit opening. Tighten each clamp evenly, and use tabletop holdfasts once your table lets you secure the fence from below. This gives you a steady grip without crowding your hands.
- Place clamps where they’ll not twist the fence.
- Use holdfasts for fast, low profile support.
- Recheck tightness after any small adjustment.
Once the fence can’t shift, you can stay focused on clean edge routing, and that’s where your best work starts.
Test Cut Verification
How close is the fence really? You find out with test cuts, not guesswork. Before you touch the final board, run calibration checks on the fence, bit height, and speed. Then make scrap verification cuts on the same wood type and thickness you plan to use. Watch the edge for burning, chatter, or a gap that shows the fence needs a small shift.
Move the fence in tiny steps, then cut again. That steady rhythm helps you feel in control, and it keeps your work looking crisp. Whenever the scrap comes out clean, you’re ready. If it does not, keep tuning until the cut feels smooth, safe, and right. That’s how you build results you can trust.
Adjust Bit Height and Depth
Set the bit so only the right amount of cutter shows above the table, because that initial setup shapes every cut you make.
Then fine tune the depth in small steps, since tiny changes can make a big difference in how clean the edge looks and feels.
Before you commit to the final piece, make a few test cuts on scrap so you can confirm the height is exact.
Setting Bit Projection
With the router unplugged, start by bringing the bit close to your workpiece and checking how much cutter you actually need exposed. The router bit exposure should match the cut, not your impatience, because a shorter reach gives you steadier control and cleaner edges.
Set the plunge depth in small steps, then lock it before you power up. You aren’t guessing here; you’re joining a group of woodworkers who measure twice and cut once.
- Raise the bit until it clears the stock.
- Lower it until the cutting edge meets the mark.
- Tighten the lock, then recheck from the tabletop.
If the projection looks right, you’ll feel more confident at the fence and less likely to chatter the wood. A calm setup helps you work like you belong there.
Fine-Tuning Cut Depth
As soon as the bit is close to the correct depth, the real work begins with small, careful adjustments. You fine tune the depth by raising or lowering the bit in tiny steps, then locking it in place before moving on.
This gives you incremental depth control, which helps you stay in command of the cut and prevents the wood from pushing back. Watch the cutter against the fence and the stock, and trust the tabletop scale only after confirming it with your own eyes.
If the edge seems too bold, lower the bit slightly. If it seems too shy, raise it a little. These small changes build confidence, and they help you work like part of a crew that values clean results.
Test Cuts And Adjustments
Before you rout your final piece, make a test cut on scrap wood and check what the bit is really doing.
That scrap calibration helps you read the cut honestly, not hope for it. Start with the bit a little high, then make micro adjustments until the groove, edge, or profile matches your plan.
You aren’t chasing perfection in one move. You’re sneaking up on it with control.
- Raise or lower the bit a hair, then cut again.
- Check width, depth, and surface quality.
- Repeat until the fit feels right and the cut looks clean.
When the test pass feels dialed in, lock the setting before you touch the real board.
That’s how you stay calm, confident, and part of the craft.
Use a Router Table Safely
Router table safety starts with calm setup and steady habits because a well-prepared machine gives you more control and less stress. You can work confidently once you check that the table is level, the fence is square, and the bit is tight.
Keep the insert plate flush, use sharp bits, and set the speed to match the cutter. Before you switch on, clear the area, secure the cord, and make sure dust collection and workshop ventilation are working.
Stand ready with an emergency shutdown plan so you can cut power quickly if anything feels off. Use featherboards, push sticks, and a steady stance to keep your hands away from danger. When you move with care, the router table becomes much safer to use.
Feed Wood Through the Router Table
To feed wood through a router table well, control the direction and keep the stock moving with calm, even pressure.
You’ll usually feed from right to left. That steady motion helps the bit cut cleanly instead of grabbing the wood. Stay relaxed and keep the pass smooth for better control and a safer cut.
Feed Direction Control
When you feed wood through a router table, the direction you push the board matters just as much as the bit you choose. You want to work with the feed direction and against the cutter rotation, usually from right to left, so the bit grabs cleanly instead of pulling the stock away from you.
- Keep the board between you and the bit.
- Hold it against the fence with steady pressure.
- Use push sticks where your hands need space.
This simple habit helps you feel in control, and it also helps your cut stay predictable. Whenever the board starts to drift, pause and reset your grip. You aren’t fighting the tool here. You’re guiding it, and that makes the whole job feel safer and a lot less stressful.
Smooth, Steady Passes
Smooth passes build on that steady feed you already practiced, but now the real goal is rhythm. You want your hands, eyes, and ears to work together so the board glides without hesitation.
Start each pass with light pressure, then keep a calm pace as the bit bites. If you rush, the cut can chatter. If you stall, the wood may burn.
Listen for a smooth hum, and watch the edge stay clean. Keep your shoulders relaxed, your stance balanced, and your push firm but not stiff.
A consistent pass rhythm helps you trust the cut flow and makes each board feel easier to guide. When the stock resists, don’t wrestle it. Ease back, reset, and continue with control.
Use Featherboards for Better Control
Featherboards can make a router table feel much less nerve-wracking because they hold the stock firmly against the fence and tabletop while you guide it past the bit.
With smart featherboard placement, you maintain even pressure and get steadier cuts. That extra contact also improves anti kickback control, so the board stays aligned while the cutter engages.
- Set one featherboard before the bit for inward pressure.
- Add another on the tabletop to keep the stock flat.
- Test the hold with scrap before routing your real piece.
You will feel more in control, and that helps you work with confidence instead of tension. Keep the pressure firm, not excessive, and let the board glide.
You aren’t wrestling the wood. You’re working with it for cleaner, safer passes.
Make Straight Profiles and Edges
To make straight profiles and clean edges, set your fence parallel to the bit so the board tracks true from start to finish.
Keep steady pressure against the fence, and let sharp bit choices and careful speed do the work instead of forcing the cut.
When you do that, your passes stay smooth, and the edge looks crisp instead of uneven.
Fence Alignment Basics
A well-set fence is the quiet hero of straight router-table work, because when it lines up with the bit, your cuts stay clean and your edges stay true. You should begin by checking fence squareness, then trim the opening clearance so the bit sits close without rubbing. That small gap supports the work and helps you stay in control.
- Tap the fence into line with a reliable square.
- Close the opening around the bit with care.
- Lock the fence after each small adjustment.
When you make changes in small steps, you avoid unexpected wander and keep profiles crisp. If a board starts to drift, stop and reset instead of chasing the cut. With a calm setup, you can guide each pass with confidence and get edges that look like they were meant to meet.
Consistent Edge Guidance
Under the fence, your board should glide in a straight, calm line. That steady contact gives you clean edges and crisp profiles. Guide it with light, even pressure so the fence stays your reference and the cut stays true.
Keep the fence square, then use firm workpiece support so the stock doesn’t dip or wander. Whenever you start a pass, check edge registration against the fence opening, and let the board ride there without twisting. If the piece feels sticky, slow down and reset your grip, because rushing invites a crooked edge.
Feed from right to left, keep your hands clear, and let the router do the work. That way, you build skill and confidence, one steady edge at a time.
Clean Profile Passes
When you want a clean profile pass, start with a setup that keeps the cut calm and predictable. Set the fence parallel, lock the bit height, and test on scrap so profile consistency shows up before you touch the real board. Then feed the stock steadily against the bit, keeping firm fence contact without pushing hard.
Use sharp bits for smoother edges.
Take shallow passes to reduce chatter.
Keep dust clear so you can watch the cut.
If you hear rough noise or see fuzz, slow down and adjust before the next pass. That small pause saves your piece and your nerves. After the main cut, you can handle finishing touchups with light sanding, so the edge feels crisp and belongs in the final project.
Cut Dadoes, Rabbets, and Grooves
Dadoes, rabbets, and grooves are some of the most useful cuts you can make on a router table, and the good news is that they aren’t as fussy as they first seem. Start with careful joinery layout, then mark the cut line and set the fence so the bit removes only what you need.
For rabbets, let the board ride flat against the table and take shallow passes. For dadoes, use a stop block or a miter gauge to place the cut where you want it. Whenever you need stopped grooves, make test cuts on scrap first, then gradually move to the final depth.
Keep steady feed pressure, and let the table do the hard work. That’s how you make strong joints with confidence.
Shape Curves With a Router Table
Curves can feel tricky at first, but a router table gives you steady support and better control, so you can shape them with much more confidence. You aren’t working alone here; the table helps you guide each pass with calm focus. Start by tracing curve templates onto your blank, then make light cuts and sneak up on the line. When you prefer freehand shaping, keep both hands firm and move at a steady pace.
- Use a template guide for smoother arcs.
- Rotate the piece slowly, not wildly.
- Stay patient if the curve tightens.
As you work, keep the stock flat and let the bit do the cutting. That simple rhythm helps you feel in control and makes curved edges look clean and intentional.
Avoid Tearout and Burning Marks
A clean router cut starts with control, because tearout and burning usually appear when the bit is stressed or the wood fibers lose support. You can prevent both by using a sharp bit, setting the fence tight, and feeding the stock at a steady pace. When you slow down just enough, you improve tearout prevention and keep the cutter from rubbing too long in one spot.
Short, shallow passes also reduce the load, so the wood cuts cleanly instead of splintering. For burning reduction, match the speed to the bit size and wood type, then keep the work moving consistently. If the grain feels difficult, support it with a backer board or a zero-clearance insert. You aren’t fighting the wood alone, you’re guiding it with the full setup.
Fine-Tune Results With Test Cuts
Test cuts help you dial in the setup before you touch your final board, and that practice run can save you a lot of stress. When you make scrap test cuts, you learn how the bit, fence, and feed speed work together.
Before the real piece goes on the table, you can verify fence settings and catch small mistakes early.
- Check the cut width against your mark.
- Adjust the fence in small steps.
- Test the feel of the feed, then try again.
If the result looks off, don’t push through and hope for the best. Make one change at a time, then cut another scrap.
That steady habit helps you build confidence with every pass.
Maintain Your Router Table for Accuracy
Even though your cuts were perfect yesterday, your router table can drift out of line over time, so you need to keep it tuned for accuracy.
Check the tabletop, insert plate, fence, and router mount before each session because small gaps can turn into uneven cuts. Use a maintenance checklist to spot loose bolts, dull bits, and dust buildup. Then focus on cleaning and calibration, since a clean surface helps the stock glide and a true fence keeps every pass on track.
Recheck bit height, fence parallelism, and table level after heavy use or a moved setup. As you stay consistent, you protect your work and join a crew that values clean, reliable results. Tiny fixes now save you from stubborn mistakes later.
Frequently Asked Questions
How Do I Align the Router Table Insert Plate Flush?
Loosen the insert plate screws, raise or lower the leveling set screws until the plate is flush, then tighten the screws gradually. Check the tabletop with your fingertip for a seamless transition, then make a test cut.
What’s the Best Way to Set Table Height Ergonomically?
Set the table so your forearms stay level and your shoulders remain relaxed. This height adjustment supports an ergonomic working posture. You will control cuts better, feel less strain, and stay in a steady rhythm.
How Can I Tell if My Bits Are Too Dull?
If your bit has gone blunt, you will notice it quickly: cutting performance drops, the cut quality worsens, burning may appear, and you will need to apply more force. For cleaner cuts, replace dull bits soon.
When Should I Use Stop Blocks or Micro-Adjusters?
Use stop blocks or micro-adjusters whenever you need repeatable cuts, precise setup, or fine dimension control. They help you sneak up on exact settings, match parts reliably, and maintain confidence when tiny adjustments matter.
How Do I Keep the Power Cable Safely Routed?
You’ll keep the power cable safely routed by using cord management clips or hooks, guiding it away from moving parts and the cut path, and checking cable safety before every pass so you stay confident and connected.


