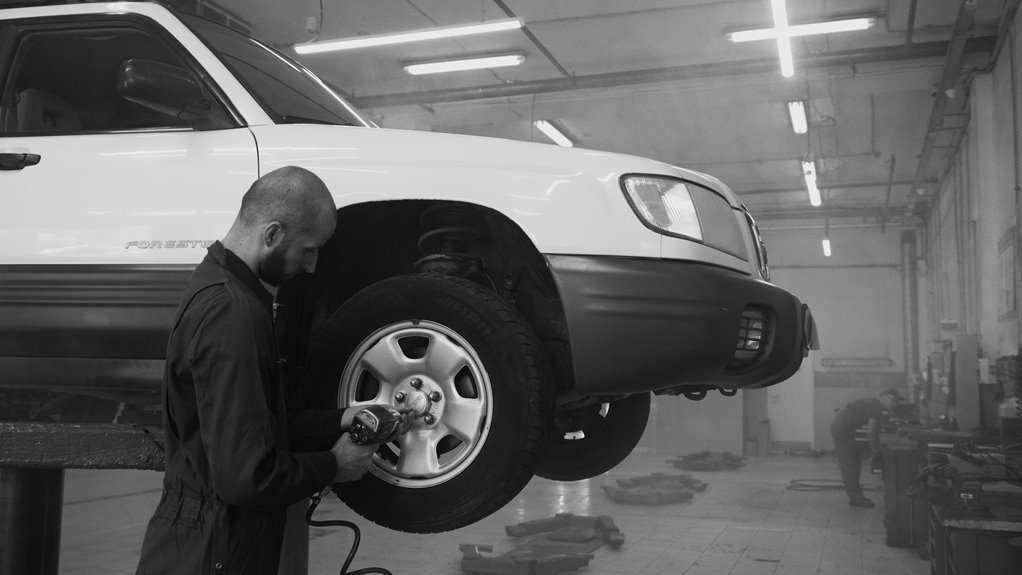

If you have ever stared at a stubborn lug nut and felt your patience slip, you are not alone. Using an impact wrench for a tire change can make the job faster, but only if you use it the right way. You will want the right socket, the right setting, and a few safe habits before the wheel comes off. Once you know the simple steps, the whole process gets a lot easier, but one small mistake can still ruin the plan.
What You Need Before You Start
Before you reach for the impact wrench, gather everything you need so the job feels smooth instead of rushed. Park on a flat surface, set the brake, and use wheel chocks so the car stays steady.
Then place jack stands nearby because safety precautions matter more than speed. Next, collect the impact wrench, the correct socket, a jack, and your safety gear.
After that, do a quick tool inspection. Check the wrench’s power, charge, or air supply, and make sure the socket fits snugly.
Finally, keep gloves and eye protection close so you can work with confidence and fewer surprises while you prepare for the tire change.
Choose the Right Socket and Power Setting
The right socket and power setting can make this job much easier, and it can also protect your lug nuts from damage.
First, match the socket size to the lug nut exactly, often 17 mm, 19 mm, or 21 mm. A snug fit helps the tool grip cleanly and keeps the edges from rounding off.
Next, make sure the socket locks firmly onto the wrench anvil.
Then choose the power mode. Start with a lower setting if your wrench offers one, because you need controlled force, not excessive torque. If the tool is pneumatic, adjust the regulator carefully.
Once you choose the right setup, you work more efficiently, stay more confident, and keep the tire change smoother from the start.
Loosen the Lug Nuts With an Impact Wrench
Now that your socket is matched and your wrench is ready, you can start loosening the lug nuts with confidence. Keep the wheel on the ground, set the wrench to reverse, and test the trigger for a quick spin check.
Then seat the socket squarely on each lug nut and pull the trigger in short bursts. Let the tool work, and don’t lean on it too hard. If you run into wheel nut corrosion, pause and try again with steady pressure.
For rusted fastener removal, a few controlled bursts often work better than one long pull. Move from nut to nut so you break each one loose evenly. When they all crack free, you’re set for the next step with less strain and more peace of mind.
Jack Up the Car and Remove the Wheel
Once you have broken the lug nuts loose, raise the car with the jack and keep it steady on jack stands before you pull the wheel off. You are building a solid vehicle safety setup here, and that gives you confidence. Check the lift points, then make sure the car sits level and stable. After that, remove the loosened nuts fully and set them where you will not lose them. Now the wheel hub is accessible, so grab the tire with both hands and pull it straight toward you.
| Step | What you do | Why it helps |
|---|---|---|
| 1 | Lift the car | Clears the tire |
| 2 | Set jack stands | Adds support |
| 3 | Remove nuts | Frees the wheel |
| 4 | Pull wheel off | Exposes the hub |
Keep the area clear, and you will work smoothly with confidence every driveway helper deserves.
Install the Spare and Hand-Tighten the Lug Nuts
Now set the spare tire onto the hub and line it up with the studs so it sits flat and steady.
Next, thread each lug nut by hand to keep the threads clean and avoid cross threading.
Then snug the nuts lightly with the impact wrench in a star pattern, just enough to hold the wheel in place.
Position Spare Tire
With the spare tire ready, line it up with the hub so the bolt holes or studs match cleanly, and slide the wheel on straight without forcing it. If the spare came from trunk storage access, wipe off any dirt first so it seats flat.
Keep the wheel centered with both hands, then press it snug against the hub. Start each lug nut by hand and turn it just enough to catch the threads. You’re building a solid fit now, and that matters more than speed.
A steady start keeps the parts working together and makes the next tightening step much easier.
Thread Lug Nuts
Thread each lug nut onto the studs manually and give it a few turns so the threads catch cleanly. This keeps you in control and helps confirm a proper fit. Do a quick lug nut thread inspection before you go farther, looking for dirt, rust, or bent threads. That small check supports cross thread prevention and helps you avoid problems later.
| Check | What you want | Why it helps |
|---|---|---|
| Studs | Clean, straight threads | Easier start |
| Lug nuts | Smooth threading | Better fit |
| Hand feel | Light turning only | Catch problems fast |
When the nut starts easily, you are on the right track. If it feels gritty or tight right away, back off and try again. You and your wheel team deserve a secure start before any tool touches the job.
Snug By Hand
Before you snug the lug nuts down, make sure the spare sits flat and centered on the hub, because a good seat helps the rest of the job go smoothly.
You aren’t just swapping a tire here. You’re helping the wheel settle onto the car the way it should.
- Thread each lug nut on by hand and check for smooth turns.
- Keep the wheel aligned by hand so it stays even.
- If a nut resists, back it off and start again to prevent cross threading.
- Work in a star pattern so the spare seats with steady, even pressure.
Once each nut starts cleanly, you can move on with confidence. A few patient turns now can save you trouble later, and your wheel will be set with a secure fit.
Tighten the Lug Nuts With a Torque Wrench
Now that the lug nuts are snug, set them to the correct torque so the wheel stays secure without damage.
Check your vehicle’s specifications and use a torque wrench to tighten each nut in a star pattern for even pressure.
This final step helps ensure your tire change remains safe and reliable on the road.
Proper Torque Settings
Getting the lug nuts to the correct torque matters more than most people realize because it keeps the wheel secure without stressing the studs or warping the wheel.
Follow the factory torque specifications instead of guessing, since every vehicle requires a different setting. Use a torque wrench for verification so each nut matches the manufacturer’s specification.
- Check your owner’s manual or the door sticker.
- Set the wrench to the listed torque.
- Tighten in a star pattern for even pressure.
- Recheck each lug, since that extra minute can help prevent problems on the road.
When you work this way, you’re following the same careful practice trusted by other drivers. It’s simple, and that’s the point.
Final Tightening Steps
Once you’ve set the lug nuts to the correct torque pattern, the last step is to confirm that each one is snug and even with a torque wrench. You aren’t just finishing a task; you’re protecting the entire wheel assembly.
Set the wrench to the manufacturer’s specification, then tighten each nut in a star pattern until it clicks. Keep your pull steady, and don’t lean on it after the click.
Next, perform a post-install torque check after the car has settled on the ground. This helps catch any shift as the wheel seats. If the wheel still feels off, perform a quick wheel seating verification before moving on.
A careful final pass keeps the ride smooth and your work solid.
Avoid Common Impact Wrench Mistakes
Even a strong impact wrench can cause trouble when you rush the job, so it helps to know the mistakes that trip people up most often. You stay safer and avoid stress when you slow down and work like the crew next to you.
- Use the right socket, because a loose fit can strip the lug.
- Check rotation before you touch the nut, or you’ll fight the fastener.
- Don’t skip tool safety, since a jumping wrench can hurt your hand or wheel.
- Avoid torque errors by finishing with a manual torque wrench, not the impact.
After that, keep the wrench square on each lug and loosen nuts on the ground first. Then you’ll feel more in control, and the whole tire change goes smoother.
Frequently Asked Questions
Can an Impact Wrench Damage Alloy Wheels?
Yes, an impact wrench can damage alloy wheels when you overdo it. To protect your wheel, use the right socket and control the torque, snug only, then finish with a torque wrench.
How Often Should Impact Wrench Sockets Be Replaced?
You should replace impact wrench sockets when wear appears, not just on a fixed schedule. A cracked or rounded socket will not help your crew. Inspect them often and replace them as soon as damage shows.
Is an Impact Wrench Safe for Rusted Lug Nuts?
Yes, you can use it on rusted lug nuts if you are careful. Start with rust removal, then apply steady torque control. Support the vehicle safely, use the correct socket, and stop before you damage the studs.
What if the Lug Nut Starts Spinning Freely?
A free spinning lug usually means you have lost bite, so stop and reassess. Use seized nut recovery tools, then hold the stud, remove pressure, and continue safely.
Can I Use One Impact Wrench for Different Vehicle Types?
Yes, you can use one impact wrench for different vehicle types provided you check vehicle compatibility, socket size, and torque matching. You will need the right settings and a final torque wrench so everyone’s ride stays secure.