
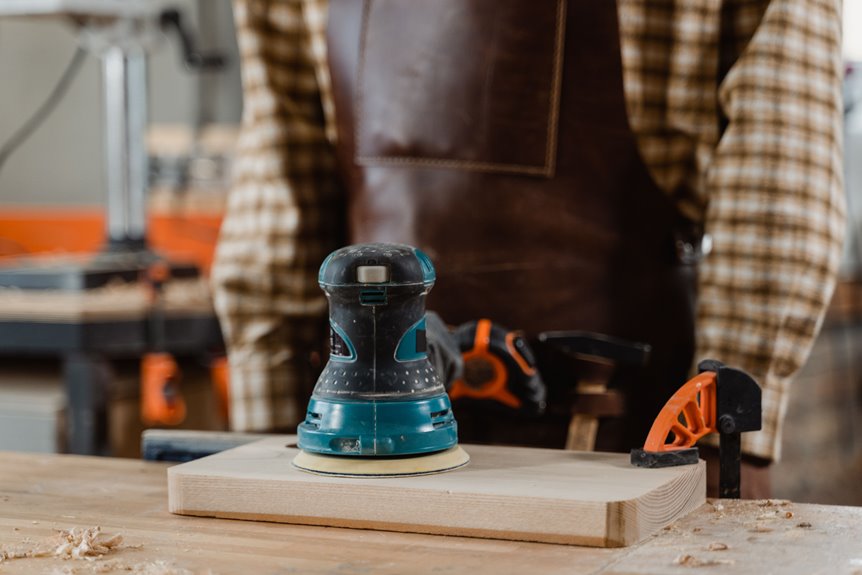

A random orbital sander helps smooth rough surfaces quickly while keeping the finish clean and even. You can use it on wood, metal, plastic, and composite materials when preparing for paint, stain, or varnish without leaving swirl marks. It is especially useful for cabinets, furniture, trim, and repair work. Once you understand how it works, you can choose the right grit and apply the right pressure, which makes a noticeable difference.
What Is a Random Orbital Sander?
A random orbital sander is a handheld power tool that smooths surfaces by moving its sanding pad in two motions at once: spinning and shifting in small, random circles. You can think of it as a steady helper that keeps your work looking clean without much effort.
Its main components include the motor, pad, grip, dust collection, and switch, which work together to keep sanding controlled. The power source can be corded or battery powered, so you can match the tool to your shop or job site.
Because the motion stays irregular, you get a smoother result and fewer marks. As you learn the tool, that mix of comfort and control makes the process feel less intimidating and more manageable.
What Is a Random Orbital Sander Used For?
People use a random orbital sander for much more than just making things smooth. It helps prep wood, metal, plastic, and composite surfaces so the next step turns out cleaner and stronger. You get real surface versatility when you need one tool for shop work or home repairs.
In woodworking, you can prepare cabinets, trim, and furniture for stain or paint. In repair work, you can scuff old coatings and level rough spots.
- You can improve adhesion before a new finish.
- You can shape plastic, fiberglass, and other composite parts.
- You can handle multi material sanding without switching tools every few minutes.
Why It Reduces Swirl Marks
You get fewer swirl marks because the pad doesn’t move in one fixed circle. Instead, it follows a random motion pattern that spreads the sanding action across the surface. That even abrasion helps smooth the wood without leaving the marks a regular sander can.
Random Motion Pattern
Because the pad moves in tiny overlapping circles, a random orbital sander breaks up the marks that other sanders can leave behind. You guide it along an orbital path, and the pad rotation keeps each touch slightly different. That changing contact helps you feel less like you’re fighting the tool and more like you’re part of the rhythm.
- You spread abrasion across many tiny passes.
- You avoid one fixed scratch pattern.
- You get a cleaner look with less guesswork.
Even Surface Abrasion
The random orbital sander stays gentle on the surface while still removing material evenly, and that balance helps keep swirl marks to a minimum. You get steady abrasive consistency, so each pass cuts in small, overlapping paths instead of digging a single hard line. That means you can level wood, primer, or filler with less risk of shiny scars.
Because the pad keeps moving in a random pattern, surface leveling feels smoother and more controlled. You’ll notice the tool helps you blend rough spots into the rest of the work, which makes the finish look consistent. So whenever you want a cleaner result, you don’t need to fight the surface. You just guide the sander, let it do the work, and stay confident.
Best Surfaces for a Random Orbital Sander
When a surface is flat enough and built to handle a steady sanding pattern, a random orbital sander can make fast, clean work of it.
You’ll get the best results on wood surfaces such as cabinets, shelves, trim, and furniture panels, where the material is compatible and the tool can move without digging in.
It also works well on some metal, plastic, and composite parts when you choose the right pad.
- Flat boards help the pad glide evenly.
- Curved edges need a light touch, not force.
- Good material compatibility keeps the finish clean.
When you match the surface to the tool, you work with more confidence and less stress. That’s why this sander fits shared shop work so well.
How to Sand Wood Before Finishing
Before you finish wood, you need to sand it so the surface feels even and the coating can grip well.
Start with a coarser grit to level rough spots, then move to finer grits so you don’t leave scratches behind.
This grit progression helps you achieve a smoother finish without making the wood work harder than necessary.
Surface Preparation
Sanding wood well is what turns a rough board into a surface that feels smooth, looks clean, and holds a finish the way it should. When you focus on surface preparation, you help the wood accept stain, paint, or sealant with less blotching and fewer surprises. Start with careful tool setup so the pad sits flat and the sander feels steady in your hands. Then keep dust control in mind, because a clean surface helps you see flaws and stay connected to the work.
- Let the sander glide, not press.
- Move with the grain whenever you can.
- Wipe away dust before coating.
That simple rhythm helps you prepare trim, furniture, and cabinets with confidence. You aren’t just sanding. You’re making the next step easier for your whole project.
Grit Progression
Once you have shaped the wood and removed the rough marks, grit progression helps turn a good surface into one that’s truly ready for finish.
Start with a coarser disc, then move through a sequence of grit changes that removes the scratches left by the previous step. That steady progression matters because each pass should make the wood look calmer, not busier.
For most projects, careful abrasive grade selection works well, begin just rough enough to level the surface, then move finer to refine it. Don’t jump too quickly, or old scratches may remain hidden until stain makes them obvious.
As you work, keep the sander moving with light pressure. You’ll create a smoother, more even surface that feels clean, consistent, and ready for the rest of the piece.
How to Remove Old Paint, Varnish, and Stain
Whenever you need to strip away old paint, varnish, or stain, a random orbital sander can save you a lot of time and effort. Keep the pad moving, and let the tool do the hard work while you guide it gently across the surface.
For safer results, follow these paint stripping techniques and keep finish removal safety in mind.
- Work in open air or with strong dust control.
- Hold the sander flat so you don’t dig into the wood.
- Stop often to check your progress and protect the details.
You will feel more in control, and your project starts to look like it belongs in the room again.
On furniture, trim, or cabinets, this method helps you remove tired layers and make room for a fresh, clean finish.
How to Choose the Right Sandpaper Grit
Choosing the right sandpaper grit can make the difference between a smooth, easy project and one that feels like a battle with the wood. Start with coarse grit selection, such as 60 or 80, when you need to flatten rough spots or strip old finish.
Then move to 120 or 150 for general smoothing. Finish with 180 or 220 when you want a softer touch before coating.
You’ll save time when your grit matches the job, and your sander will feel more controlled. Also, check abrasive compatibility so the paper works well with your random orbital sander and the surface you’re treating.
If you rush to a fine grit too soon, you can leave marks behind. When you choose well, you fit right into the rhythm of the work.
Random Orbital Sander Tips for a Smoother Finish
For a smoother finish, you need more than a good sander. You need a light touch, steady movement, and a setup that lets you work with confidence. Keep the pad flat and let the tool glide instead of digging in. Use dust extraction so grit doesn’t scratch your work or slow your progress.
- Start with clean abrasive sheets.
- Move in slow, overlapping passes.
- Use only gentle pad pressure.
When you stay relaxed, you help the sander do its job and keep the surface even. When the piece feels tricky, breathe, reset your grip, and keep going. You aren’t chasing perfection alone. You’re building a finish that looks calm, clean, and truly yours.
Common Random Orbital Sander Mistakes to Avoid
One of the easiest mistakes to make is pressing too hard, because it may feel like more force should mean faster sanding, but it often does the opposite. You can scar the surface, wear out the disc, and leave uneven marks that show up later. Keep your sanding pressure control light and steady, and let the tool do the work.
Next, don’t stay in one spot too long, or you might create dips that are hard to fix. Also, check your dust collection setup before you start and avoid dusty work, because trapped debris can scratch your piece. Finally, use the right grit for the job, and replace worn pads promptly.
As you avoid these common slips, you’ll work cleaner, feel more confident, and get results that fit right into a well-made shop.
Frequently Asked Questions
Can a Random Orbital Sander Be Used on Metal Surfaces?
Yes, you can use a random orbital sander on metal surfaces with the right abrasive disc. It can help remove rust, prepare paint, polish metal, and smooth welds and edges for a cleaner finish.
Is It Suitable for Sanding Fiberglass and Plastic?
Yes, you can use it for fiberglass and plastic with the right abrasive. It gives smoother fiberglass finishing and better plastic smoothing, especially on rough edges, repairs, and prep work, while avoiding excessive pressure or deep scratches.
How Do I Prevent Sanding Through Thin Veneer?
You can prevent sanding through thin veneer by using fine grit sanding, keeping the sander moving, checking often, and stopping sooner than you think. For finish protection, hand sand the edges gently.
Can It Help With Headlight Restoration Projects?
Yes, you can use it for headlight restoration, and it will also help with headlight polishing. You can remove oxidation, refine the lens, and improve clarity, leaving your headlights cleaner, brighter, and ready to shine again.
Does It Work Well for Removing Rust and Corrosion?
Yes, it can be used for rust and corrosion, especially with the right abrasive. It helps with rust removal basics and corrosion cleanup methods, and it is well suited for shop use.


