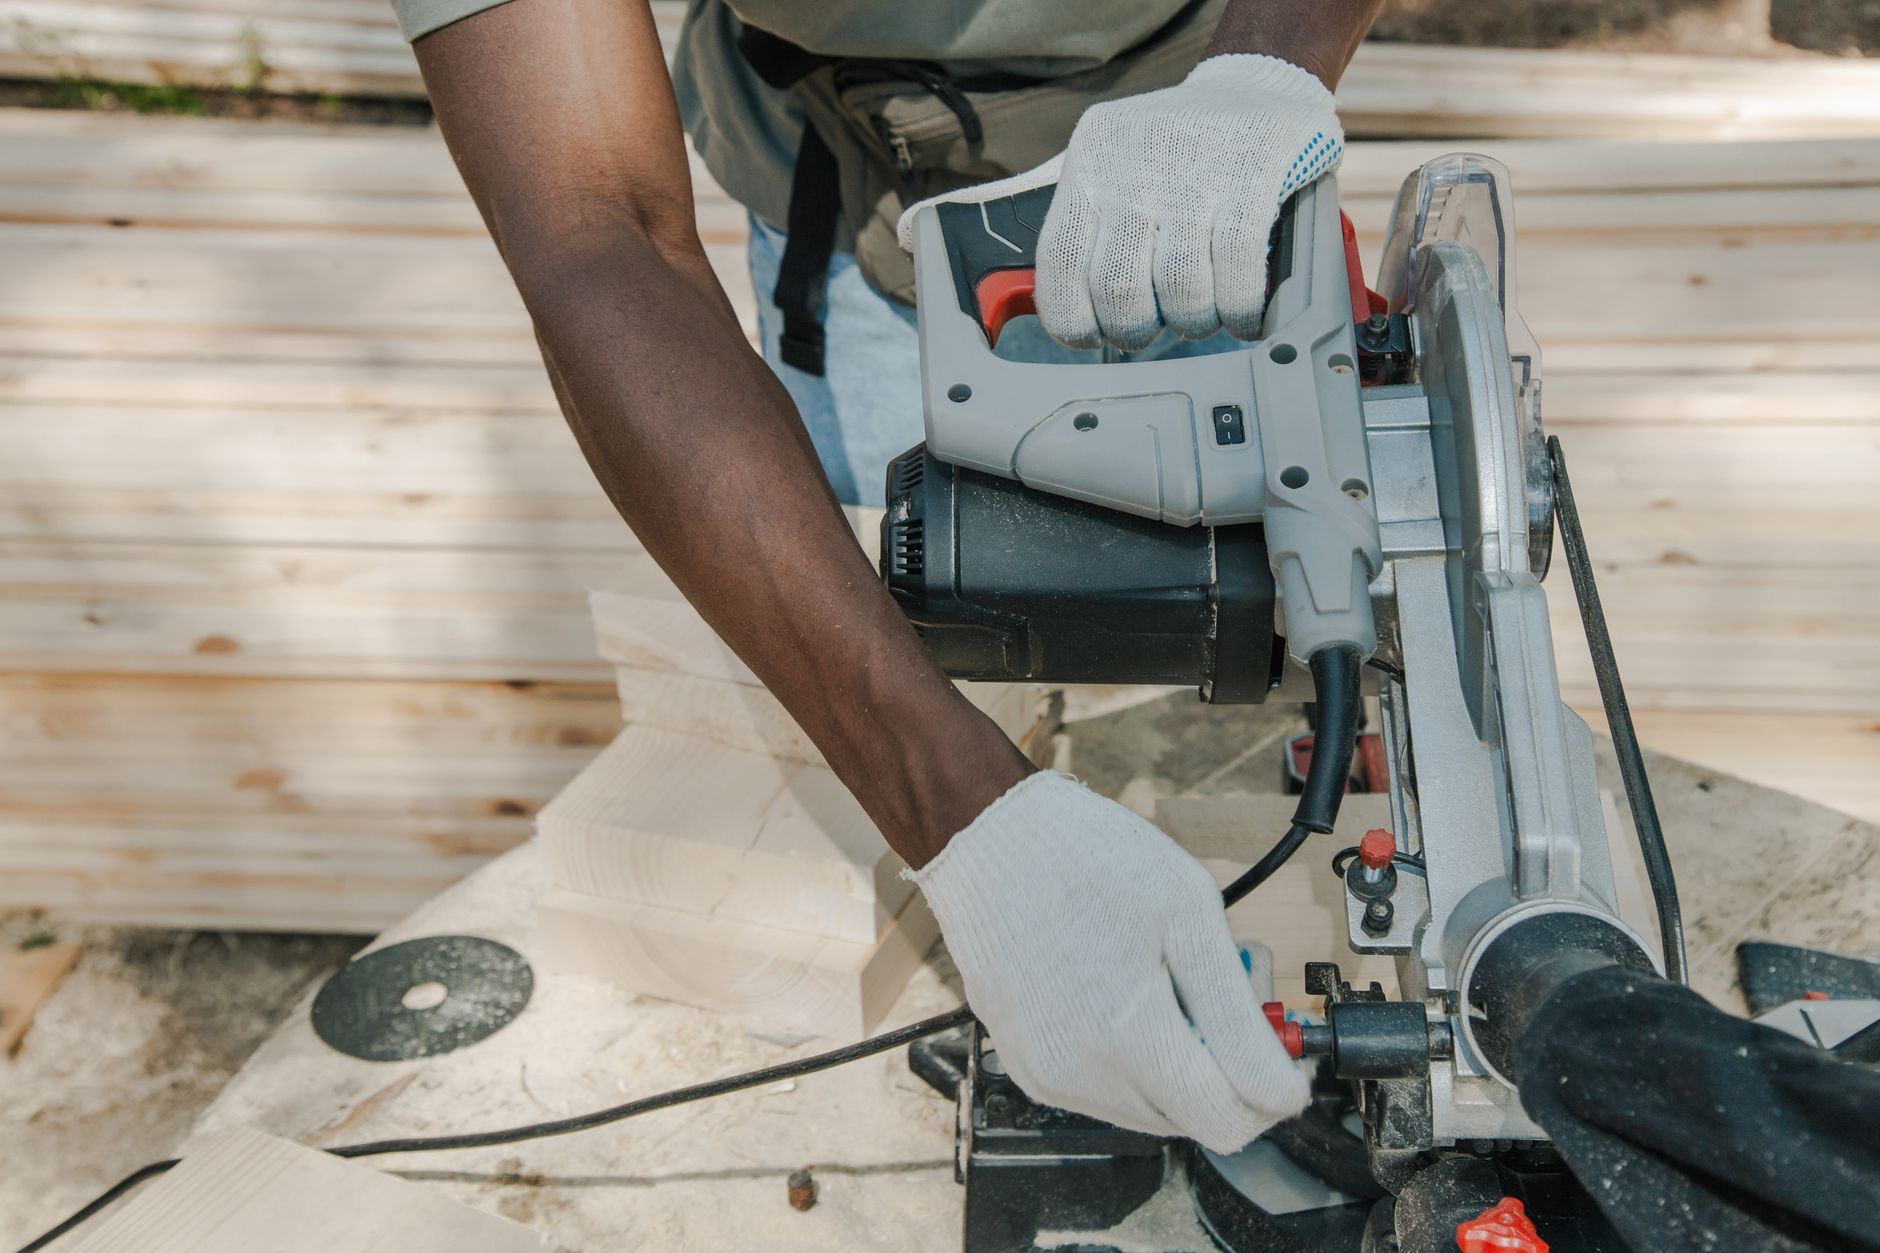

A clean cut starts with matching the saw blade to the material, setting the blade depth just past the stock, and keeping the blade guard free to move. With a clamped workpiece and steady feed, you get a clean cut instead of a wandering one.
You will learn the setup, straight-cut control, and troubleshooting steps that matter for wood, plywood, and sheet goods. This is for a beginner who wants safer cuts and fewer mistakes on the first few projects.
Choose The Right Saw And Blade First
A circular saw cuts cleanly only when the blade matches the material and the guard moves without sticking. A sidewinder places the motor beside the blade, so it usually feels lighter and easier to guide on simple home projects than a worm-drive saw.
Blade choice changes the result more than most new users expect. A coarse framing blade tears wood faster, while a finer-tooth blade leaves a cleaner edge in plywood and sheet goods, so the same tool can feel rough on one cut and tidy on the next.
Match The Blade To The Material
Wood, plywood, and sheet goods each need a different tooth pattern. More teeth leave a smoother edge, while fewer teeth clear chips faster, so the blade shape should match the job instead of forcing one setup to do everything.
- Rough lumber uses a framing blade that clears chips quickly and keeps feed pressure lower.
- Plywood needs a finer blade that leaves less tearout on the face veneer.
- Sheet goods do well with a blade made for clean crosscuts or rip cuts, depending on the cut direction.
- Laminated panels benefit from a sharp blade with stable tooth geometry, which helps keep the edge tidy.
Inspect The Blade And Guard Before The Saw Starts
Spin the saw blade by hand with the tool unplugged or the battery removed, then look for pitch buildup, resin, chips, or missing teeth. A dirty blade heats faster and drags more, which can leave burn marks and rougher edges on the workpiece.
The blade guard should spring back smoothly every time. A guard that hangs up can leave the blade exposed at the wrong moment, and that makes the saw feel twitchy before the cut even begins.
Blade direction matters more than many beginners expect. The teeth should point forward at the bottom of the saw’s rotation path, and the arrow on the blade face should match the tool’s rotation mark.
That setup work pays off as soon as the saw meets the board, and the next step is just as important: give the workpiece a stable place to sit.
A steady surface does more than support the board; it keeps the cut from shifting before it starts.
Set Up The Workpiece For A Stable Cut
A marked board that can move under the saw invites mistakes. Secure support matters because the blade keeps pulling while the kerf opens, and any shift near the end of the cut can pinch the blade or drag the line off course.
Eye protection and hearing protection belong on before the tool comes anywhere near the cut line. Circular saws are loud enough to leave your ears ringing after a short session, and flying chips from plywood can bounce into your face at floor level.
Mark The Cut Line Clearly
Use a tape measure and a sharp pencil or marking knife to draw the line in one clean pass. A wide, fuzzy mark leaves room for guesswork, and guesswork is where crooked cuts start.
- Measure once to the finished dimension you need.
- Mark the waste side so you know which side gets removed.
- Extend the line across the face where the saw shoe can stay aligned.
- Check both ends of longer cuts so the saw does not drift at the start or finish.
Support The Board Or Sheet From Below
Saw horses, a stable bench, or a rigid foam board under sheet goods keeps the material flat while the blade passes through. The key is support on both sides of the cut so the kerf does not close as the cutoff drops away.
Clamps add another layer of control. Clamp the piece so it cannot slide, then support the offcut so it hangs level until the blade clears the last inch; that small habit keeps the blade from binding right at the finish.
Keep Your Body Out Of The Blade Path
Stand slightly to one side of the saw, not directly behind it. That stance gives your arms room to guide the tool while keeping your torso away from the line of kickback if the blade grabs a knot or a twisted board.
Your hands should stay on the handles and away from the cut path. The saw shoe does the tracking, and your body position gives that shoe a stable lane to travel in.
Once the board is supported and marked, the saw itself needs one more adjustment: the blade should only stick out far enough to clear the material.
With the stock secured and the line visible, the blade setting becomes the last safeguard against unnecessary drag.
Dial In Blade Depth And Bevel Before You Cut
A shallow depth setting gives you more control because less blade is exposed below the material. Set the teeth to extend just beyond the thickness of the board, since a blade buried far deeper than needed adds drag and increases the chance of hitting whatever sits below the workpiece.
Bevel settings only matter on angled cuts, but the lock still needs a quick check before the motor starts. The shoe should sit flat on the material from the moment the saw moves, or the blade can skid and chew the edge before it bites cleanly.
Deeper depth is not safer. More exposed blade means more drag, more contact area, and less margin for control, especially on thin plywood or narrow strips.
Set The Depth Just Past The Material
Place the saw beside the board and lower the blade until the lowest tooth sits just below the bottom face. That setting usually leaves enough clearance for a complete cut without hanging a long section of tooth under the work.
On thin trim or narrow sheet goods, a shallow setting feels calmer and leaves a cleaner path. On thicker lumber, the same rule still applies, because the blade only needs enough reach to clear the stock, not an extra half inch.
Lock The Bevel Only For Angled Cuts
Most straight cuts use a 0 degree bevel. Turn the bevel adjustment only when the plan calls for a chamfer, then lock it hard so the shoe does not drift midway through the pass.
Tool brands like BLACK+DECKER, Craftsman, and DEWALT all use similar setup logic even though the control shapes differ. A BLACK+DECKER BDECS300C, a Craftsman CMES510, or a DEWALT DWE575SB still needs the same basic checks: depth, guard movement, and a flat shoe.
After the settings are locked, the first seconds of the cut decide whether the saw tracks smoothly or pulls off line.
Those first inches matter most, because a confident start sets the saw’s path for the rest of the cut.
Start Cleanly And Follow The Line With Control
The saw should be running before the teeth touch wood. That simple habit lets the blade reach full speed, which reduces snagging at the entry point and gives you a smoother start right on the cut line.
Feed pressure matters just as much as speed. Push too hard and the motor bogs down; move too slowly and the blade can burn the edge, especially in dense hardwood or resin-rich plywood.
Set The Shoe Before The Blade Touches
Rest the base plate on the material with the blade just off the edge of the mark. That setup gives the saw a stable launch point, and the cut begins where the blade already has room to spin.
Keep the shoe flat while the teeth enter the wood. A tipped base shifts the kerf, and the saw can wander before you notice the drift.
Feed At A Steady Pace
Let the motor work through the stock instead of forcing a push. The cleanest cut usually comes from a calm, even feed that matches the blade type and the density of the wood.
Here is the practical pattern: start the saw, bring it to speed, guide it along the line, and keep both hands steady until the blade clears the far edge. That rhythm is the backbone of how to use a circular saw without turning the cut into a fight.
Once the saw is tracking true, a guide can turn that steady motion into repeatable accuracy.
Use A Straightedge Or Speed Square For True Cuts
A guide turns a handheld saw into a repeatable straight-cut tool. Short crosscuts work well against a speed square, while longer rips need a clamped straightedge or guide rail so the shoe has a fixed path to follow.
Kreg guide systems and basic aluminum rails work for the same reason: they remove guesswork. The saw follows a physical edge, and your job becomes keeping pressure consistent rather than chasing the pencil line with your eyes.
Measure The Offset Before Clamping The Guide
Because the blade cuts away from the shoe edge, you need the offset between those two points before clamping anything in place. Measure once from the blade teeth to the saw base, then place the guide on the waste side by that exact amount.
That offset keeps the cut true. Without it, the saw may track beautifully and still remove the wrong slice of material.
Hold The Saw Against The Guide Without Twisting
Firm side pressure against the guide is good. Twisting is not, because it can bind the blade in the kerf and leave a rough, arced edge instead of a straight one.
Try a short crosscut on scrap before moving to the actual workpiece. A speed square gives you a fast check of stance, pressure, and alignment, and that practice cut reveals problems before they show up on the finished part.
That straightedge control also helps when the cut starts to fight back, because kickback and binding usually show up when the blade, the wood, and your feed rate stop working together.
Even a good guide cannot prevent trouble if the blade begins to pinch or the wood starts closing in.
Prevent Kickback, Binding, And Tearout In Practice
Kickback starts when the blade pinches, twists, or climbs out of the kerf. The physics are simple: the spinning teeth grab, the saw reacts in the opposite direction, and the tool can lurch toward you faster than your arms can correct it.
Binding and tearout are different problems, but they often travel together. A warped board closes on the blade, the motor strains, and rough fibers lift along the exit edge, especially in plywood with a thin face veneer.
Keep The Kerf Open
Support the workpiece on both sides of the cut so the wood does not sag into the blade. A narrow offcut can pinch just as the cut reaches the last inch, which is why a helper or a second support block matters on longer pieces.
Wet lumber, knots, and bowed stock deserve extra caution because internal stress can snap the cut closed. A steady setup and a shallow blade depth reduce the chance of the saw getting trapped midcut.
Choose The Right Blade And Feed Rate
A dull blade burns more than it cuts because the teeth scrape instead of slice. Fresh teeth shear fibers with less heat, which leaves less discoloration and less edge damage on pine, oak, and plywood.
Feed speed should match the material density. Soft pine accepts a faster pass, while dense hardwood and laminated sheet goods ask for a slower, calmer push that keeps the motor from laboring.
Place The Better Face Down On Sheet Goods
Circular saw teeth enter from the top and exit from the bottom, so tearout is often worse on the face where the blade leaves the material. Putting the better side down helps protect the visible surface on many plywood cuts.
That rule is the opposite of a table saw setup, where the blade rises through the stock. The difference matters because your saw’s direction of cut decides where the cleanest edge should face.
| Cut Situation | Best Setup | Why It Works |
|---|---|---|
| Short crosscut | Speed square | It gives a fast, square fence for the shoe to ride against. |
| Long rip cut | Clamped straightedge or guide rail | It keeps the saw on a fixed path over the full length of the cut. |
| Plywood face cut | Better face down | It keeps the cleaner exit edge on the visible side. |
| Thin offcut | Extra support block | It stops the waste piece from pinching the blade at the end. |
Even a careful cut can leave a clue, and the finish tells you whether the setup worked or needs one more adjustment.
A clean edge often reveals whether the cut was controlled, and small flaws are easier to correct right away.
Finish The Cut Cleanly And Fix Beginner Mistakes
Keep the trigger engaged until the blade clears the far edge, then release and wait for the blade to stop completely. Setting the saw down while the teeth are still spinning can mar the surface, catch clothing, or pull the tool sideways.
Small errors leave clues. A wandering line, a burned edge, or a rough exit usually points to a setup problem, not bad luck, which means the next cut can improve fast once you know what to change.
Stop The Saw The Right Way
Lift only after the blade comes to a full stop. That habit protects the work surface and keeps the guard from slamming into the wood while the blade is still coasting.
Once the cut is done, unplug the cord or remove the battery before adjustments or cleanup. The tool should be quiet and still before you inspect the blade or move to the next board.
Read The Error And Correct The Next Pass
- Wandering cut means the shoe lost contact, the guide shifted, or the blade dulled.
- Burn marks point to slow feed, packed teeth, or a blade that needs cleaning.
- Splintered edges usually come from a dull blade, weak support, or the wrong face orientation.
- Binding near the end means the offcut sagged and squeezed the kerf shut.
- Rough start often comes from starting the blade against the wood instead of at full speed.
These clues matter because the saw gives you a visible record of what happened in the cut. A clean second pass often comes from one adjustment: a sharper blade, a shallower depth, or a better support point under the workpiece.
After use, brush off dust, check the teeth, and store the saw with the guard protected. That small cleanup keeps the next cut smoother and makes the tool easier to trust the next time you pick it up.
That final cleanup leaves the saw ready for another pass and wraps the process on a safer note.
Final Thoughts
The cleanest cut comes from control before contact. A sharp blade, a shallow depth setting, solid support, and a flat shoe matter more than arm strength, and those setup details are what separate a tidy cut from a nervous one.
FAQ
How do you use a circular saw step by step?
Mark the line, clamp the workpiece, set the blade depth just past the material, and wear safety glasses and hearing protection. Start the saw before the blade touches wood, feed it steadily, then release the trigger and wait for full stop before setting it down.
Can a beginner use a circular saw?
Yes, a beginner can use one safely with a sharp blade, solid support, and a simple straightedge or speed square. The tool feels far less intimidating once you keep the shoe flat, stand slightly off the cut line, and move at a steady pace.
How do you cut straight with a circular saw?
Use a speed square for short cuts and a clamped straightedge or guide rail for longer ones. Measure the saw’s offset from the blade to the shoe, place the guide on the waste side, and keep side pressure steady without twisting the tool.
Why can’t I cut straight with my circular saw?
Wandering cuts usually come from a dull blade, a shoe that lifts off the material, a shifting guide, or a stance that pulls the tool off line. A bowed board or an unsupported offcut can also close the kerf and steer the blade.
What safety gear should I wear when using a circular saw?
Wear safety glasses and hearing protection every time you use the tool. Gloves can help during handling and cleanup, but they should never interfere with grip, trigger control, or blade clearance.
How deep should the blade be set when cutting?
Set the blade so the teeth extend just past the thickness of the material, usually only a small amount below the bottom face. That keeps drag lower, reduces exposure below the workpiece, and gives you better control on thin plywood and thicker lumber alike.