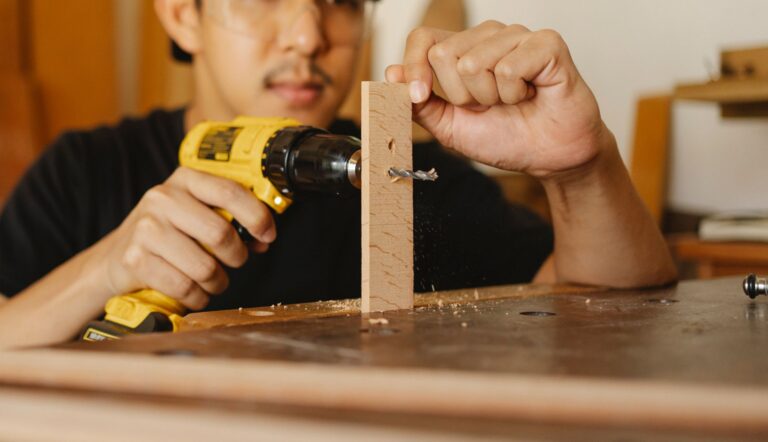
With a stepped bit and an angled clamp, this setup drills concealed holes that leave the screw hidden inside the wood joint. You get faster assembly, tighter pull-up, and a cleaner look than face screws, especially on cabinets, face frames, and small shop builds.
This walkthrough covers jig choice, board thickness, drill depth, screw length, clamping, and the fixes that keep pocket holes clean for beginner woodworking joinery.
What Pocket-Hole Joinery Does Well
Inside a recessed hole, the screw draws two boards tightly together, which is why the joint holds so well. That gives you a fast, hidden fastener with enough clamp force for face frames, cabinet boxes, drawer parts, furniture aprons, and shop fixtures.
The method shines when you want solid results without complex cutting. A pocket hole jig controls the angle, so your drill bit follows the same path each time and the screw lands where it can pull straight instead of wandering.
Hidden Fasteners With Simple Setup
Angle-guided drilling keeps the hole consistent, which matters because the screw head needs a clean seat inside the pocket. A crooked entry can turn into a shallow recess, a rough wall, or a screw that pulls the joint off line.
You can use a butt joint with pocket screws when speed matters more than show joinery. The clamp, drill bit, and pocket hole depth chart do the setup work that would otherwise take more layout time.
Common Project Uses
- Face frames: Pocket screws pull rails and stiles tight without visible fasteners on the front.
- Cabinet boxes: The joint works well for square carcasses where speed matters more than show joinery.
- Furniture aprons: Short stretchers and rails benefit from the screw’s angled pull.
- Shop builds: Jigs, stands, and storage units gain strength with quick assembly.
That range is why a pocket hole jig guide belongs at the start of the project, not after the cut list is done. Once you know what the joint does well, you can choose a pocket hole jig that fits the work and the amount of repetition ahead.
That usefulness only matters when the jig matches the scale of the job and the amount of repeat drilling ahead.
Choosing A Jig That Fits The Project
A small jig works for a few boards, while a more adjustable model helps when you drill the same thickness over and over. Your choice depends on how often you drill, how much control you want, and how much clamping support your parts need.
Basic jigs are fine for shelf brackets, small repairs, and one-off shop parts. Midrange and adjustable models earn their place on cabinet runs, face frame work, and repeat cuts because they hold the stock more steadily and make pocket hole jig setup less fussy.
Basic Jigs For Occasional Work
| Jig Type | Setup Control | Best Fit |
|---|---|---|
| Basic guide block | Low | Small repairs and light shop projects |
| Midrange clamp-on jig | Medium | Face frames and small cabinets |
| Adjustable multi-hole jig | High | Repeat work, mixed stock, and longer runs |
Guide quality matters more than flashy extras. A stiff sleeve keeps the drill bit from wandering, and a solid clamp point matters because movement at the start of the hole turns into a crooked pocket by the time the bit exits the workpiece.
Choose the jig for the jobs you actually cut. A simple block can be enough for a small shelf, but a more stable system saves time once you start drilling the same thickness over and over.
A small shelf can get by with a simple block, while heavier repetition rewards a steadier setup.
Setting Thickness, Depth, And The Stop Collar
Board thickness sets the whole system. A 3/4-inch board needs a different drill depth than a 1-1/2-inch board, and the stop collar keeps the bit from boring past the useful pocket shape.
Measure the actual stock with a ruler or caliper before you set the jig. Dimensional lumber can arrive undersized, so a 1x board may not measure exactly 3/4 inch, and a 2x board may not measure exactly 1-1/2 inches after milling.
Quick Depth Chart For Common Lumber Sizes
| Nominal Lumber | Actual Thickness | Practical Setup |
|---|---|---|
| 1x stock | About 3/4 inch | Shallow pocket setting and short screw length |
| 1-1/2 inch stock | About 1-1/2 inch | Standard pocket setting for 2x material |
| 2×4 lumber | About 1-1/2 inch by 3-1/2 inch | Use the face thickness, then match screw length to 1-1/2 inch stock |
The stop collar creates the depth stop on the drill bit, and that little collar does more than protect the board. It keeps the bit from punching through the face, which helps the screw seat cleanly and leaves enough wood around the pocket for strength. A pocket hole depth chart gives you a quick reference when the stock thickness changes.
Why The Stop Collar Matters
Overdrilling leaves a weak shoulder around the hole and can shorten the bearing surface for the screw head. Underdrilling leaves the screw head sitting too high, which stops the joint from pulling tight and can leave the pieces proud of each other.
- Measure thickness: Match the setting to the actual board, not the name on the lumber rack.
- Set the bit stop: Lock the collar so the same depth repeats on every hole.
- Check the test hole: A scrap cut shows whether the pocket shape fits the screw head.
- Use consistent stock: Mixed thickness in one assembly forces separate setups.
That setup work pays off only after the board stays fixed during drilling, which brings the job to clamping and hole placement. The same drilling method also answers how to drill pocket holes in 2×4 stock without tearing out the face.
Accurate setup carries straight into drilling, where clamping and alignment decide whether the holes stay clean.
Clamping, Alignment, And Clean Drilling
Pocket holes belong on the edge or underside of a workpiece, where the recess stays out of sight and the screw can pull across the joint line. On a face frame, that means the back side of the rail or stile. On a cabinet box, that often means the inside face of the part.
Stable clamping keeps the guide from shifting as the bit enters the wood. A board that creeps even a little can produce a hole that exits off angle, which weakens the pull and makes screw heads sit unevenly in the pocket.
Hold The Workpiece Tight
Clamp pressure should resist both sideways movement and lift. The bit produces torque as it cuts, and that torque can lift light stock unless the board is trapped against the jig or the bench.
For 2×4 lumber, clamp the face that will receive the pocket so the board cannot rock. That matters because wide stock magnifies small angle errors, and the screw path must stay inside the thicker face to avoid breakout on the opposite side.
Drill Steady And Clear Chips
Feed the bit in a steady motion rather than forcing it. Pocket-hole cutters remove a lot of wood at the point where the angle changes, and chip buildup can make the bit rub instead of cut, which leaves a rough pocket wall.
Back the bit out once or twice on deep stock. Chip clearing keeps the flutes cutting and helps the pocket stay smoother at the bottom.
Clean drilling sets the stage for the screw choice, because a hole that looks right still fails if the fastener length or head shape does not match the material. When you choose pocket hole screws correctly, the joint pulls together instead of crushing fibers.
Good drilling still depends on the fastener choice, since the right screw lets the joint tighten without damage.
Screw Length, Glue, And The Joint That Holds
Pocket hole screws are not generic wood screws. They use a washer-style head that seats against the pocket wall, plus a self-tapping tip that bites into the mating piece without a separate pilot hole.
Screw length should match both the board thickness and the joint type. A short screw in 3/4-inch stock may pull the joint tight, while an overly long screw can punch through the opposite face or split the receiving part.
Match Screw Length To Thickness
- 3/4-inch stock: Use the short pocket screw made for thin material.
- 1-1/2 inch stock: Use the standard pocket screw for 2x material.
- Mismatched stock: Check both boards before choosing length, not just the thickest piece.
- Softwood joints: A finer thread can bite cleanly without crushing the fibers.
Glue helps in some joints and stays optional in others. On cabinet parts or face frames, glue across the mating face can stiffen the connection, but it also reduces adjustability, so dry fit the pieces before committing.
Where Glue Helps Most
On the flat faces of a butt joint, a thin glue line adds the most strength when pocket screws pull the pieces together. The screw supplies the clamp force, and the glue fills minor surface irregularities so the joint behaves like one broader piece after cure.
On parts that may need later disassembly, skip the glue and rely on the screw pull alone. That choice matters in shop fixtures and jigs, where serviceability can matter more than raw stiffness.
Once the screw size and glue choice are settled, the last barrier is avoiding the mistakes that leave the joint ugly or weak. A pocket hole jig guide only works as well as your setup and inspection.
Even a well-made joint can fail at the edges, which is why mistakes and limits deserve a closer look.
Troubleshooting Errors And Knowing The Limits
A pocket hole can fail in five familiar ways: the bit goes too deep, the board shifts, the parts land out of line, the wood splits, or the screw length misses the mark. Each problem points back to setup, not luck.
A 2×4 setup is the clearest place to spot those errors. The face thickness is forgiving, but the wide stock makes angle drift easy to see, so a bad stop collar setting or loose clamp shows up fast.
Common Mistakes And Fast Fixes
- Overdrilling: Reset the stop collar and test on scrap before drilling the part.
- Poor clamping: Trap the board tighter so the jig cannot creep under cutting force.
- Misalignment: Flush the faces before driving the screw, then check the clamp position.
- Split wood: Move the hole farther from the end or switch to a coarser thread.
- Wrong screw length: Recheck board thickness and use the matched pocket screw.
A short assembly check avoids most of the mess. Confirm thickness, collar position, clamp pressure, screw length, and hole location before the first screw goes in. That five-point check catches the mistakes that send a joint off line.
When Another Joint Makes More Sense
Pocket holes are a practical choice for hidden fasteners and quick assembly, but they are not the right answer for every project. A tabletop edge, a high-visibility miter, or a joint that faces heavy racking load may need dowels, biscuits, mortise-and-tenon joinery, or another stronger layout.
The reason is simple physics. A pocket screw pulls along one line, so it resists separation well, but it does not distribute load like a larger interlocking joint. That is why pocket hole joinery shines in carcasses and frames, then gives way to other methods on show surfaces and stressed connections.
Those strengths make it ideal for hidden structure, but they also define where another method should take over.
Final Thoughts
The cleanest pocket holes come from matching three things: board thickness, drill depth, and screw length. Get those aligned, clamp the work firmly, and the jig stops feeling fussy. It becomes a repeatable system that gives you cleaner joints, faster assembly, and fewer surprise splits.
Visible holes still need finishing, and that step matters on face frames, cabinet sides, and furniture aprons. Pocket-hole plugs can hide the recess, and a light sanding or flush trimming blends the patch so the repair disappears under finish.
FAQ
What is a pocket hole jig used for?
It guides a drill bit at an angle so you can drive screws through one board into another without exposing the fastener heads. That makes it useful for face frames, cabinets, and small furniture parts.
How do you set the depth on a pocket hole jig?
Measure the actual board thickness, then set the jig and drill stop collar to match that thickness. A scrap hole tells you quickly whether the bit reaches the right pocket depth before you drill the real part.
What size pocket hole screws should I use?
Use the screw length matched to the board thickness, not a general wood screw from the bin. Thin 3/4-inch stock needs a shorter screw, while 1-1/2 inch stock needs the standard length made for 2x material.
How do you drill pocket holes in a 2×4?
Clamp the 2×4 so it cannot rock, set the jig for about 1-1/2 inch material thickness, and drill with steady pressure. A test hole in scrap helps you confirm the stop collar setting before you drill the workpiece.
What are the most common pocket hole mistakes?
Overdrilling, poor clamping, bad alignment, split wood, and the wrong screw length cause most failures. A short setup check before driving the screw solves most of them.
Do you really need a pocket hole jig?
You need one if you want hidden fasteners and quick assembly without complex joinery tools. For exposed show joints or heavy structural work, another method can make more sense.