
Removing old finish, smoothing scratches, and preparing wood for primer, paint, stain, or a clear coat are the main steps in this process. To do it well, you match the grit, tool, and pressure to the surface so you clean the wood without cutting through veneer or rounding edges.
This guide covers the practical choices that make refinishing a table, dresser, or chair go smoothly, from picking abrasives and tools to setting up the room for a clean prep job.
Start With The Finish Before You Choose Sandpaper
Surface condition decides almost everything about the job. A thick varnish on a kitchen chair needs a different start than a stable oil finish on a walnut side table, because each coating reacts differently to abrasion.
Full sanding fits deep scratches, heavy build, and uneven repairs. Light scuff-sanding fits sound paint or clear coat when you only need tooth for primer, while brittle veneer, decorative laminate, or a piece with good wear may need little more than cleaning and a very light pass.
Wear a dust mask before the first pass. Fine dust from drawer fronts, aprons, and edge profiles hangs in still air and settles on nearby shelves fast.
Shellac softens with alcohol, lacquer can re-dissolve, and polyurethane behaves like a hard plastic film. That matters because a gummy finish loads sandpaper grit quickly, while a powdery finish responds better to lighter pressure and cleaner paper changes. Once you know the coating, the tool choice becomes far simpler.
That same surface check also helps you decide how to sand furniture before painting or staining, because the finish goal changes the level of prep. Next, match the tool to the shape in front of you.
The tool matters less than how well it matches the contours you need to prep.
Match The Tool To The Surface You Have
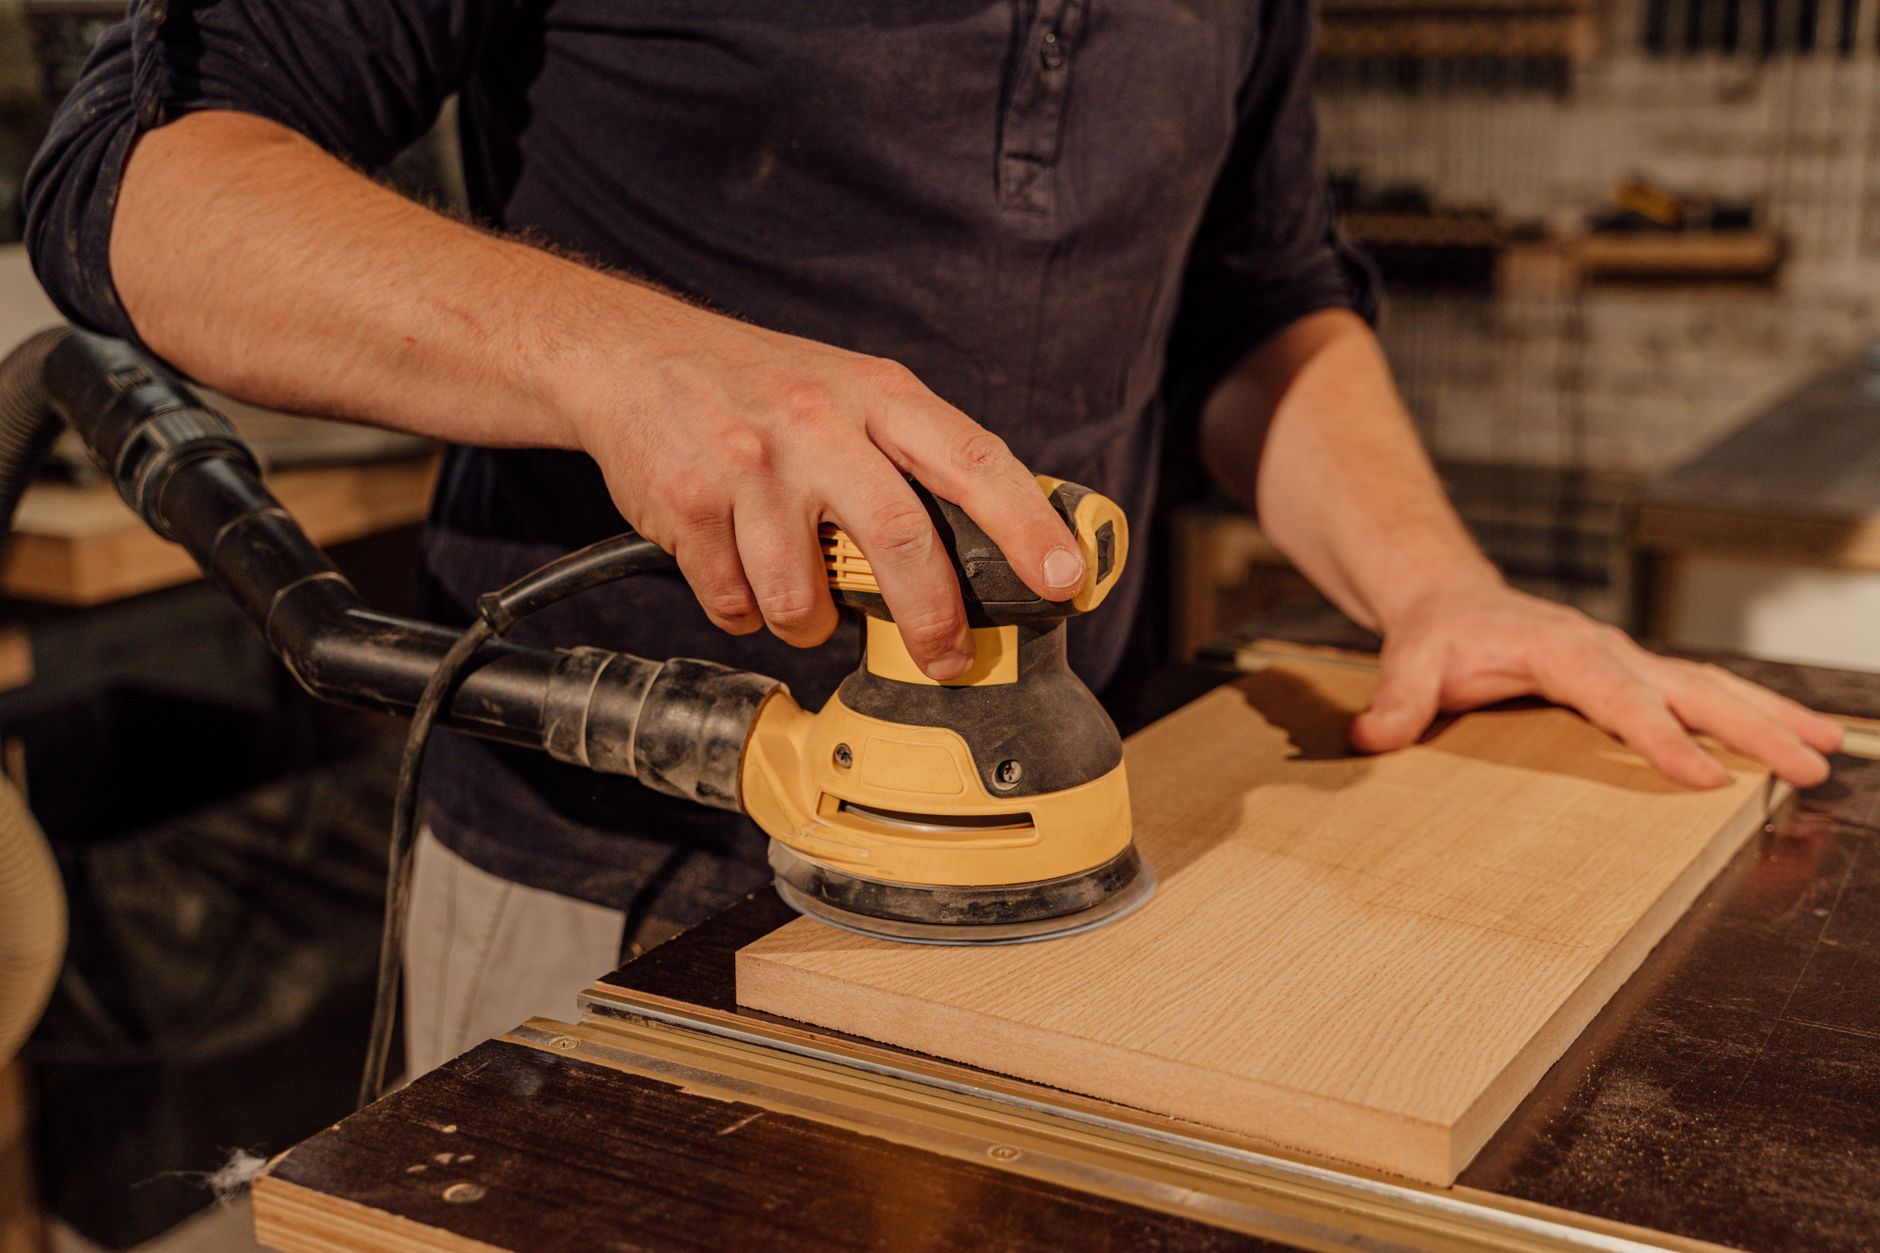
Flat faces reward speed, while curves punish it. An orbital sander works well on tabletops, cabinet doors, and wide aprons because it removes material evenly without leaving obvious straight scratches.
| Surface | Best Tool | Why It Fits |
|---|---|---|
| Wide flat panels | Orbital sander | It covers large areas fast and blends scratch patterns. |
| Edges and trim | Sanding block or folded paper | It keeps pressure even and protects sharp lines. |
| Curved rails | Sanding sponge | It flexes around the shape without digging in. |
| Turned legs and grooves | Small hand tools | It reaches tight spots that a machine cannot touch cleanly. |
Hand sanding still matters even when a machine is nearby. A sanding block keeps your pressure flat on edges, while a foam pad follows gentle curves on a spindle chair or routed drawer pull. For carved details, smaller strips of paper and detail sponges keep you from flattening the profile.
An electric sander saves time on plain pine, maple, oak, and other wood furniture with broad faces. Hand sanding gives you better control on veneer and thin edges, where one careless orbital pass can burn through the outer layer. That tradeoff matters even more once you set the grit path.
With the tool chosen, you can build a grit plan that fits the condition instead of fighting the piece. The next section shows a practical progression you can follow.
With the surface mapped out, the challenge becomes stepping through grits without creating new scratches.
Build A Grit Progression That Fits The Job
The starting point comes from the surface in front of you. A rough rescue job may need 80 or 100 grit to cut old finish, while a sound piece that only needs paint prep often starts at 120 or 150 grit and skips the heavy cut.
| Project Condition | Start Grit | Next Steps | Best Finish Goal |
|---|---|---|---|
| Thick old coating or scratches | 80 or 100 | 120, then 150 or 180 | Repair or full refinish |
| Paint prep on sound surface | 120 or 150 | 180 if needed | Primer and paint |
| Stain prep on bare wood | 120 | 150, then 180 or 220 | Even stain absorption |
| Final smooth pass | 180 or 220 | Stop there | Topcoat ready |
Move through the sequence in steps instead of jumping straight from coarse to very fine paper. Each grit removes the scratches left by the last one, and skipping a step leaves marks that show under stain or a glossy finish. In wood fibers, deeper scratches hold more pigment and read darker after color goes on.
- Use coarse grit sparingly. Save 80 or 100 grit for damage, heavy varnish, or uneven patches.
- Step upward gradually. 120, 150, 180, and 220 each erase the prior scratch pattern.
- Match the finish goal. Paint prep can stop earlier than stain prep on bare wood.
- Stop before burnishing. Overworking 220 grit can polish the grain so stain grabs unevenly.
That last point trips up beginners more than any other. A polished patch on maple can resist stain and leave a pale spot, while the same area on oak may show darker lines in the pores. Once the grit path is set, the workspace has to be ready for the dust that follows.
That preparation keeps the room cleaner and helps you judge the surface honestly. Next, set up the area so the first pass cuts evenly and the cleanup stays manageable.
That sequence works best when the bench is clear and the dust has somewhere to go.
Lay Out The Workspace Before The First Pass
A steady surface keeps the piece from skating while the sander vibrates. A workbench, padded sawhorses, or a flat drop cloth over sturdy blocks gives you control, and that control keeps an edge from rounding off.
Open a window, run a box fan out of the room, and vacuum the floor before you start. Dust clings to baseboards, cabinet fronts, and fresh finish coats, so a clean area saves you from sanding twice.
Indoor sanding gets messy fast because fine particles ride air currents and settle on nearby trim. Mask off drawers you do not want to fill with dust, keep a vacuum hose close to the work, and wipe the bench between grit changes so loose grit does not scratch the next pass.
Set out your paper, sanding block, orbital sander, and vacuum before you touch the furniture. That small setup step keeps you from crossing the room with dusty hands and losing momentum halfway through a panel, which is usually when uneven pressure starts.
That preparation pays off as soon as the first pass starts cutting evenly. From there, the way you move across the wood matters as much as the setup.
Once the space is ready, steady movement determines whether the sanding stays consistent.
Use Even Pressure And Follow The Wood Grain
A moving sander leaves a flatter surface than one held in place. Let the pad glide in overlapping passes and lift it only after the machine stops spinning, because a stopped pad on one spot can carve a shallow dish into soft wood.
Keep The Motion Constant
The pad should stay in motion before it touches the panel and after it leaves it. On wide faces, overlap each pass by about one-third of the pad width so the scratch pattern blends instead of forming stripes.
Work With The Grain By Hand
Scratches disappear much better when hand sanding follows the direction of the wood grain instead of crossing it. The grain direction acts like a guide, and a sanding block or folded sheet keeps your hand from wandering across soft earlywood and harder latewood at different speeds.
Light from a lamp at a low angle shows what your fingers miss. Run a hand across the surface after each grit, and stop on any spot that still feels rough, sticky, or ridged. A common beginner mistake is chasing one dull patch so hard that the rest of the panel becomes too thin; a better move is to blend the rough spot into the surrounding field and move on.
How to sand furniture well comes down to control, not force. An orbital sander can still leave swirl marks if you lean on it, while a gentle hand pass can erase those marks before they spread into the finish.
The trickiest areas are still ahead, and they need a slower touch. Corners, grooves, and curves can look crisp or ruined after only a few strokes.
Those sweeping motions still need restraint where the profile tightens and the grain turns.
Handle Corners, Grooves, And Curves With Care
Turned legs, bead trim, and routed grooves need separate attention because flat pads cannot reach them cleanly. Folded sandpaper, narrow sanding sponges, and small detail blocks let you follow the profile without flattening the design.
Protect Veneer And Sharp Edges
Veneer often measures less than 1 millimeter thick, so a heavy hand can cut through the face layer and expose the substrate beneath. Keep your strokes short on edges, and stop before the corner gets hot from friction.
Blend Detail Work Into The Flats
Detail sanding should fade into the surrounding surface instead of ending in a hard line. Feather the edge of each repaired area with the next finer grit so the profile and the flat panel read as one continuous finish.
Carved furniture can look torn up if you chase every shadow with the same abrasive. A wooden spoon, a dental pick wrapped in paper, or a narrow flexible pad reaches into grooves without slicing across the ridge, and that matters on vintage chair backs, rope trim, and drawer pulls. One careless stroke on a veneered side rail can do more damage than ten slow hand passes can fix.
Saltwood, mahogany, oak, and pine all respond a little differently because density changes how fast the abrasive cuts. Harder wood resists a bit more, softer wood gives up faster, and that difference is why you keep checking depth by eye and by touch instead of trusting the stopwatch.
Once the shape is right, the final cleanup decides how the new coating will sit. A clean surface also tells you whether the sanding is truly done.
When the profile looks right, dust removal becomes the final test before any finish goes on.
Clean The Piece Thoroughly Before Finish Coat Prep
Dust left in a pore or seam turns into gritty bumps under primer, stain, or topcoat. Vacuum between every grit change, then wipe the piece so loose particles do not ride along into the next pass and scratch the surface you just smoothed.
- Vacuum seams. Use a brush attachment on joints, bead trim, and drawer corners.
- Wipe the panels. A microfiber cloth picks up fine dust that the vacuum misses.
- Check the light. A low lamp shows swirl marks, scratches, and dull patches fast.
- Inspect by touch. Your hand catches ridges that your eyes can skip over.
- Clear residue. Remove dust from hinges, inside edges, and carved recesses before finish work.
Mineral spirits can help on oil-based residue, but let the wood dry fully before primer or stain goes on. For paint prep, a clean surface helps primer bond evenly; for stain, dust in the grain can sit like gray lint and darken the wrong areas. The final check is simple: no grit, no shiny patches, no torn fibers, and no sanding dust in corners.
A swirled patch or a pale stripe means the sanding sequence needs one more fine pass, not a bigger machine. That last inspection saves you from sealing in a flaw that becomes more visible after the finish darkens the wood. The finish choice changes how careful the last pass should be.
That final inspection also tells you whether the surface is ready for paint, stain, or a clear coat. The right finish asks for a slightly different ending, which is where the next section helps.
Different coatings reward different stopping points, which is why grit choice matters here.
Choose The Final Grit By Finish Type
Paint hides color better than it hides texture, so paint prep still needs a smooth surface. A flat primer coat can show every scratch under angled light, which is why 180 grit on a stable piece often gives a better painted result than pushing to a mirror-like 320 grit.
| Finish Goal | Final Grit | Surface Feel | Reason It Matters |
|---|---|---|---|
| Paint | 150 to 180 | Even, lightly keyed | Primer sticks well without telegraphing deep scratches |
| Stain | 180 to 220 | Smooth but open-grained | Stain absorption stays more even across the board |
| Clear topcoat | 180 to 220 | Flat and clean | The finish stays clear without grain fuzz or haze |
Stain prep asks for cleaner work because scratches fill with pigment and show through the color. A 120 grit scratch on cherry can look like a dark pencil line after wiping on stain, while the same mark under paint may disappear. That is the main reason paint and stain prep do not follow the same stopping point.
How to sand furniture for staining takes more patience at the end, not more force at the start. Finish with a fine-grit sanding pass, inspect under raking light, and stop only after the whole piece feels even from edge to edge. That final pass is where a plain project starts looking careful.
Different finishes reward different stopping points, but the process stays the same: match the grit to the goal and leave the surface clean. The last section pulls that plan into a simple rule you can use on the next piece.
From there, a quick rule makes the decision easier on the next project.
Use A Simple Decision Tree For The Next Piece
The right sanding choice comes from three facts: the current finish, the surface shape, and the finish you want to apply next. That order keeps you from sanding harder than the job demands.
- Start with no sanding. If the finish is sound, clean, and only mildly dull, a wash and light scuff may be enough.
- Use light scuff-sanding. Stable paint or clear coat that needs tooth for primer usually needs 120 to 180 grit only.
- Use full sanding. Heavy damage, failed finish, or uneven patch repairs call for coarse-grit sanding first, then a gradual climb.
- Protect thin surfaces. Veneer, laminate, and sharp edges need a lighter touch or hand sanding instead of aggressive machine work.
How to sand furniture for beginners gets easier when you treat every piece as a decision instead of a race. A chair with chipped varnish, a laminate shelf with a stable coating, and a pine table with bare spots do not need the same sequence, and the difference shows in the final coat.
The fastest path is usually the safest one only when the surface already supports it. If the wood is thin, fragile, or badly worn, slower hand sanding protects the shape and keeps the repair cleaner. That balance is what turns sanding from guesswork into repeatable prep.
That simple check keeps future sanding cleaner, faster, and far less guesswork-driven.
Wrap Up
The cleanest result comes from matching the sanding plan to the piece, not from chasing the highest grit or the fastest machine. Start with the finish you already have, use the right tool for the shape, and stop before the wood loses its character. That rhythm gives you a smooth base for paint, stain, or a clear coat.
FAQ
What grit sandpaper should you use to sand furniture?
Most pieces start at 120 or 150 grit, then move to 180 or 220 for the final pass. Coarser paper belongs on damaged wood, heavy varnish, or deep scratches that need real removal.
What kind of sander is best for furniture?
An orbital sander is best for flat panels because it saves time and keeps the scratch pattern even. Hand tools work better on edges, curves, veneer, and carved details where control matters more than speed.
Do you always have to sand furniture before painting or staining?
No, you do not always need full sanding. Sound old paint or a stable clear coat may only need a light scuff-sand for primer, while stain on bare wood usually needs a more careful progression.
How do you sand furniture without ruining the wood?
Use the lowest grit that does the job, keep the tool moving, and follow the grain by hand on finish areas that show easily. Veneer, edges, and carved details need lighter pressure and shorter strokes so you do not cut through the surface.
How hard is it to sand furniture for a beginner?
It is manageable if you work in sections and check your progress often. Most beginners do best starting with a sanding block on edges and an orbital sander on flat areas, then finishing by hand with finer paper.
How do you sand furniture step by step?
Check the finish condition, choose the right tool, start with the correct grit, move through finer grits in order, and clean the piece before primer, stain, or topcoat. Each step removes the scratches from the one before it, so the final surface stays even.