
A dull chain can be restored by resetting the cutting edges and depth gauges so it bites cleanly again. To sharpen a dull chain, you match the round file, top plate angle, and raker height to the cutter so the saw makes chips instead of dust.
This guide covers the angles, files, and setup steps that help anyone bringing a tired chainsaw back to clean, fast cutting, from first signs of dullness to careful depth-gauge adjustment.
Recognizing A Chain That Has Gone Dull
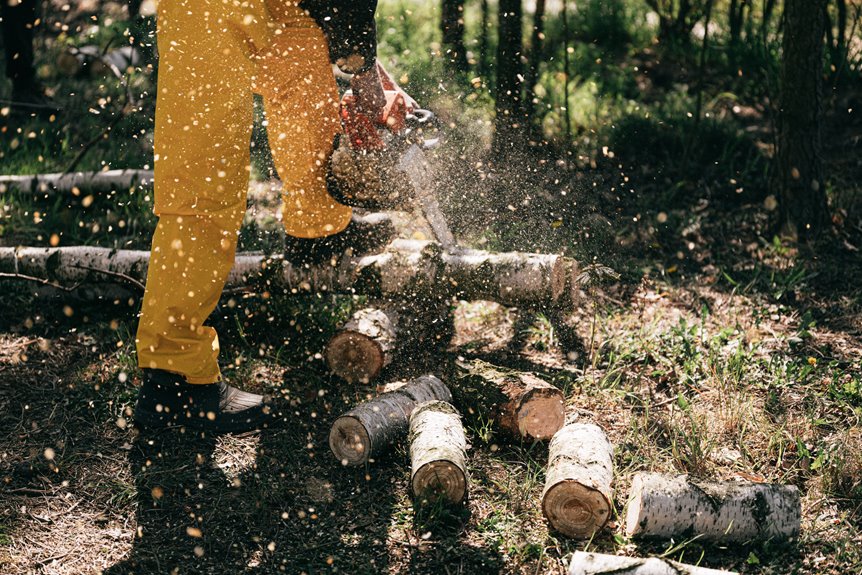
Fresh chips still mean the cutters are slicing cleanly, while powder and heat show that friction has taken over. You can spot the difference fast by watching the first few cuts, because dull cutters force the saw to work harder and pull unevenly.
- Dust instead of chips means the tooth edge is rounding over and scraping wood.
- Extra pressure tells you the chain is no longer feeding itself into the cut.
- Drifting cuts point to uneven cutter lengths or uneven filing angles.
- Smoke or heat show friction is climbing faster than cutting speed.
- Rough feed often means the depth gauges sit too high for the current cutter length.
A bent cutter, a missing tooth, or a chain that has stretched past normal adjustment changes the fix. Sharpening can restore edge geometry, but it cannot straighten damaged steel or recover metal that is already gone.
Stop the cut before the saw starts forcing itself through the wood. Extra pressure often pushes you toward the wrong fix, because the chain may be uneven rather than simply dull.
That diagnosis decides your next step, because not every dull-looking loop should get the same treatment. Chainsaw chain sharpening starts with the cutter condition, then moves to pitch, gauge, and file selection so you do not waste metal on the wrong edge.
That edge only works when the chain’s measurements are right, especially pitch, gauge, file size, and angle.
Matching Pitch, Gauge, File Size, And Sharpening Angle
A round file that fits the cutter profile removes metal cleanly, while the wrong size leaves a rounded edge or an undersized gullet. Chain pitch and chain gauge identify the family, and those numbers tell you which file guide and file diameter belong on the bench.
| Chain pitch | Common round file size | Typical use |
|---|---|---|
| 1/4 inch | 3/16 inch | Light-duty saws, small pruning cuts |
| .325 inch | 3/16 inch or 13/64 inch | General property and firewood work |
| 3/8 inch low profile | 5/32 inch | Many homeowner saws |
| 3/8 inch | 7/32 inch | Mid-size and larger saws |
| .404 inch | 7/32 inch or larger | Heavy cutting, professional setups |
The top plate angle usually lands near 30 degrees for many crosscut chains and near 35 degrees for some specialty styles, so the chain maker’s chart matters more than a guess. Husqvarna, STIHL, and Oregon all publish chain-specific filing data because tooth geometry changes bite, chip size, and pull across the cut.
The side plate angle shapes how the cutter clears chips after the top plate slices the wood. A steeper angle can cut faster in soft wood, but it also shortens edge life, which is why a chainsaw sharpening angle chart helps you match the chain to the job instead of forcing one setting onto every loop.
Use the numbers stamped on the drive links or the box the chain came in before you buy any file guide. Pitch and gauge sound close, but the wrong match can ruin the cutting edge in one pass.
Stihl’s 2-in-1 file holder matters because it keeps the round file and depth gauge work tied together in one motion. That matters for you because the cutter edge and raker height work as a pair, not as separate chores, and the next step is setting the saw up so the file stays steady.
With the numbers sorted, a steady setup keeps the file tracking cleanly through each tooth.
Setting Up The Saw For Clean, Stable Filing
A loose bar turns sharpening into guesswork. Lock the saw in a bar vise or bar clamp, then set chain tension so the cutters sit snugly against the bar but still move by hand with gloved fingers.
- Clamp the bar so the saw does not shift mid-stroke.
- Set chain tension to remove slack without binding the loop.
- Brush away debris so sap and grit do not score the file.
- Wear eye protection because metal filings and grit fly off the tooth.
- Gather tools such as a round file, file gauge, flat file, marker, and filing jig.
Clean cutters file more evenly than sticky ones. Sap behaves like glue, and grit acts like sandpaper, so both shorten file life and can tilt the stroke enough to change the tooth angle before you notice it.
Manual chainsaw file sharpening goes smoother with a marker line on the top plate. The dark line gives you a visual stop point, which helps keep every pass the same length and keeps the cutter edge from drifting longer on one side of the chain.
Once the saw is stable, the next job is matching each cutter to the same length so the chain pulls straight.
A stable saw makes consistency possible, which is what keeps every cutter aligned in length.
Filing Each Cutter To The Same Length
The shortest damaged tooth should set the reference length, because chasing a longer cutter down to that size takes more metal than the rest of the chain can safely lose. Once the shortest cutter is known, every other cutter gets matched to it so the saw pulls evenly through wood.
Match The Shortest Cutter First
A chain cuts like a row of teeth, not a single blade, and one long cutter can steer the saw off line. Start with the side that shows the most wear, then file the rest of that side to the same visible length before turning the saw and doing the opposite side.
Use smooth strokes that move away from the cutting edge, not back and forth like a hacksaw. The file should sit at the tooth’s angle and rise just enough to cut the top plate cleanly without rubbing the side plates flat.
Keep Stroke Pressure Even
Too much force makes the file chatter and leave a rough edge. Light, repeatable strokes remove metal more predictably, and that matters because each cutter needs the same amount of work for the chain to stay balanced.
STIHL, Oregon, and Husqvarna all ground their chain families around repeatable cutter geometry, which is why small filing errors show up fast in the cut. A chain with uneven tooth length usually pulls toward the longer cutters, and the bar starts drifting before the chain feels truly sharp.
Work one side fully, then rotate the saw and mirror the process on the other side. Alternating side to side after every tooth invites imbalance and makes the cut wander under load.
Use A File Guide For Repeatability
A file guide keeps the round file at the same top plate angle from one cutter to the next. That matters because a few degrees of tilt can change how the tooth enters the grain, and that changes chip shape right away.
In practice, the best result comes from steady motion, matching angles, and patience on each cutter. A chain that leaves the bench with equal teeth on both sides feels smoother, cuts straighter, and stays easier to maintain on the next pass, which leads straight into the depth gauges.
When both sides match, the depth gauges become the last adjustment before the chain bites properly.
Lowering The Depth Gauges Without Overdoing It
Rakers control how deep each cutter bites, so a freshly sharpened tooth can still cut poorly if the depth gauge sits too high. After several sharpenings, the cutters get shorter, and the gauges need to come down in small steps to keep the chip size in range.
- Check after sharpening because tooth length changes the relationship to the gauge.
- Use a flat file to lower only the metal that stands above the guide.
- Follow the chain spec since different chains use different depth settings.
- Round the leading edge so the gauge does not grab or chatter.
- Recheck all rakers after every few sharpenings to keep feed even.
Remove only enough metal to bring the depth gauge back to the chain’s intended feed. A gauge set too low makes the saw lunge and chatter, while a gauge set too high leaves you pushing the saw through the cut with far too much effort.
The physics here are simple: the cutting tooth slices the wood fiber, and the depth gauge controls how thick the chip can be. Set the raker too high and the edge never bites deeply; set it too low and the tooth bites too hard, which loads the motor, shakes the bar, and shortens chain life.
Depth gauge work matters most on older chains, because the teeth lose height long before the loop is worn out. That balancing act is one reason professional shops can rescue a chain that feels slow to a novice, yet a chain with structural damage still calls for a different choice.
With the rakers set correctly, you can choose the best sharpening method for the amount of steel that still needs to come off.
Once those limits are set, the remaining choice is how aggressively to remove metal from the chain.
Choosing Between Hand Filing, Electric Sharpeners, And Square-Ground Work
Hand filing stays the most portable option because you can touch up a chain at the stump, on the tailgate, or in the garage with very little gear. An electric chainsaw sharpener speeds through heavily used loops, but it removes metal faster, so setup and angle control need more care.
| Method | Best use | Trade-off |
|---|---|---|
| Manual round file | Routine touch-ups, field work, light correction | Slower, but most forgiving |
| Electric sharpener | Busy users, badly dulled loops, shop use | Faster metal removal needs careful setup |
| Square-ground filing | Specialized chains and advanced users | Faster cutting edge, far less margin for error |
| Rotary tool | Tight spots or small corrective work | Easy to tilt and overcut a tooth |
Square-ground filing gives a crisp corner that some cutters prefer for speed, but it asks for exact hand control. A rotary tool such as a Dremel or a drill attachment can work for a quick touch-up, yet the wheel can overheat the tooth or round the edge faster than a round file.
The right choice depends on how much steel needs to come off and how steady your setup is. Ace Hardware and local sharpening shops often handle routine touch-ups for a modest fee, which can make sense for a heavily used chain, but a loop with broken or warped teeth needs inspection before any machine work begins.
Use an electric sharpener only after the chain is cleaned and checked tooth by tooth. The wheel removes material fast, so a damaged cutter can disappear before you notice the problem.
For most home saws, a round file remains the most practical option because it teaches you what the chain is doing as you work. That matters more than speed, because a chain that cuts straight and throws chips again has already paid you back in time and fuel.
Because performance matters more than pace, the real question becomes when the chain needs attention again.
Knowing When To Sharpen Again, Repair, Or Replace
Fine dust, extra bar pressure, and a saw that starts to drift are the signals to sharpen again. Waiting until the chain smokes or the wood burns only creates more heat and more wear, and both shorten the life of the bar and the cutters.
Chainsaw chain sharpening cost depends on location and the amount of work needed. Many hardware stores and local shops charge a modest service fee for a simple touch-up, while repair work on bent, damaged, or badly uneven chains costs more because more labor and metal removal are involved.
Sharpen Again At The First Drift
The best time to touch up a chain is before it turns into a maintenance job. A saw that starts making powder instead of chips can often be restored with a short filing session, and that small habit protects the chain from unnecessary wear.
Repair Only When The Steel Still Has Life
A chain with one slightly damaged cutter can often be saved by matching the rest of the teeth to that shorter reference. A chain with cracked cutters, stretched links, or cutters worn so short that the working edge is nearly gone no longer has enough steel left to justify more filing.
Replace When Metal Loss Becomes The Real Problem
Replacement makes more sense than repair when sharpening would shorten chain life more than it would help. A chain that has lost too much cutter length, has missing teeth, or has uneven wear that filing cannot level should come off the saw rather than stay on it.
A practical example helps. A homeowner cutting dry oak might get several sharpenings from one chain before the depth gauges need attention, while a storm clean-up saw that clips dirt and nails may need replacement sooner because the cutters lose shape faster than normal filing can recover.
That sharpen-versus-replace choice is the last piece of chainsaw chain sharpening, and it saves more money than chasing a tired loop for one more cut. A sharp, even chain pays you back in cleaner cuts, less strain, and a saw that feels easier every time you pull the cord or squeeze the throttle.
That ongoing payoff is what makes the finishing advice worth keeping in mind.
Final Thoughts
A chain that throws chips, cuts straight, and feeds itself is doing its job. Once dust, drift, or heat show up, the fix starts with the right file size, the right angle, and equal tooth length, then ends with the depth gauges and a hard look at whether the steel still has enough life left.
FAQ
How do you know when a chainsaw chain needs sharpening?
Fine dust instead of chips, extra pressure at the bar, and a cut that drifts to one side are the most reliable signs. Heat, smoke, and a dull-looking cutting tooth confirm that the chain has lost bite and needs attention.
Should a chainsaw chain be sharpened at 30 or 35 degrees?
Both angles appear on common chains, but the chain maker’s spec decides the right one for your cutter style. Many crosscut chains use 30 degrees, while some designs call for 35 degrees, so a sharpening chart or the chain package should set the angle.
How much does it cost to get a chainsaw chain sharpened professionally?
Pricing varies by region and by the amount of work the chain needs. A simple touch-up at a hardware store or shop often stays modest, while damaged, uneven, or repaired chains cost more because the shop has to remove more metal and inspect more closely.
Can you sharpen a chainsaw chain with a file, Dremel, or drill?
A round file is the most forgiving manual tool and the best place to start. A Dremel or drill attachment can help in tight spots or light corrective work, but those tools remove metal fast and can tilt the tooth edge more easily.
When should you sharpen the depth gauges on a chainsaw chain?
Check the depth gauges after several sharpenings, since the cutters get shorter and the rakers sit higher by comparison. File them only enough to restore proper feed, then smooth the front edge so the chain does not grab or chatter.
Is it better to sharpen or replace a chainsaw chain?
Sharpening makes sense while the cutters still have usable length and no structural damage. Replace the chain when cutters are cracked, missing, badly uneven, or worn so short that more filing would do more harm than good.