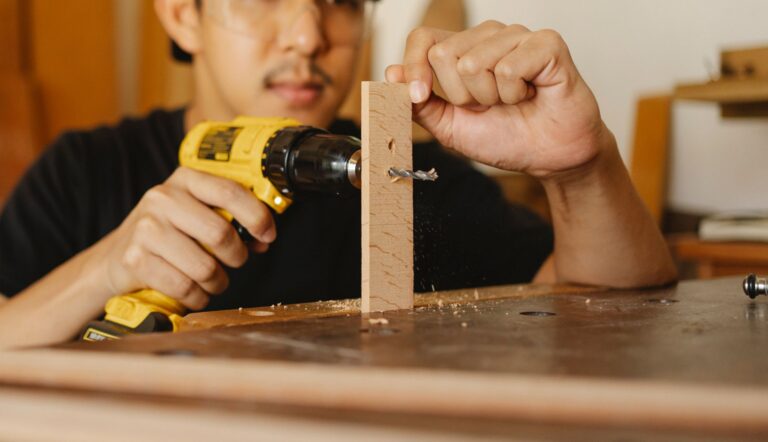
A sharp corner becomes a smooth curve with a roundover bit, sandpaper, or hand tools. The result is easier on your hands, safer on touch surfaces, and cleaner on furniture, shelves, trim, and picture frame edges.
This guide covers practical ways to shape crisp wood edges into refined profiles, helping DIYers and woodworkers choose tools, set up cuts, and handle tricky corners with confidence.
Start With The Right Edge Profile
A softer edge changes both feel and appearance before finish goes on. A light eased edge just removes the knife-sharp corner, a chamfer creates a flat angled face, and a true roundover gives a consistent radius that reads as a finished profile.
That choice affects comfort, style, and how much stock you remove. A chair arm or tabletop usually benefits from a fuller curve, while a utility shelf may only need a small ease so it does not catch skin, sleeves, or cords.
Pick The Shape That Fits The Job
- Light eased edge: Use this for hidden parts, quick cleanup, and paint-grade work where you only want to knock off the sharpness.
- Chamfer: Choose this when you want a crisp decorative line with less visual bulk than a curve.
- True roundover: Use this on touch points, visible furniture, and surfaces that should feel smooth in daily use.
- Styled profile: Add a bead or fillet only when the design calls for more detail than a simple softened corner.
Radius size matters before you make the first pass. A 1/8-inch radius barely changes the shape, while a 1/4-inch or 3/8-inch profile reads much more clearly on chair rail, shelf stock, or a picture frame.
On narrow parts, a large radius can swallow the edge and make the piece look thin. Mark the profile on scrap first so you can see whether the curve looks balanced before you touch the final board.
That kind of test matters most when you compare chamfer vs. roundover on the same project. The chamfer preserves more visual sharpness, while the roundover feels softer in the hand and hides small wear marks better over time.
That visual tradeoff becomes the real deciding factor when matching the cutter to the material and finish.
Choose The Tool That Fits The Job
A router with a roundover bit is the standard woodworking method because it cuts a repeatable profile fast and clean. A handheld router gives you reach on fixed pieces, while a table router helps when you need the same edge on a stack of parts.
Hand tools still earn their place. A block plane, file, or sanding block works well when the edge only needs softening, when the piece is small, or when a spinning cutter would feel risky near a corner or grain break.
Compare Router And Hand Methods
| Method | Best Use | Why It Matters |
|---|---|---|
| Handheld router | Single boards, tabletops, cabinet parts | Leaves a consistent radius with a bearing-guided bit. |
| Router table | Repeated parts, long runs, steady setups | The fence helps keep contact even across multiple pieces. |
| Block plane | Small easing jobs, delicate edges | Lets you shave the corner without a spinning cutter. |
| File or sandpaper | Plastic, metal, and touch-up work | Useful where deburring matters more than a perfect radius. |
Metal and plastic call for a different touch. A file removes burrs on aluminum or steel, and sandpaper removes mold lines or sharp flash on plastic without gouging the surface.
That same calm approach also helps when you need to round edges of wood without a router. A block plane takes off a controlled shaving, and a sanding block lets you sneak up on the final feel without risking a deep gouge.
WOOD Magazine often stresses matching the tool to the surface, and the logic is simple: the tool should match the material’s failure mode. Wood splinters, plastic gums up, and metal leaves a burr, so the edge treatment changes with the stock, not just the shape you want.
Because the stock behaves differently, the next step is dialing in the machine for a smooth first cut.
Set Up For A Clean First Pass
A clean edge starts before the cutter touches the board. Mark the face and edge, then test the bit on scrap that matches thickness and grain so you can see where the curve lands.
Bit radius and bearing contact need to match the look you want. A bearing-guided bit rides the existing edge, so the bearing must spin freely and stay in contact without digging into the work.
You get the best result from a handheld router or a table router when the setup matches the stock thickness. A bearing that is too loose, a bit that sits too high, or a fence set off by even 1/32 inch can leave a flat strip or a lopsided shoulder.
Check The Setup On Scrap
- Mark the target line: Use a pencil line to show where the curve should begin and end.
- Run a scrap sample: Match thickness, species, and grain so the result tells you something useful.
- Confirm bearing travel: Spin the bearing by hand so it rolls instead of rubbing.
- Set bit height: Raise or lower the bit until the profile lands where the edge needs it.
Tool height changes the visual result more than many beginners expect. A bit set too high can leave a lopsided shoulder, while a bit set too low may not reach the full roundover and leaves a flat strip on top.
That small adjustment decides whether the edge looks intentional or accidental. If the cut is for a stack of identical parts, lock the setting after the test piece so the last board matches the first.
Wear eye protection and keep both hands ready before the cut starts. A round-over bit removes wood fast, and the first contact can pull the router harder than a smooth face cut, especially on narrow stock or at a corner.
Even with setup complete, the cut itself demands steady movement and careful control at every contact point.
Cut The Curve With Control
The router should move against the bit rotation, not with it, so the cutter bites cleanly instead of running away. Take two light passes on harder species or wide stock; the bit leaves a cleaner wall and the tool stays calmer.
Flat boards are the easiest starting point, but small pieces and slanted wood surfaces need more support. A firm grip, a stable work surface, and a steady pace matter more than speed, because a rushed pass shows up as a wavy edge right away.
That same control matters when you use how to round edges of wood with a router as the main method. The cut should feel guided, not forced, and the sound should stay even instead of jumping as the bearing loses contact.
Use A Router Table For Repeated Parts
Repeated trim, frame parts, and cabinet rails work especially well on a router table. The fence keeps the cut consistent, and you can feed shorter parts with a push block so your hands stay away from the cutter.
That setup also helps when you use a round over bit on a router table for matching parts. Picture frame edges, for example, stay consistent only when the bearing, fence, and feed direction all agree on the same line.
You can also use a router table for short runs of trim where the handheld router feels awkward. The fence gives you a fixed reference, which helps when the stock is narrow or the profile must match across four or eight identical pieces.
Keep Feed Direction And Grain Direction In Sync
Wood grain direction controls how clean the cut looks. Routing into the grain on a face edge can lift fibers ahead of the bit, while routing with the grain often leaves a smoother surface and less cleanup.
WOODworking Stack Exchange threads tend to circle back to the same principle: the edge fails where fibers exit the cut. That is why climb-cutting on a tiny section can help on a tricky spot, but only with restraint and a firm grip, since the bit can grab hard.
Because the cut follows the fibers, end grain needs special care at corners and transitions. A light pass into the weak direction can keep the edge from chipping, and that matters most on species with open grain or brittle latewood.
Those weak spots make awkward pieces especially unforgiving, which is why setup shifts toward safer handling.
Handle Lumber, Corners, And Awkward Shapes
Common lumber sizes ask for different habits. A 2×4 is narrow enough that a big radius can overpower the shape, while a 4×4 post gives you more room but also more end grain to manage at the corners.
Start with scrap, not the final piece. That practice run tells you how the grain reacts, how much stock the bit removes, and whether the profile stays even through the length of the board.
These details matter most when you need to round the edges of a 2×4 without making it look overworked. The same caution helps on picture frame stock, where a heavy cut can throw off the mitered look even if the profile is clean.
Round A 2×4 With A Light Pass
Use a light cut on a 2×4 and ease the end grain carefully, since the fibers at the ends tend to split more readily than the long grain. A 1/8-inch or 1/4-inch radius usually keeps the piece looking normal instead of bulky.
A sanding block can finish the job if the profile only needs to feel softer. For small utility parts, that hand method is often enough and keeps you from removing more material than the board can spare.
Shape A 4×4 Post And Frame Stock Evenly
Round corners on a 4×4 post by checking the radius often as you work around the faces. Picture frame edges need the same care, because one corner cut too deep breaks the visual balance and makes the miter look off.
A 4×4 post also gives you room to use a fuller curve without the profile disappearing. That extra thickness helps, but the transition still has to stay even from face to face so the post does not look lopsided.
Adjust For Short Stock And Slanted Edges
Short pieces are awkward because the router base wants more support than the stock can give. A sacrificial backer board, bench hook, or router table fence keeps the work steadier and helps you keep the curve even across a short run.
Sloped surfaces need a lighter hand. The cutter should stay planted on the reference face, not tilt over the edge, or the radius shifts and leaves a flat spot on one side.
That small mistake is easy to spot once finish goes on, so slow down at corners and exits. A slanted part rewards careful setup more than extra pressure, especially when the surface is small and the bearing has little room to ride.
With the shape established, attention turns to smoothing flaws and avoiding the small mistakes that linger.
Sand, Refine, And Prevent Common Problems
Routing leaves a profile, not a final feel. Sandpaper removes faint tool marks, blends the start and stop points, and softens any tiny ridges left where the bearing met the stock.
Tear-out, chatter, and burn marks come from different causes. Tear-out follows grain direction that lifts, chatter comes from vibration or a loose grip, and burn marks show up when the cutter lingers or the bit rubs instead of cutting.
When you refine the edge by hand, the goal is to round over wood edges evenly without flattening the curve you already cut. A few strokes with 180-grit or 220-grit paper are usually enough to remove fuzz and make the shape feel continuous.
Fix The Common Surface Problems
- Tear-out: Take lighter passes and back up the end grain with scrap.
- Chatter: Slow the feed rate, tighten the setup, and support the work better.
- Burn marks: Clean the bit, reduce dwell time, and keep the cutter sharp.
- Rough feel: Finish with 180-grit or 220-grit sandpaper until the curve feels even.
A sharp cutter removes chips; a dull one rubs and heats the wood. That heat can darken resin-rich species like pine and leave a scorched line that sanding only hides for a moment, so bit condition matters as much as speed.
Finish the edge cleanly, then run a fingertip along the full length. A good roundover feels continuous, not lumpy, and that tactile check catches small defects faster than your eyes on a busy grain pattern.
That feel test leads naturally to the practical takeaway: a consistent edge is the real measure of success.
Bottom Line
The cleanest edge comes from matching the profile, tool, and stock before the cut starts. A light ease suits utility work, a chamfer gives a crisp look, and a true roundover suits surfaces your hands touch often.
Once the curve is cut and sanded, the piece feels finished instead of merely trimmed. For larger stock, that same planning helps you round corners on a 4×4 post without flattening the visual shape.
FAQ
How do you round over an edge?
Choose the radius you want, mark the workpiece, and cut with a round-over bit or a hand tool that fits the job. Light sanding removes the last tool marks and evens the feel along the full length.
What tool is used to round edges?
A router with a round-over bit is the standard tool for wood. A block plane, file, or sanding block works well for smaller jobs, and a file is the right choice for burrs on metal or plastic.
How do you round wood edges without a router?
Use a block plane for wood, then finish with a sanding block to soften the line. On small parts, a few careful strokes are often enough to create a modest eased edge without the setup time of a machine.
How do you round the edges of a 2×4?
Use a light pass with a small radius, then ease the end grain with extra care. A 2×4 has limited width, so a large curve can look oversized and remove more material than you want.
How do you round corners on a 4×4 post?
Work from scrap, keep the bit height consistent, and check the profile at each face. A 4×4 post gives you enough thickness for a fuller curve, but the corners still need even passes so the radius stays balanced.
How do you avoid tear-out and burn marks when routing edges?
Take lighter passes, feed against cutter rotation, and watch grain direction closely on end grain. Clean the bit often and keep it moving, because heat and friction are the usual reason burn marks appear.