Sharp blades, exposed cutters, drifting dust, loud machinery, and sudden kickback can turn a routine project into an urgent-care visit without basic shop habits and checks. To work safely, you use training, protective gear, machine checks, and clean habits before the blade ever touches wood.
This guide covers the shop habits that help a first-time cabinetmaker, weekend hobbyist, or class student stay focused, avoid mistakes, and move through a project with far less risk.
Training, Supervision, And Shop Authorization
A machine can look harmless until it starts moving at thousands of revolutions per minute. That is why woodworking safety training begins before power reaches the tool, with a real walk-through of the room, the machine, and the stop procedure.
Classroom, Home Shop, And Employee Rules Differ
Shop class safety rules usually require direct supervision, signed permission, and limited tool access until you show safe control. In a home shop, your own habits fill that same role, while an employee setting adds shop authorization, reporting steps, and lockout/tagout when maintenance or repair enters the picture.
OSHA woodshop safety guidance treats training as part of the job, not a side task. The National Institute for Occupational Safety and Health has long pointed to wood dust and machine injury as separate hazards, which means your setup needs both instruction and controls before cutting starts.
Learn the emergency shutoff, the tool-specific manual, and the reporting process before the workpiece leaves the bench. A slow start prevents the fast mistake.
Know The Shutoff And The Reporting Path
You need to know which switch kills power, which machine needs a cord pull, and where the breaker sits. You also need a clear path for reporting a loose guard, a dull blade, or a frayed cord, because a small defect becomes a bigger hazard once vibration and feed pressure start working on it.
Woodshop safety for students and woodshop safety for employees both depend on the same thing, a controlled space with clear responsibility. Once that base is set, the gear you wear matters just as much as the skill you bring.
When that training is in place, the next layer is the gear that protects your eyes, ears, lungs, and skin.
Orderly shops keep those safeguards effective, because a clear floor and reachable tools reduce mistakes.
Protective Gear And Clothing That Belong In The Shop
Eye injury is fast and brutal in a shop, and chips do not care whether you are ripping pine or sanding a maple edge. Eye protection belongs on your face any time you cut, sand, or route wood, because flying dust and splinters travel farther than most people expect.
Essential Gear For Cutting, Sanding, And Routing
Hearing protection belongs around loud power tools, especially table saws, miter saws, planers, and routers. Respiratory protection matters when dust collection is weak or the tool throws fine dust straight into the air, which is common with sanding and some handheld routing jobs.
Loose clothing, dangling jewelry, and untied hair create a snag point near rotating machinery. Gloves can be worse than bare hands near a spinning bit or blade, because fabric can pull your hand toward the cutter faster than you can react.
- Eye protection stays on for cutting, sanding, and routing.
- Hearing protection belongs near loud motors and blade noise.
- Respiratory protection helps when dust control cannot catch fine particles.
- Close-fit clothing keeps fabric out of the path of moving parts.
- Short cuffs and tied hair reduce snag risk around rotating machinery.
A shop apron can help keep loose fabric controlled while giving you a pocket for a pencil or tape. With the right clothing in place, the next risk is not what you wear, it is how you move around the machine.
That clothing only helps if the space around you stays orderly, because footing and reach control often decide whether a cut stays safe.
Even the best protection falls short when clutter blocks movement or throws balance off.
General Conduct That Keeps Injuries From Snowballing
A clean floor and a clear bench change the odds in your favor before the blade even turns. Chips, offcuts, and cords on the ground cause bad footing, and bad footing turns a normal cut into a body-position mistake.
Keep The Shop Dry And Uncluttered
Dry floors matter because sawdust and spilled finish can turn a step into a slip, and a slip near a running machine can send your hand into the wrong place. Stock should stay stacked, not scattered, so a board does not shift under your foot or snag against another project.
Stay on one task at a time. Reaching over a moving blade or cutter brings your sleeve, arm, or hand into the work zone, and even a brief glance away can be enough for a cut to wander or a board to twist.
Stand out of the kickback line on a table saw and feed from a balanced stance. A board that snaps back follows the same path as your body position.
Use Push Tools Before Your Hands Get Close
Push sticks, push blocks, and featherboards let the machine do the cutting while your hands stay outside the danger zone. That matters most near narrow stock, where grip pressure and blade proximity rise together.
Kickback is a force problem, not a mystery. The blade grabs, the wood twists, and the stored energy in the spinning teeth throws the stock back along the same straight line the blade already made, which is why stance and feed angle matter so much.
Once your stance and hand placement are under control, the next hazard moves into the air itself: dust and noise.
A steady stance helps, but fine particles and machine noise can still wear down concentration fast.
Dust, Noise, And Air Quality Matter More Than Most Beginners Think
Fine dust behaves like smoke. It hangs in the air, settles on surfaces, and gets pulled into your breathing zone long after the cut ends, which is why dust collection at the source does more than make cleanup easier.
Catch Dust At The Tool
Use dust collection wherever the machine allows it, then add respiratory protection when the room still looks hazy or the stock creates a lot of fine powder. Sanding, routing, and machine cutting can all send particles into the air that irritate your nose and lungs right away.
Wood dust is not one-size-fits-all. Coarse chips from a jointer or band saw drop fast, while finer sanding dust stays airborne much longer, so ventilation and a fitted mask belong in the same setup routine as the blade guard.
Treat Noise As A Daily Exposure
Noise damage builds with repeated exposure, and saws are loud enough to matter even in short sessions. Hearing protection is not just for extended jobs; it belongs on the bench whenever the tool noise rises above a normal conversation.
That habit pays off in shared shops, school labs, and garages with concrete walls that bounce sound back at you. Once air and noise are under control, the machine itself needs a close look before it starts.
With the room itself handled, you can catch mechanical problems before they turn a clean setup into a bad cut.
Once the air is under control, attention shifts to the equipment itself and the faults it can hide.
A Pre-Use Inspection Catches Problems Before They Become Accidents
A blade with missing teeth, a crooked fence, or a sticky switch is a warning that shows up before the cut. A fast inspection catches the problem while power is still off, which is the cheapest time to find it.
Check The Parts That Move And Guard The Cut
Inspect blades, bits, guards, fences, cords, switches, and stops before you power up any machine. Sharp, properly installed cutters make cleaner cuts and reduce binding, burning, and sudden movement, which is why dull edges are not just a finish problem.
Disconnect power before changing blades, bits, or making adjustments. On many machines, that means unplugging the cord or using lockout/tagout in a shared shop, because a switch can be bumped without warning during setup.
- Blade or bit condition should show sharp edges and no missing teeth.
- Guard position should cover the danger zone without binding.
- Fence alignment should track straight and lock firmly.
- Cord and switch should show no frays, cracks, or loose movement.
- Stops and settings should match the cut before power comes on.
Burning, chatter, and tight feed pressure often point to a blade or bit that needs attention. Fixing that before the cut saves the tool, the stock, and your fingers, which is the point of every woodshop safety checklist.
After the inspection, the next factor is how you hold the material and feed it through the machine.
That check matters most when material is being guided by hand, where small slips quickly become accidents.
Cutting Safely Depends On Feed, Support, And Hand Placement
A workpiece that is not held still can move faster than your hands can respond. Clamps, fences, and jigs remove that variable, and that is why secure material support belongs in every cut and drill operation.
Hold The Stock Before The Tool Starts
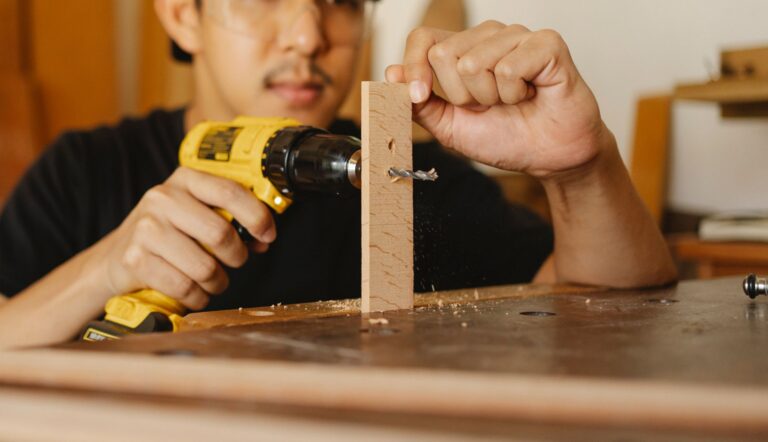
Clamp the board, lock the fence, or set the jig before the cutter spins. A drill press works best with the stock secured, and a saw works best when the fence or guide does the steering instead of your grip.
Keep your hands clear of the blade or cutter and feed at a controlled rate. A steady stance gives you balance, but the real control comes from letting the tool remove material at its own pace rather than forcing a cut with arm pressure.
Use The Right Aid At The Right Distance
Push sticks and push blocks matter when the stock gets close to the blade, and featherboards help keep a board tight to the fence or table. These aids protect your fingers and reduce wandering, which is why they belong in the drawer, not on a wish list.
A miter saw cut starts clean only when the board sits flat and your hands stay well away from the path of the spinning blade. That same idea carries into machine-specific habits, where each tool asks for its own discipline.
Different machines create different failure modes, so the safest setup changes with the tool in front of you.
A saw, drill, or sander each asks for a different approach, and habits must change with the tool.
Machine-Specific Discipline For Saws, Jointers, Drills, And Sanders
Different machines fail in different ways. A table saw can throw stock back, a jointer can grab uneven board edges, and a drill press can catch a loose workpiece, so the safe setup changes with the tool.
| Machine | Main Risk | Safe Habit |
|---|---|---|
| Table saw | Kickback and blade contact | Use the fence, stay out of the kickback line, and feed with push tools. |
| Band saw | Pinch points and blade drift | Keep hands away from the thin blade and guide the stock at a calm pace. |
| Jointer | Knife contact and sudden grab | Use push blocks and keep pressure on the infeed and outfeed tables, not over the cutter head. |
| Drill press | Spinning workpiece and bit grab | Clamp the stock and use the correct speed for the bit and wood. |
| Belt/disc sander | Heat, dust, and hand contact | Hold the work with control and keep pressure light so the abrasive does the work. |
The radial arm saw still shows up in some shops and school labs, and it demands the same respect as any high-risk machine because the carriage can pull the blade through stock in a hurry. A band saw is more forgiving than a table saw, but it still needs sharp, correctly installed blades and a calm feed rate.
Match the setup to the cut, the stock, and the tool rather than forcing a routine that only fits one machine. That discipline keeps a cut from turning into a repair job, which leads straight to cleanup and reporting.
After the cut is done, cleanup and reporting finish the job and help the next session start safely.
Those habits matter even after the blade stops, because debris, errors, and injuries still need attention.
Cleanup, Reporting, And First Aid Close The Safety Loop
A safe cut can still end badly if the shop stays messy after the machine stops. Return tools, sweep dust, and stack stock where the next person can move without tripping over an offcut or stepping into a cord.
Clean As Part Of The Work
Housekeeping belongs at the end of every task, not only at closing time. A dust pile near a motor fan can get sucked into the tool, and a cluttered bench slows the next setup enough to invite a mistake.
Report damaged guards, dull blades, frayed cords, and near-misses right away. In a shared shop or school setting, that report may keep another person from repeating the same setup with a damaged machine.
Keep a basic first aid kit where it is easy to reach and know the shop emergency steps before anything goes wrong. A clean reaction matters as much as a clean workbench.
Know The First Response Before An Incident
Basic first aid means pressure for bleeding, clean water for minor dust irritation, and immediate help for any deep cut or eye injury. A supervisor, shop manager, or trained coworker should know the next step, because speed matters more than debate once the injury has happened.
That final habit closes the loop on woodshop safety rules. You start with training, gear, and machine checks, then you end with cleanup, reporting, and a clear response plan so the next session begins in better shape.
That sequence leaves the shop safer, and it gives each new session a cleaner starting point.
Bottom Line
The safest shop is not the quietest or the biggest, it is the one where every cut starts with a check, every machine has a purpose, and every hand stays out of the line of danger. Woodshop safety rules work best as habits, not slogans, because habits still hold when the project gets rushed.
FAQ
What are the 10 safety rules in a wood workshop?
Wear eye and hearing protection, keep hair and clothing secured, use dust control, inspect tools, disconnect power before adjustments, clamp stock, use push tools, stand clear of kickback, keep the shop clean, and report damaged equipment right away.
What are the safety precautions for woodworkers?
Use training, proper PPE, and machine-specific setup before any cut starts. You also need good footing, sharp cutters, dust collection, and clear reporting for defects or near-misses.
What PPE should be worn in a woodshop?
Eye protection is the baseline for cutting, sanding, and routing. Add hearing protection around loud tools and respiratory protection when dust collection cannot keep the air clear.
How do you prevent kickback on woodworking machines?
Stand out of the line of kickback, use the fence or guide correctly, keep the blade sharp, and feed at a controlled rate. Push sticks, push blocks, and featherboards help keep your hands away from the danger zone.
What should be included in a woodshop safety checklist?
Training records, PPE, blade and bit condition, guards, fences, cords, switches, dust collection, workholding, cleanup, and the emergency shutoff belong on a thorough shop checklist. In a shared shop, add reporting and lockout/tagout steps for damaged tools.